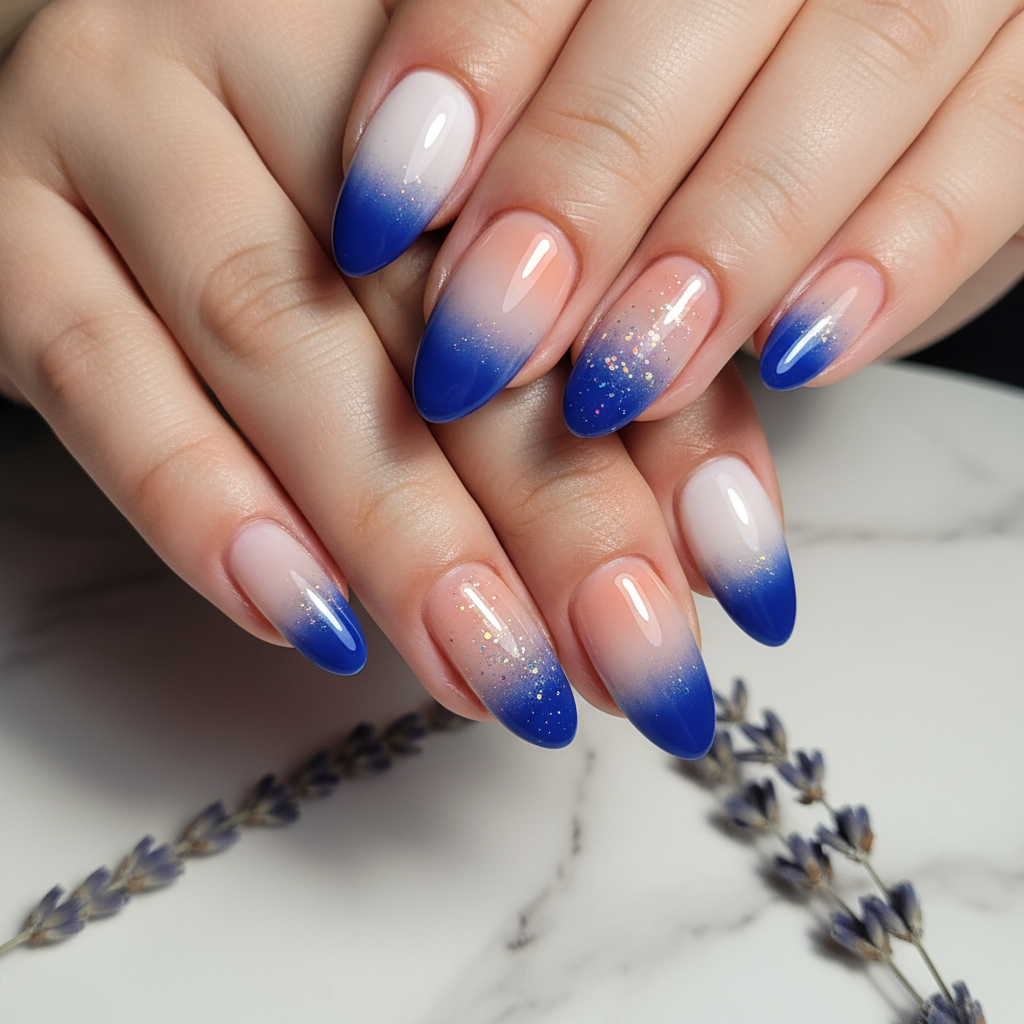
Stunning Photo-real Salon Ombre Nails
Ombre inspired nail art with stunning, photo-real finish and professional salon quality
Created: October 5, 2025 at 06:15 PM
More Ombre Designs
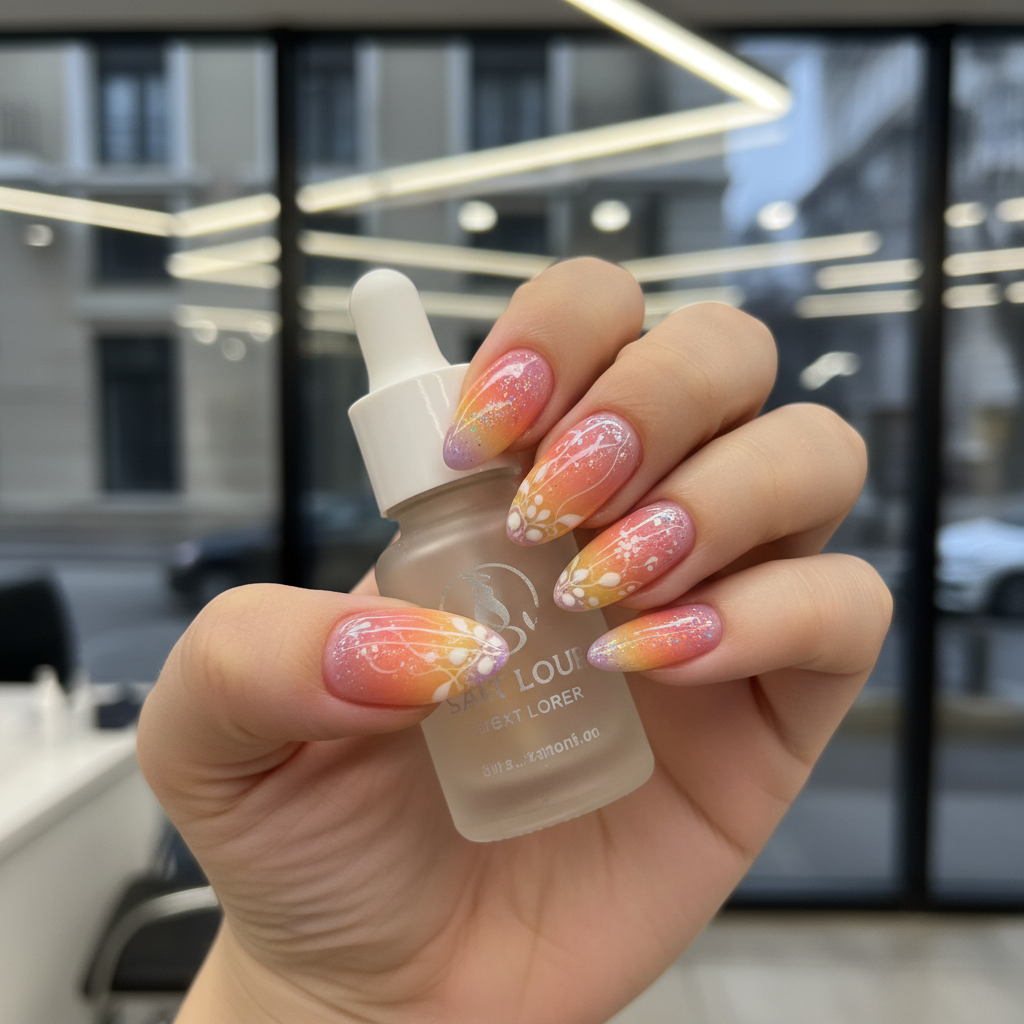
Beautiful Photo-real Salon Ombre Nails
Ombre inspired nail art with beautiful, photo-real finish and professional salon quality
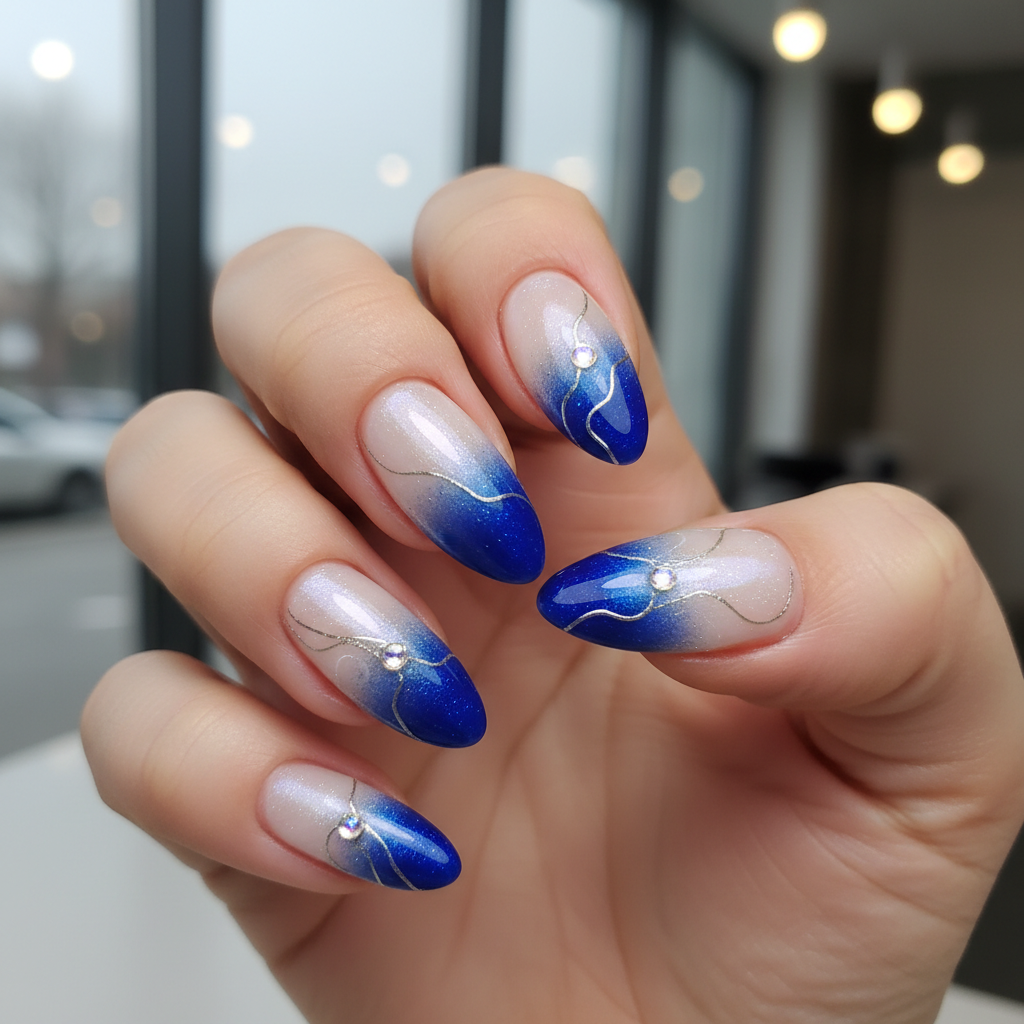
Gorgeous Photo-real Salon Ombre Nails
Ombre inspired nail art with gorgeous, photo-real finish and professional salon quality
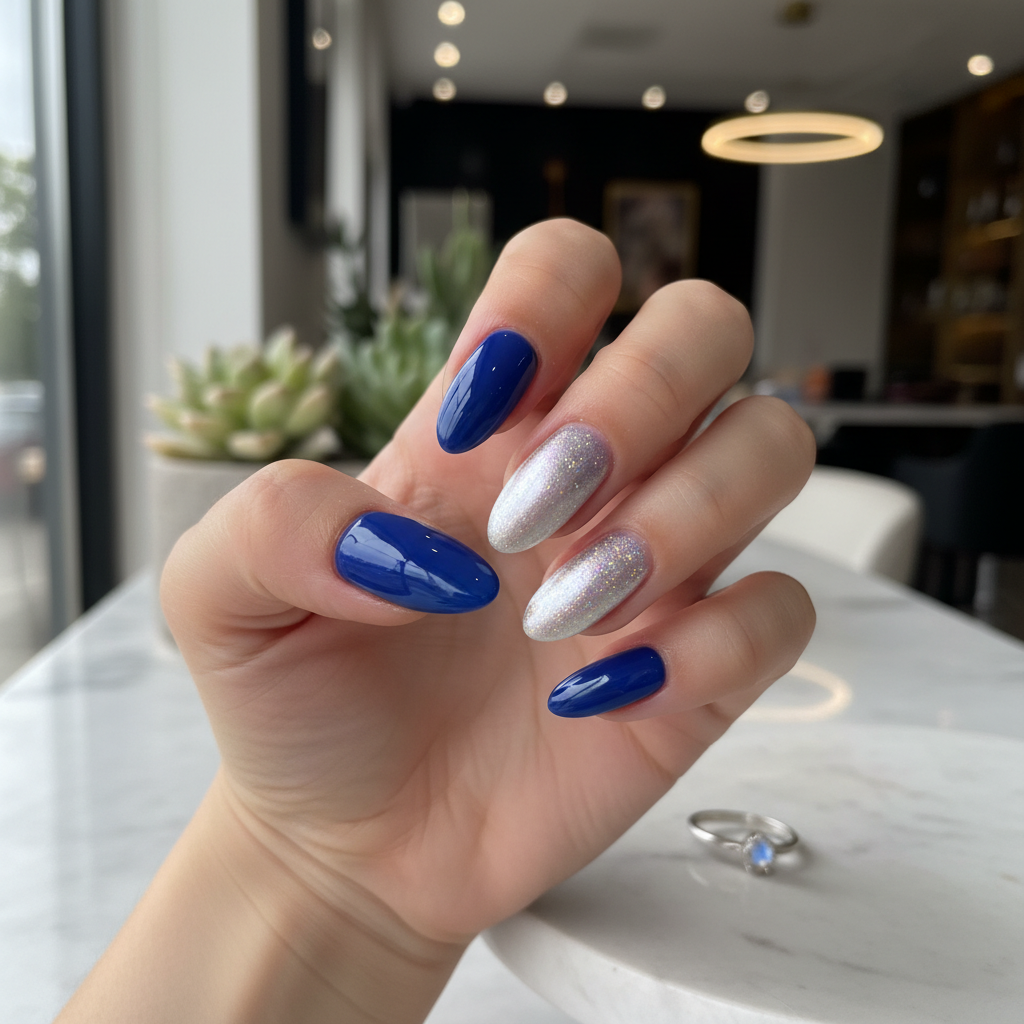
Sophisticated Photo-real Salon Ombre Nails
Ombre inspired nail art with sophisticated, photo-real finish and professional salon quality
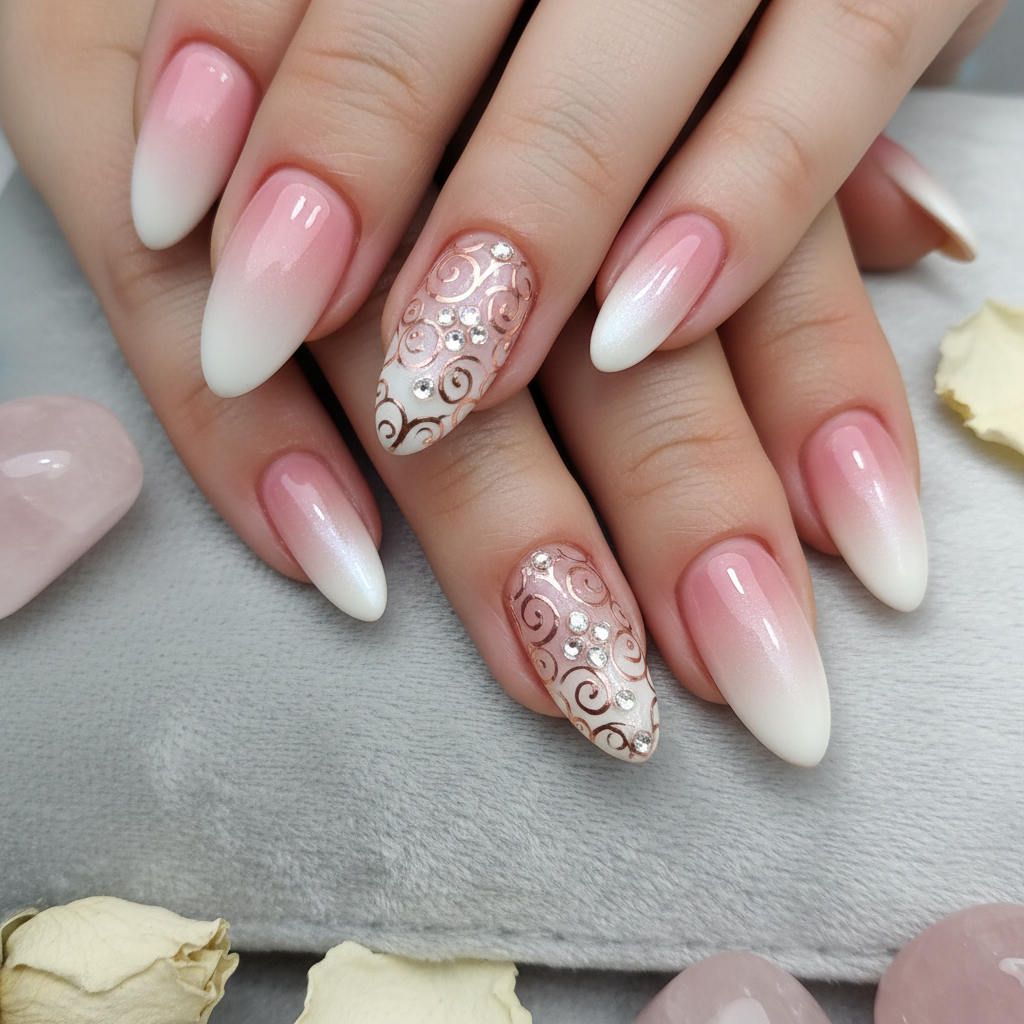
Photo-real Salon Ombre Nails
Ombre inspired nail art with elegant, photo-real finish and professional salon quality
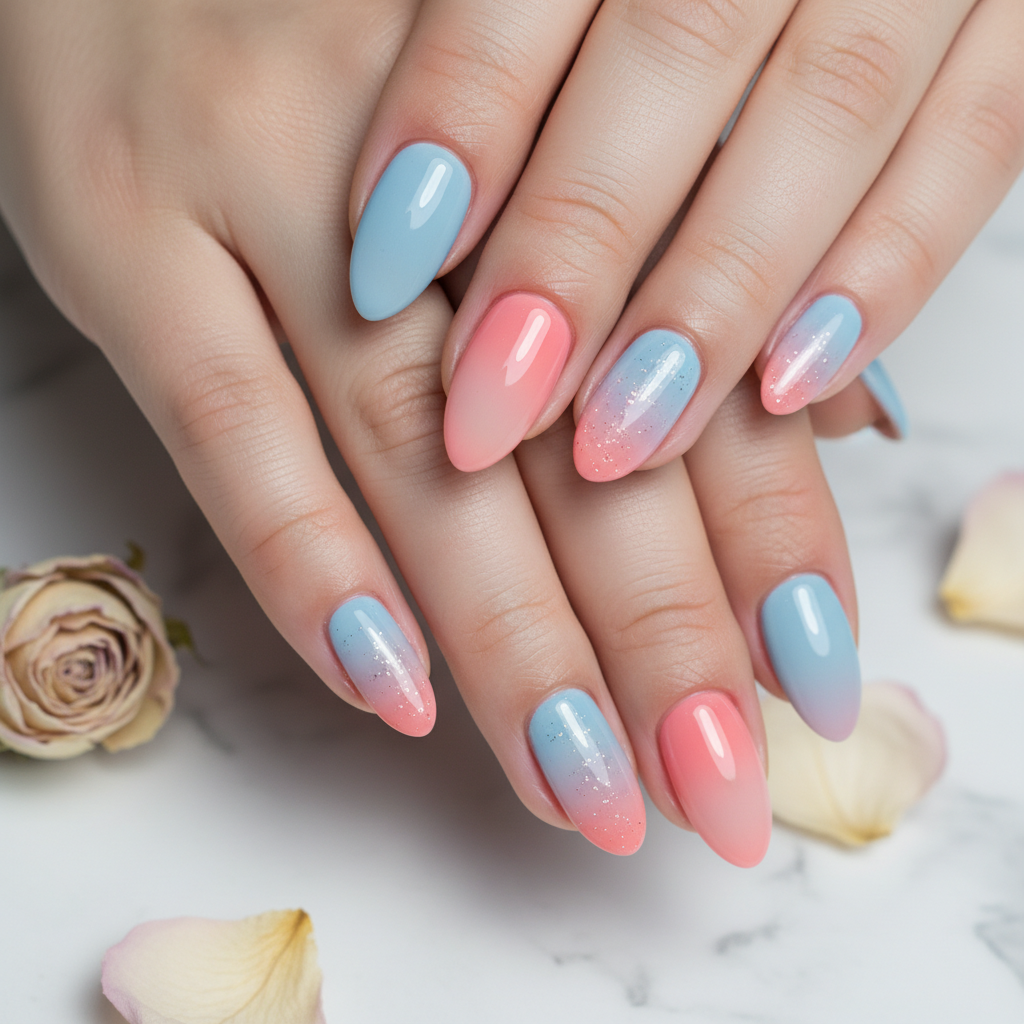
Photo-real Salon Ombre Nails
Ombre inspired nail art with clean, photo-real finish and professional salon quality
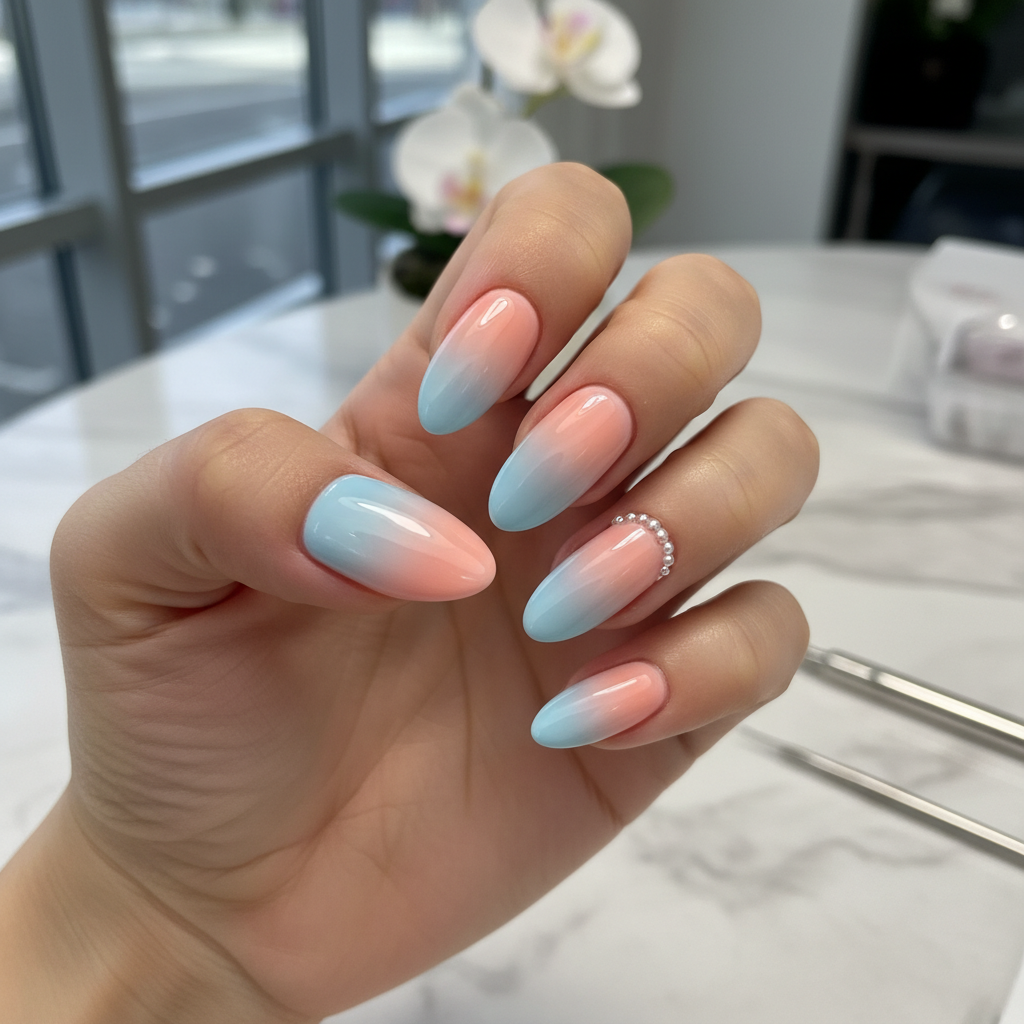
Photo-real Salon Ombre Nails
Ombre inspired nail art with clean, photo-real finish and professional salon quality
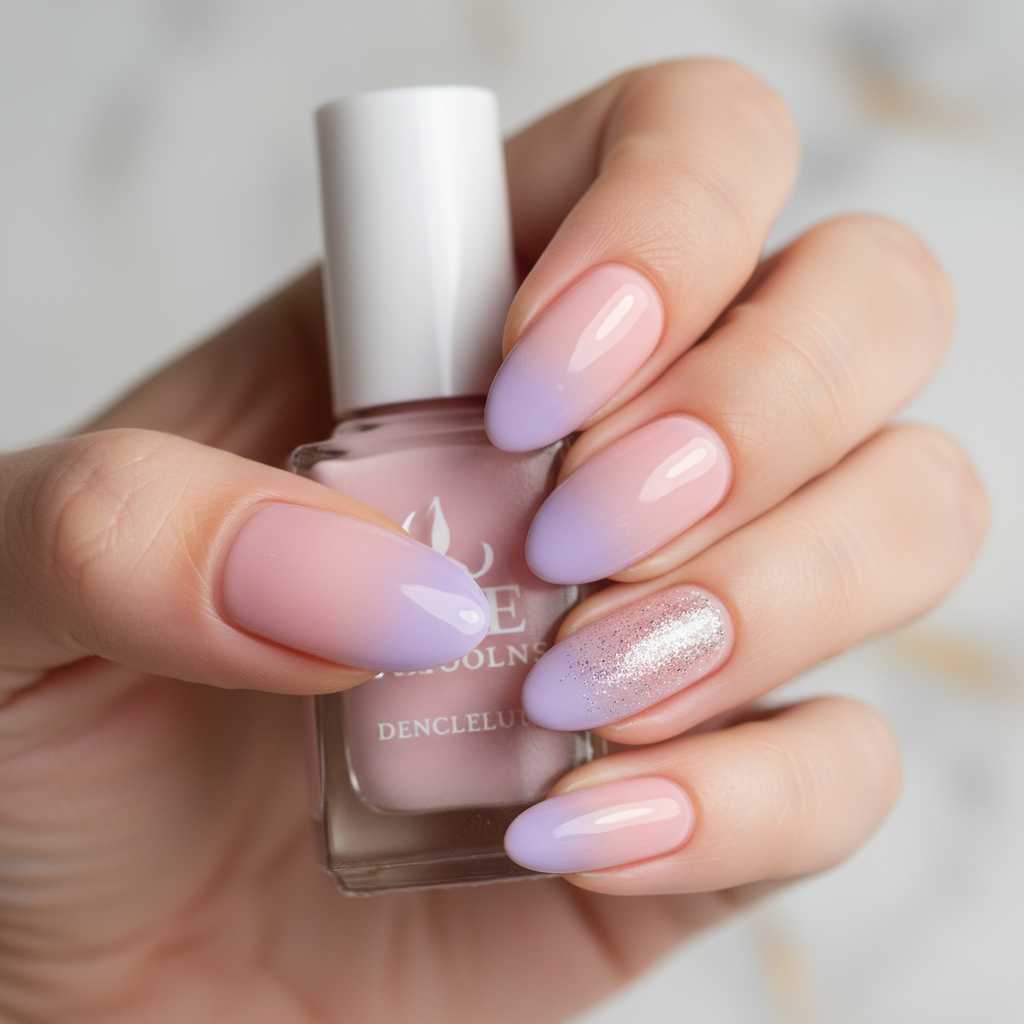
Photo-real Salon Ombre Nails
Ombre inspired nail art with clean, photo-real finish and professional salon quality
More Designs
Flawless Photo-Real Salon Ombre Nails: Stunning Gradient Art
Experience the epitome of nail art with our Flawless Photo-Real Salon Ombre design. This stunning look features a perfectly blended gradient, transitioning seamlessly between colors for a truly photographic finish. It embodies professional salon quality, ensuring a luxurious and long-lasting manicure.
Supplies You'll Need
- High-quality gel polishes in complementary gradient shades
- Fine-grade blending sponge or specialized ombre brush/airbrush system
- Gel base and high-gloss top coat
- LED/UV curing lamp
- Nail prep tools (files, buffers, cuticle pushers)
- Lint-free wipes and gel cleanser
How To Recreate It
- **Prep & Prime:** Thoroughly prep nails: shape, buff, push back cuticles. Apply gel base coat and cure for a strong foundation.
- **Base Layer Application:** Apply the lightest shade of your chosen gradient as a full base color over the entire nail and cure thoroughly.
- **Gradient Build-Up (Precision Blending):** Apply a small amount of the second color onto a fine sponge or ombre brush. Gently dab/feather onto the nail, starting from the tip (or base) and blending towards the center, gradually building a delicate gradient. For true photo-realism, this step might involve multiple very thin layers or an airbrush.
- **Seamless Transition:** Repeat with subsequent colors, ensuring each layer overlaps slightly and blends invisibly into the previous one, creating a smooth, unblemished transition. Cure between layers if using gel.
- **Refine & Seal:** Clean up any excess polish from the skin. Apply a high-gloss, self-leveling gel top coat generously to encapsulate the design and enhance shine. Cure thoroughly according to lamp specifications.
- **Finishing Touch:** Wipe with a gel cleanser solution to remove the sticky inhibition layer, revealing a flawless, photo-real finish.
Expert Tip
For that truly 'photo-real' effect, practice ultra-thin layering and gentle, repetitive dabbing or feathering with your blending tool. Less is more in each application, allowing for a buildable, airbrushed-like finish with no harsh lines.
Try These Variations
- →**Glitter Ombre Accent:** Incorporate a fine holographic or iridescent glitter into the gradient on one or two accent nails for subtle sparkle.
- →**Vertical Photo-Real Ombre:** Apply the gradient vertically down the nail instead of horizontally for a unique visual flow.
- →**Matte Photo-Real Ombre:** Finish with a velvety matte top coat for a sophisticated, soft-focus effect, beautifully highlighting the seamless gradient texture.
Aftercare Tips
- ✓Keep nails dry and clean immediately after your appointment to allow for full adhesion and curing.
- ✓Moisturize hands and cuticles regularly with a non-greasy lotion to maintain skin health around the nail.
- ✓Avoid picking or peeling your gel/acrylic to prevent damage to your natural nails underneath.
- ✓Protect your nails from prolonged water exposure, especially in the first 24 hours post-application.
Safe Removal
- 1.**Gentle Filing:** Gently file off the top coat to break the seal, allowing acetone to penetrate the product.
- 2.**Soak Off:** Soak nails in acetone-soaked cotton pads wrapped in foil for 10-15 minutes until the product softens.
- 3.**Careful Removal:** Gently scrape off the softened product with an orange wood stick. Do not force or pick at any remaining product to avoid damaging the natural nail.
Quick Facts
Why It's Trending
The demand for 'photo-real' beauty is soaring, and this Ombre design delivers. Its ultra-smooth, flawless gradient reflects a desire for polished perfection that simple ombre techniques can't achieve, making it a current favorite for those seeking high-end nail artistry.
Seasonal Styling
This versatile design shines year-round. Opt for pastels in spring, vibrant neons in summer, earthy tones in autumn, or deep jewel hues for winter. It's also perfect for weddings, galas, or any event where a sophisticated, polished look is desired.
Color Variations
Perfect For
Why People Love It
Clients rave about how our Photo-Real Salon Ombre design receives endless compliments, often mistaken for airbrushed art due to its seamless transition. It's frequently featured on social media by influencers showcasing their premium nail transformations, making it a highly requested and admired style.
Daily Maintenance
- 💅Apply cuticle oil daily to keep nails and surrounding skin hydrated and prevent dryness.
- 💅Wear gloves for household chores, gardening, and contact with harsh chemicals to protect your design.
- 💅Schedule infills every 2-3 weeks to maintain the integrity and appearance of the Ombre design as your natural nails grow.
- 💅Avoid using nails as tools to prevent chipping, lifting, or damage to the natural nail.
Common Issues & Fixes
- ⚠**Visible Lines in Gradient:** Issue: Not enough blending or too much product applied at once. Fix: Use lighter pressure and more frequent dabs/feathers; apply thinner, more translucent layers.
- ⚠**Uneven Opacity:** Issue: Inconsistent application of polish during blending, leading to patchy areas. Fix: Ensure even distribution on sponge/brush and consistent pressure across the nail surface.
- ⚠**Chipping/Lifting Early:** Issue: Improper nail prep (e.g., oil residue, dust) or inadequate top coat coverage/curing. Fix: Re-evaluate prep steps to ensure a clean base; ensure all edges are properly capped with top coat.
- ⚠**Dull Finish:** Issue: Insufficient curing of the top coat or using a poor-quality top coat. Fix: Ensure proper cure times under your LED/UV lamp and invest in a high-quality, non-wipe gel top coat for maximum shine.
Design Inspiration
Inspired by the smooth, captivating gradients found in natural phenomena like breathtaking sunsets, ocean horizons, and delicate flower petals, this design translates that organic beauty into a highly polished, 'photo-real' finish, pushing the boundaries of traditional ombre techniques to achieve unparalleled artistry.
Explore Similar Designs
Colors in this Design
Techniques Used
Perfect For
Nail Shapes
More Categories to Explore
Popular Colors
Popular Techniques
Perfect Occasions
FAQs
What makes this "photo-real" compared to regular ombre?
The "photo-real" aspect refers to an exceptionally smooth, virtually imperceptible transition between colors, achieved through advanced blending techniques and meticulous layering, giving an almost airbrushed or photographic quality that eliminates harsh lines.
How long does this design typically last?
With proper application (using gel or acrylic) and diligent aftercare, your Photo-Real Salon Ombre can last 2-4 weeks, depending on your natural nail growth, lifestyle, and how well you maintain them.
Can I get this design on shorter nails?
While achievable on shorter nails, the full impact and intricate blend of the seamless gradient are best appreciated on medium to long lengths, as this allows more space for the intricate color transition to be showcased.
Is this design suitable for natural nails?
Yes, this sophisticated ombre can be beautifully applied to natural nails using high-quality gel polish. However, enhancements like gel or acrylic extensions often provide a smoother, more durable canvas and can enhance the overall 'photo-real' effect.
Does this technique require special tools?
For the true photo-real finish, specialized fine-grade blending sponges, precision ombre brushes, or even an airbrush system are typically used. These tools, along with expert technique, distinguish it from simpler, two-tone ombre methods.
Can I customize the colors for my Photo-Real Ombre?
Absolutely! We encourage clients to choose any complementary colors that match their personal style, outfit, or a specific event. Our goal is to ensure the advanced 'photo-real' technique beautifully showcases your chosen palette with stunning clarity.