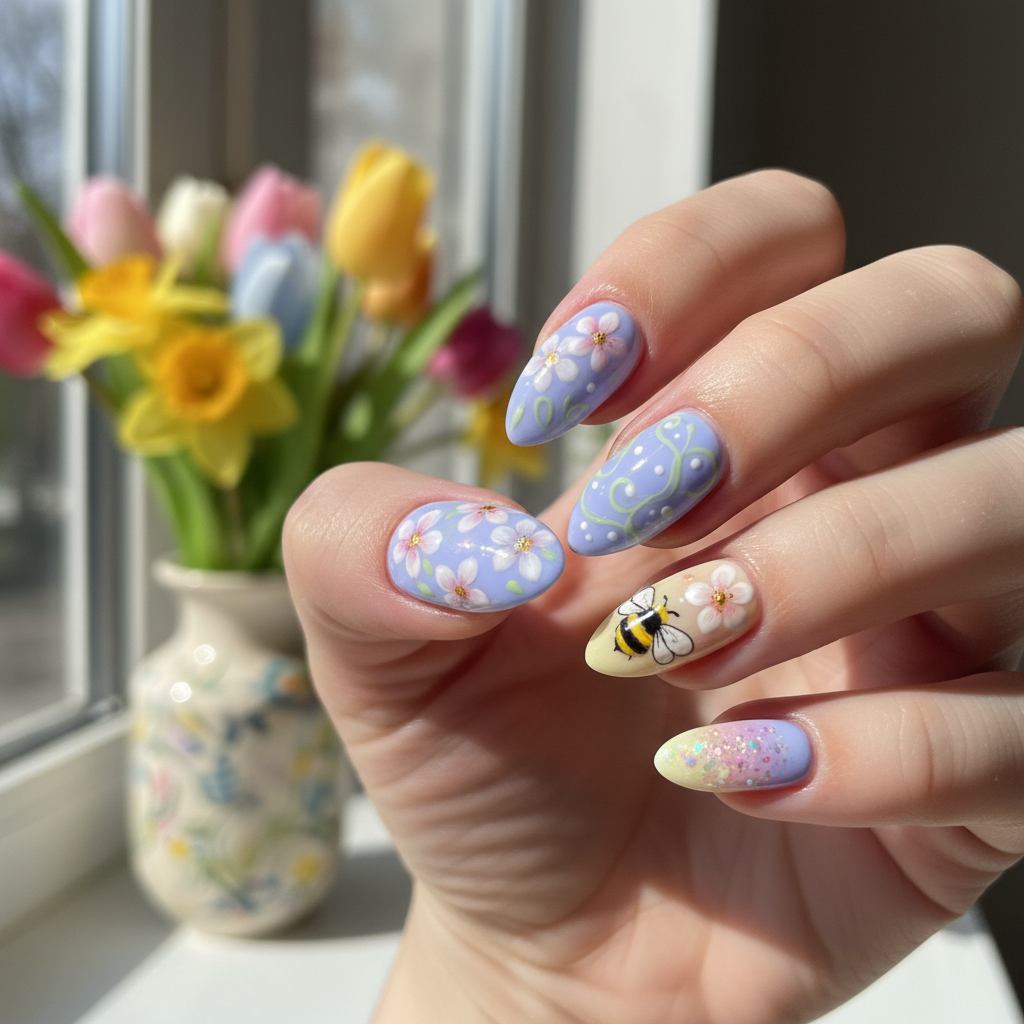
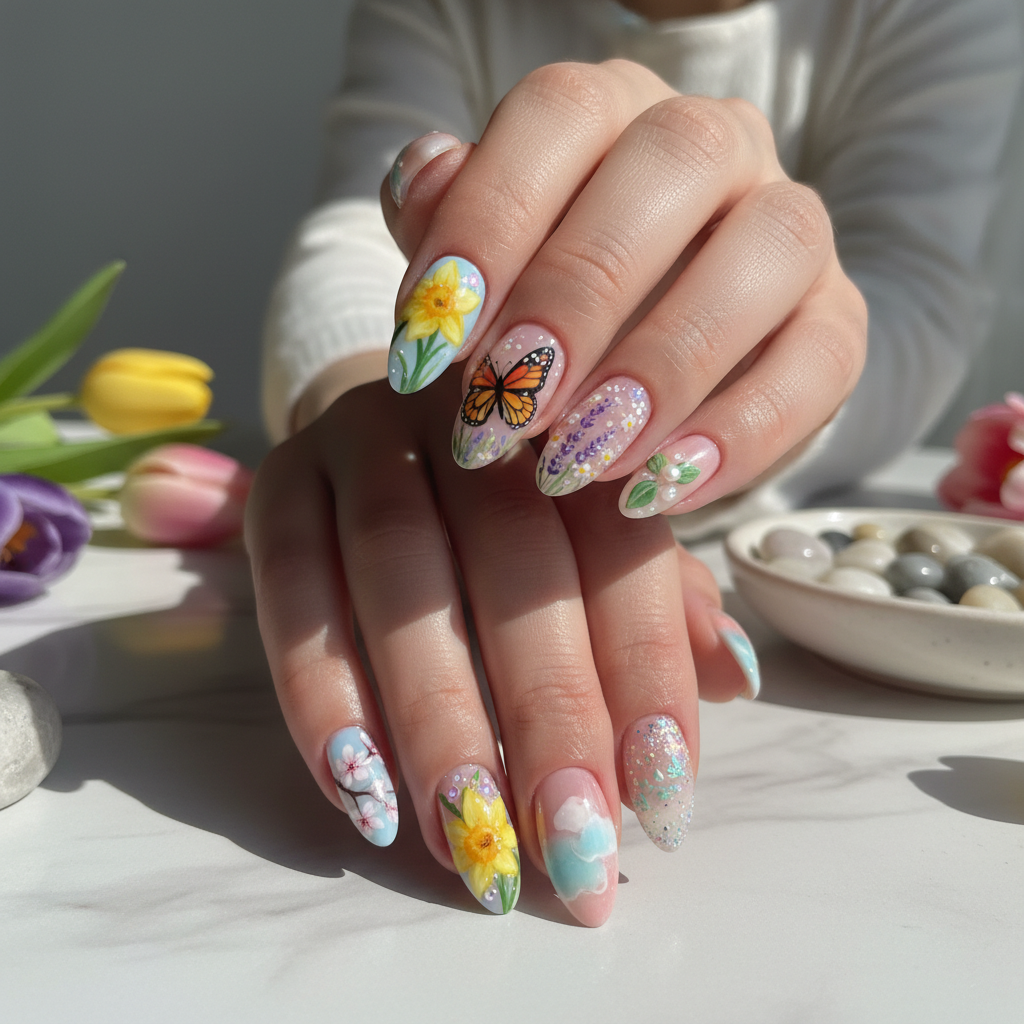
Photo-real Salon Spring Nails
Spring inspired nail art with clean, photo-real finish and professional salon quality
Created: October 5, 2025 at 11:55 AM
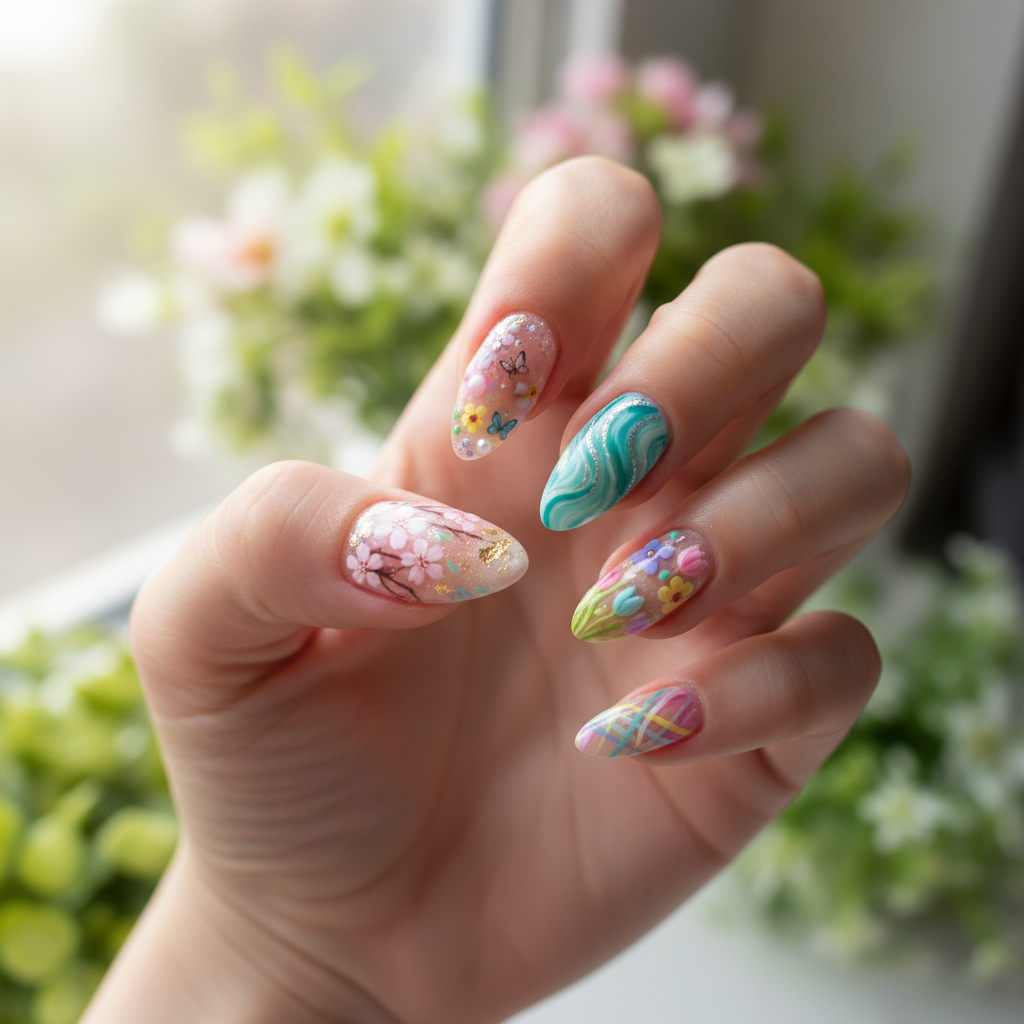
More Spring Designs
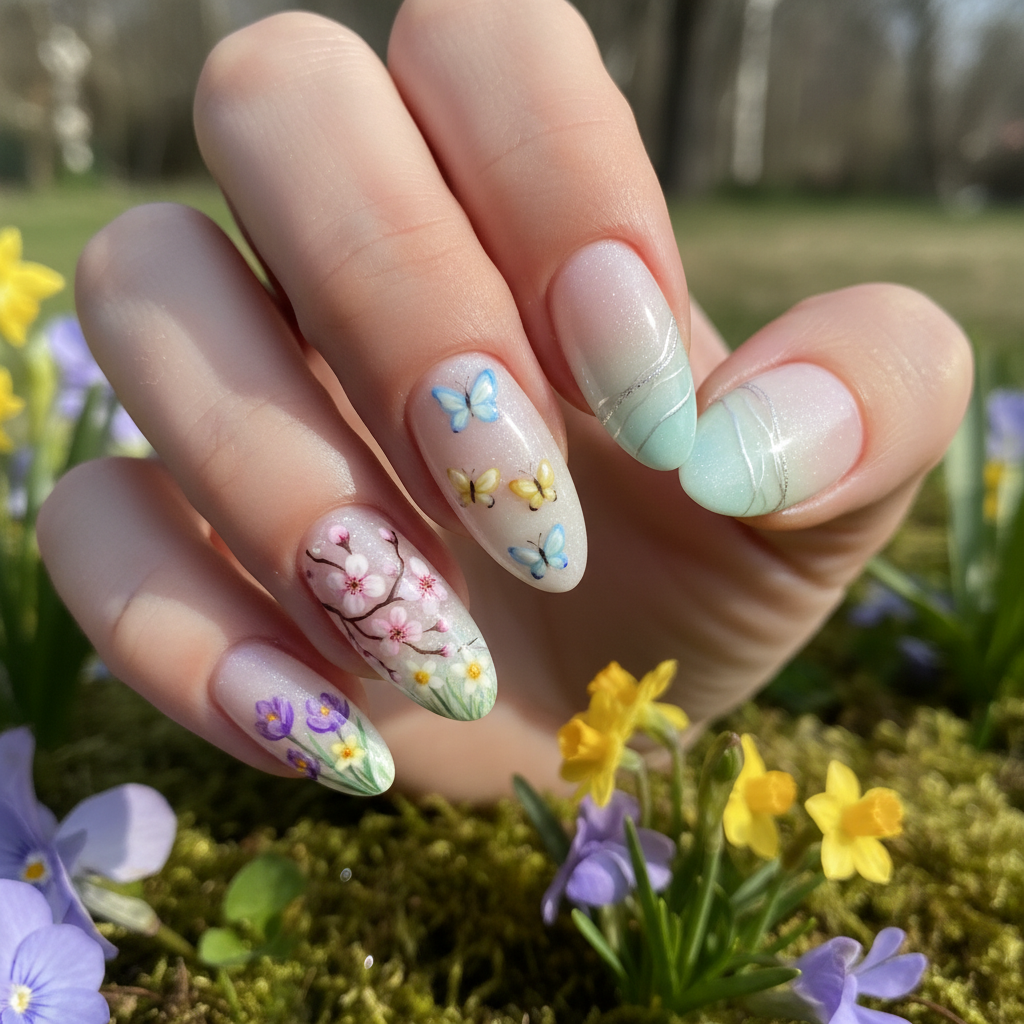
Beautiful Photo-real Salon Spring Nails
Spring inspired nail art with beautiful, photo-real finish and professional salon quality
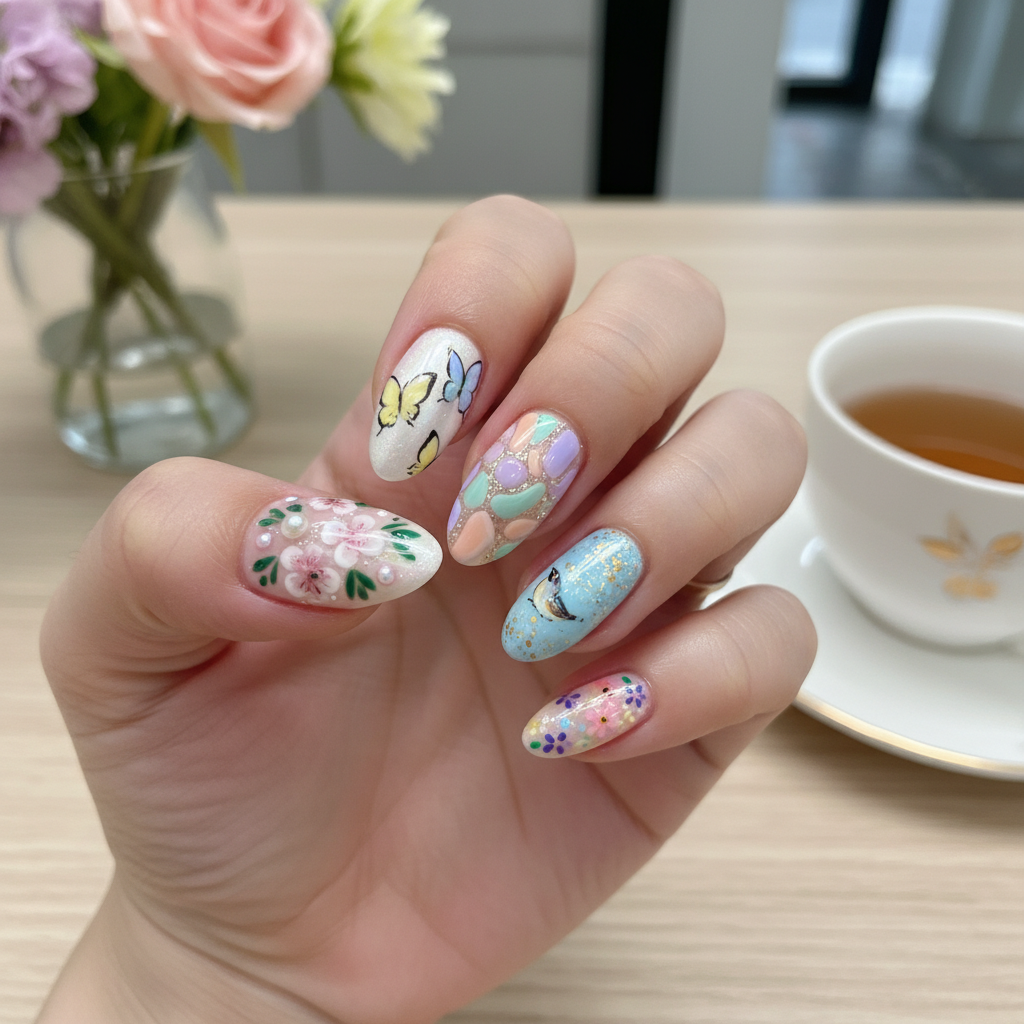
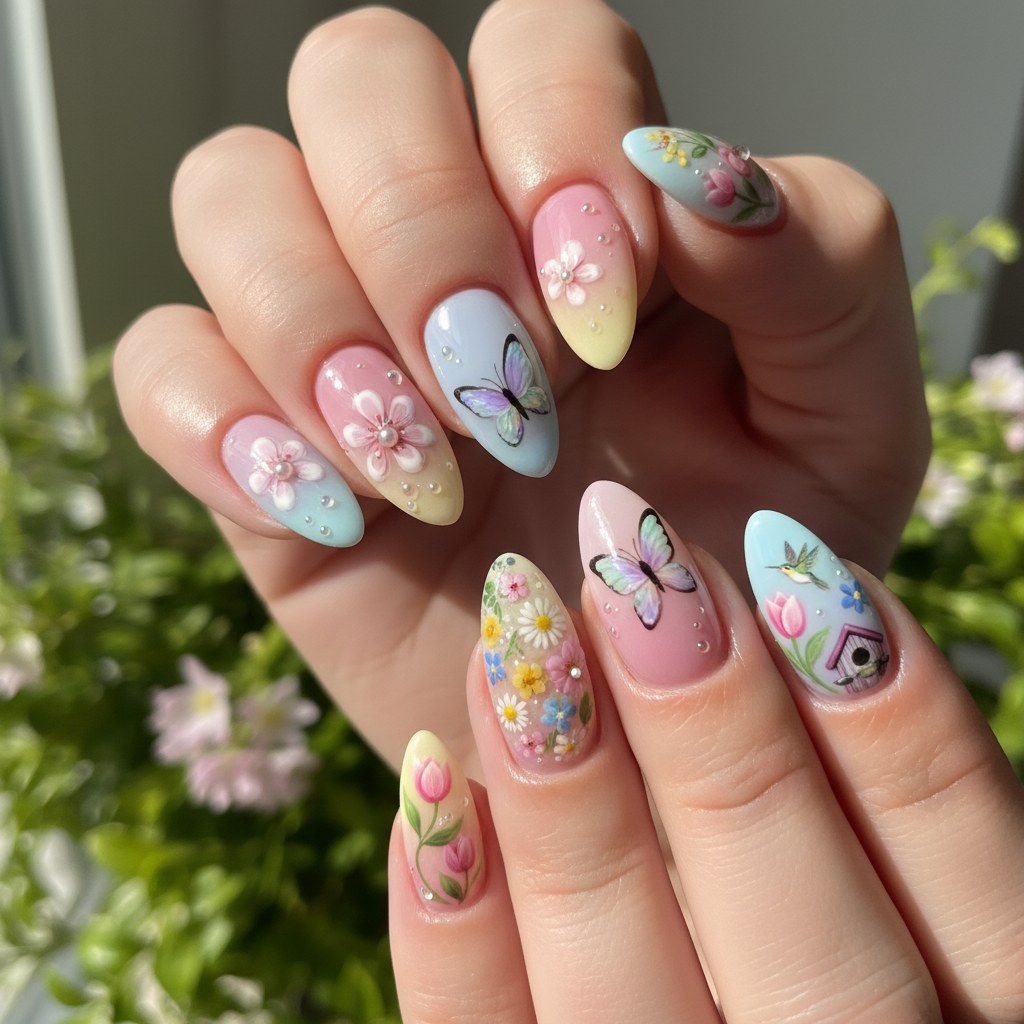
Gorgeous Photo-real Salon Spring Nails
Spring inspired nail art with gorgeous, photo-real finish and professional salon quality
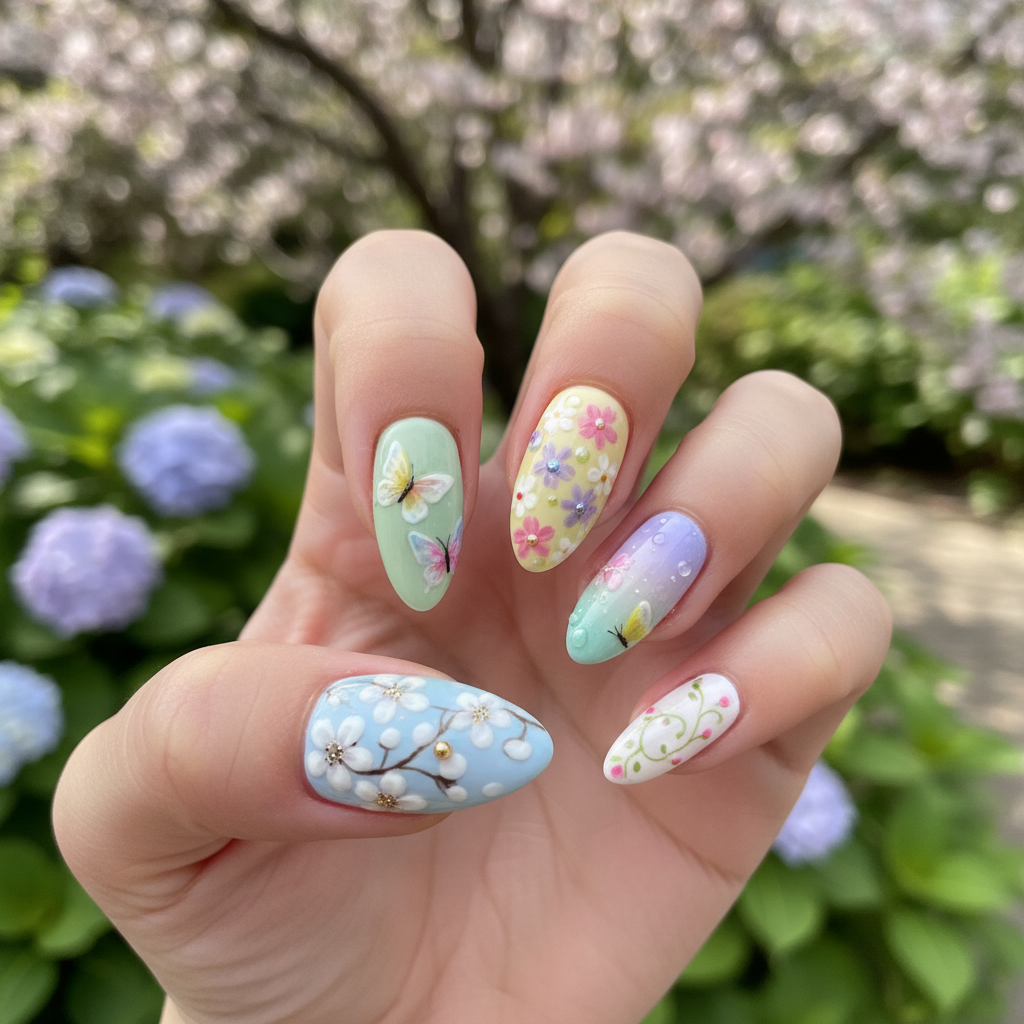
Beautiful Photo-real Salon Spring Nails
Spring inspired nail art with beautiful, photo-real finish and professional salon quality
Gorgeous Photo-real Salon Spring Nails
Spring inspired nail art with gorgeous, photo-real finish and professional salon quality
Stunning Photo-real Salon Spring Nails
Spring inspired nail art with stunning, photo-real finish and professional salon quality
Stunning Photo-real Salon Spring Nails
Spring inspired nail art with stunning, photo-real finish and professional salon quality
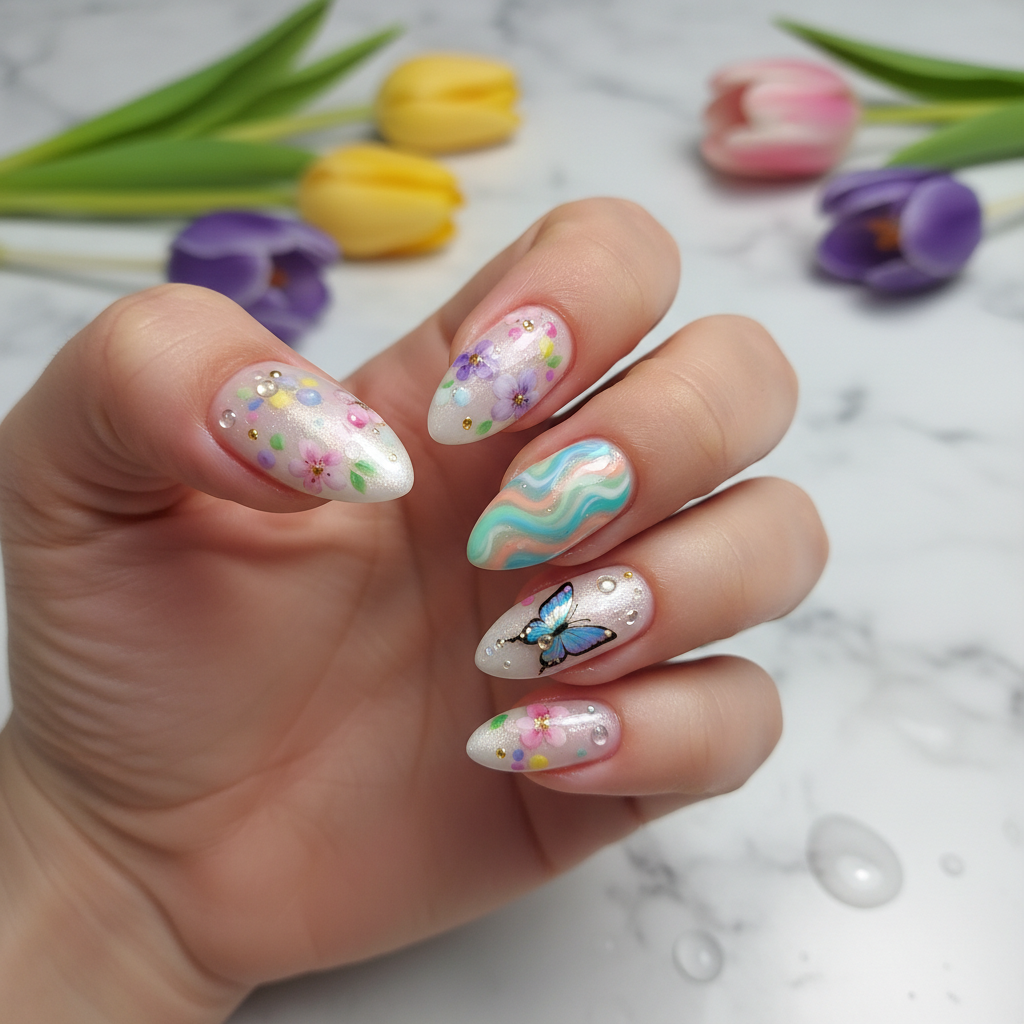
Sophisticated Photo-real Salon Spring Nails
Spring inspired nail art with sophisticated, photo-real finish and professional salon quality
Sophisticated Photo-real Salon Spring Nails
Spring inspired nail art with sophisticated, photo-real finish and professional salon quality
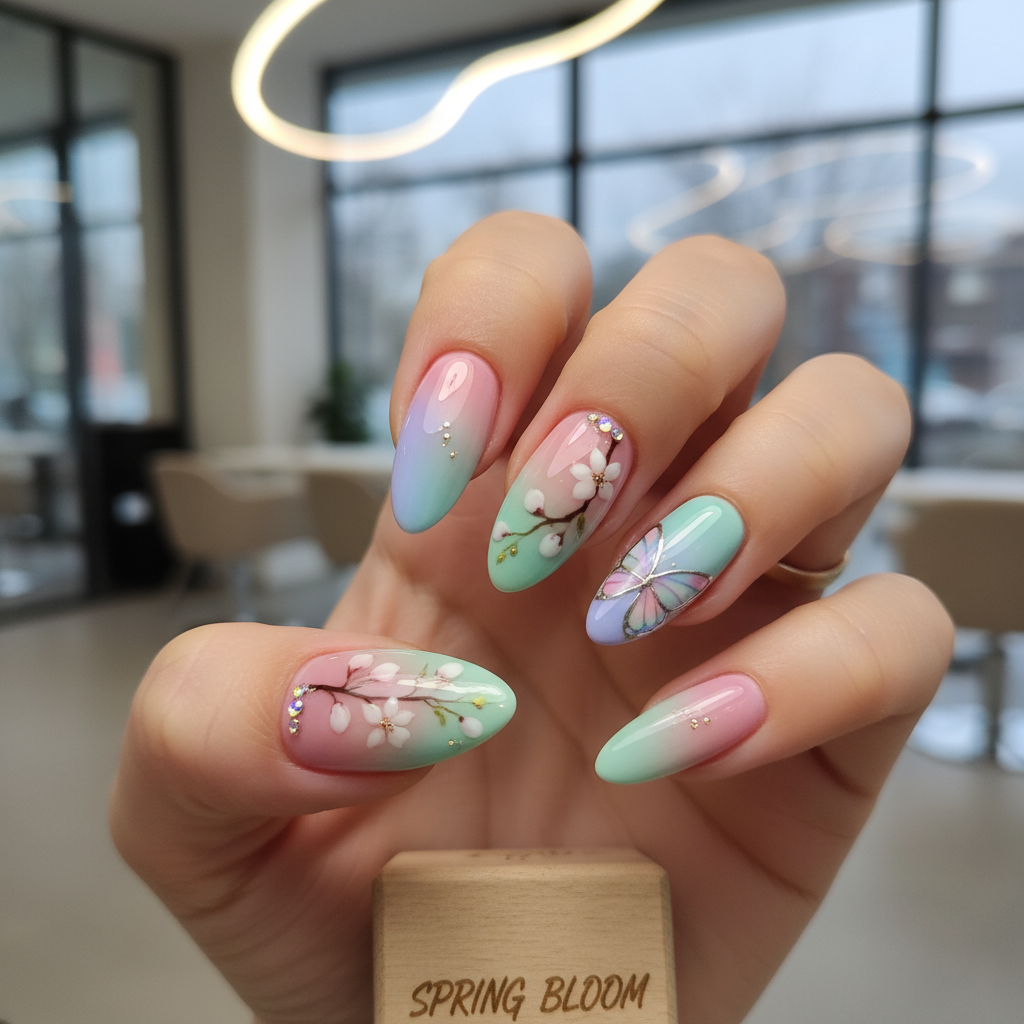
Photo-real Salon Spring Nails
Spring inspired nail art with elegant, photo-real finish and professional salon quality
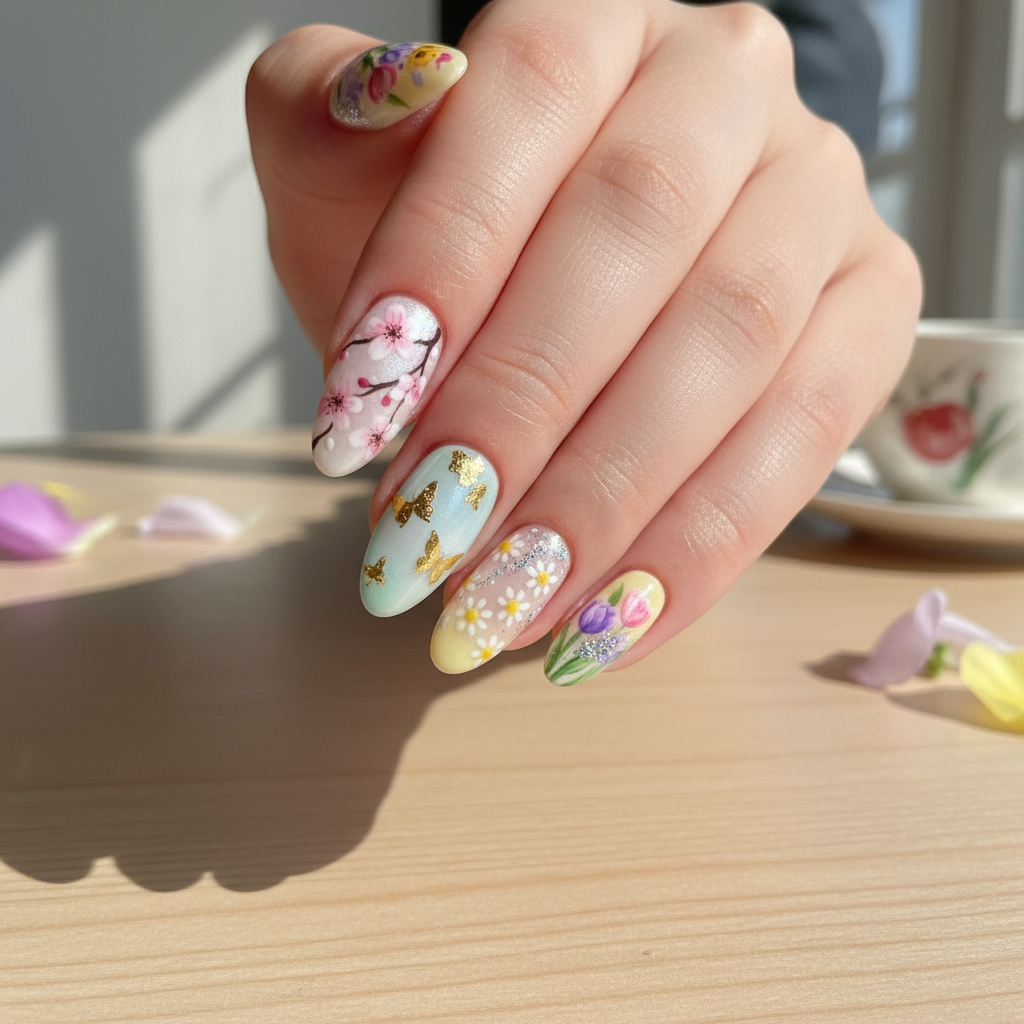
Photo-real Salon Spring Nails
Spring inspired nail art with elegant, photo-real finish and professional salon quality
More Designs
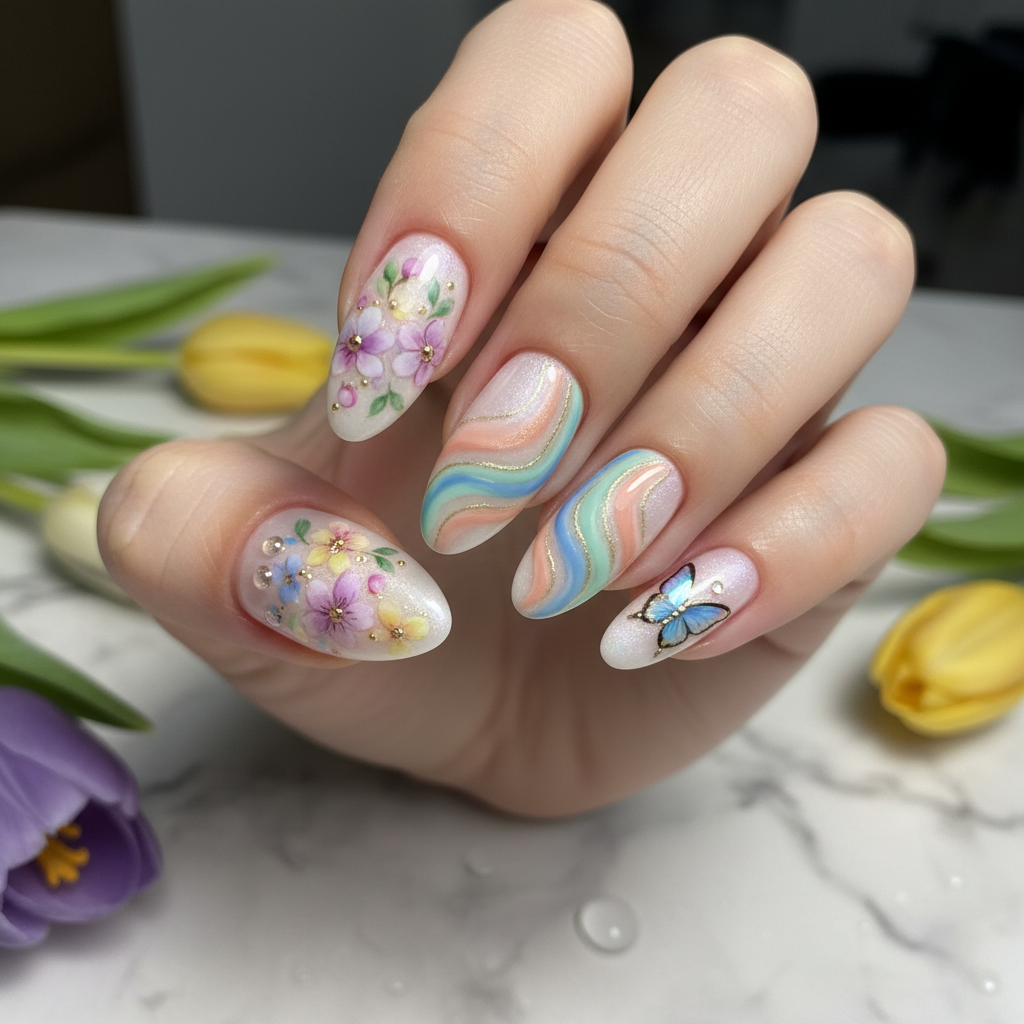
Photo-Real Spring Garden Nails | Salon Quality Design
Capture the essence of springtime with these photo-realistic floral nails. This salon-quality design features intricate floral detailing that brings the beauty of a spring garden to your fingertips. Perfect for adding a touch of elegance and vibrancy to any outfit.
Supplies You'll Need
- Base coat
- Pastel nail polishes (pink, white, green, yellow, lavender)
- Fine detail nail art brushes
- Top coat
- Dotting tool
- Nail art palette
How To Recreate It
- Apply a base coat to protect your nails.
- Apply a pastel base color (e.g., light pink or lavender) to each nail and let it dry completely.
- Using fine detail brushes and various pastel colors, create realistic floral designs on each nail. Focus on layering and shading to achieve a photo-realistic effect.
- Use a dotting tool for small floral accents.
- Allow the design to dry thoroughly.
- Finish with a glossy top coat to seal and protect the design.
Expert Tip
Use a light hand and thin layers of polish for the floral details to avoid a thick or clumpy look. Practice your floral designs on a nail art palette first to perfect your technique.
Try These Variations
- →Ombre Floral: Blend pastel colors at the base of the nail before adding floral details.
- →Negative Space Floral: Leave parts of the nail bare for a modern, minimalist look.
- →Matte Finish: Use a matte top coat for a more subtle and sophisticated effect.
Aftercare Tips
- ✓Keep your hands moisturized.
- ✓Avoid picking at the nail art.
- ✓Use a gentle nail polish remover when it's time to remove the design.
Safe Removal
- 1.Soak cotton pads in acetone-based nail polish remover.
- 2.Place the cotton pads on your nails and wrap them with foil for 10-15 minutes.
- 3.Gently remove the polish with a cotton pad or orangewood stick.
Quick Facts
Why It's Trending
Floral designs are always popular in spring, and the photo-realistic effect gives this manicure a modern, high-end look that's trending on social media.
Seasonal Styling
Ideal for spring and summer; pairs well with pastel outfits and garden parties. For a fall twist, use darker, richer floral tones.
Color Variations
Perfect For
Why People Love It
Instagram influencers are showcasing similar designs, and nail art enthusiasts are loving the realistic and elegant look.
Daily Maintenance
- 💅Apply cuticle oil daily to keep nails hydrated.
- 💅Wear gloves when doing household chores to protect the design.
- 💅Avoid using harsh chemicals that can damage the polish.
- 💅Touch up any chips with matching polish and a top coat.
Common Issues & Fixes
- ⚠Smudging: Allow each layer to dry completely before adding more details.
- ⚠Uneven Floral Design: Practice your floral designs on a nail art palette first.
- ⚠Bubbles in the Top Coat: Apply a thin layer of top coat and avoid shaking the bottle vigorously.
- ⚠Polish Chipping: Ensure the nail surface is clean and dry before applying the base coat.
Design Inspiration
Inspired by the vibrant colors and intricate details found in a blooming spring garden, recreating the beauty of nature on your nails.
Explore Similar Designs
Colors in this Design
Techniques Used
Perfect For
Nail Shapes
More Categories to Explore
Popular Colors
Popular Techniques
Perfect Occasions
FAQs
How long does this design last?
With proper care, this design can last up to 2 weeks.
Can I do this on short nails?
While the design shines on longer nails, you can adapt it for shorter nails by simplifying the floral details.
What kind of brushes should I use?
Opt for fine detail brushes specifically designed for nail art. These will allow for precise lines and intricate details.
Is it necessary to use gel polish?
No, regular nail polish can also be used, but gel polish will provide a longer-lasting and more durable finish.
How do I prevent smudging?
Ensure each layer of polish is completely dry before applying the next. Use quick-drying top coat for faster results.
Where can I find inspiration for more floral designs?
Pinterest and Instagram are great sources for finding inspiration for different floral nail art designs.