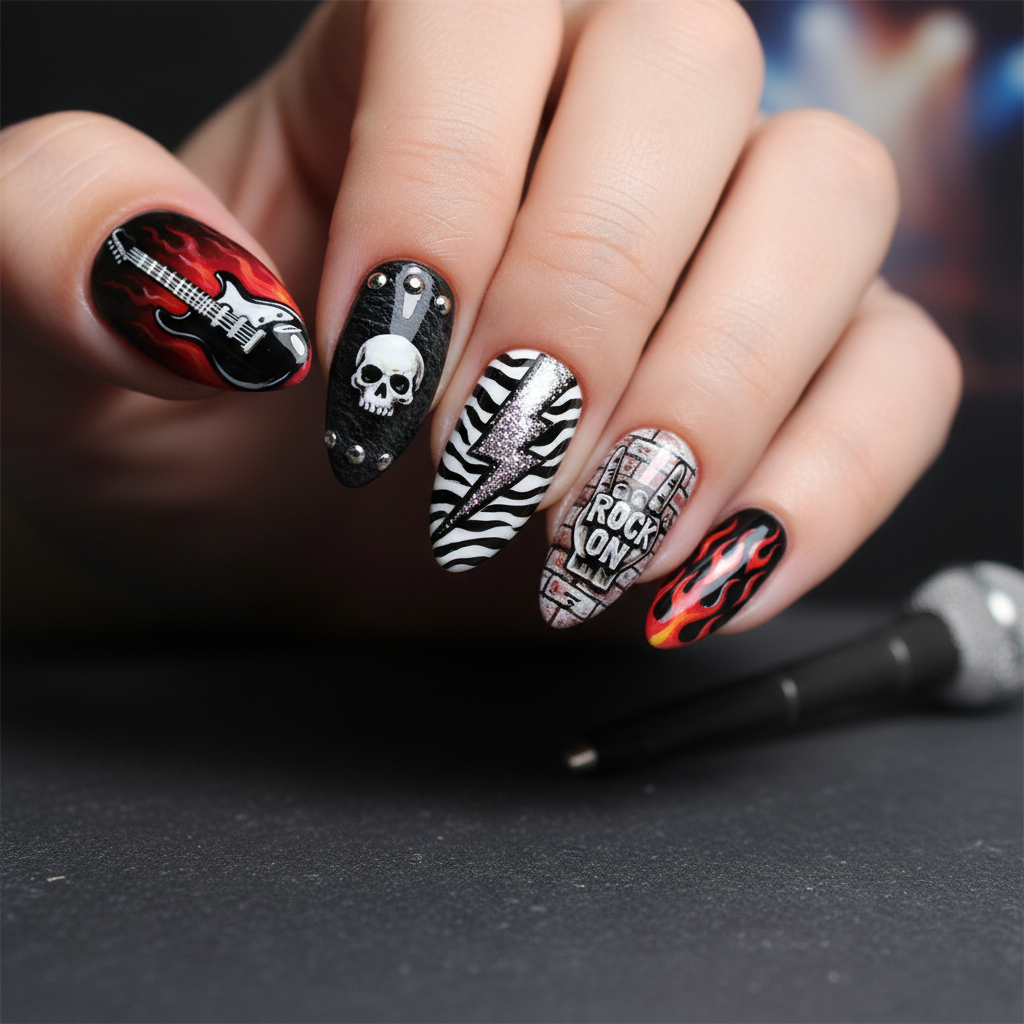
Photo-real Salon Rock Nails
Rock inspired nail art with clean, photo-real finish and professional salon quality
Created: October 5, 2025 at 12:57 PM
More Rock Designs

More Designs
Salon Rock Nails: Photo-Real Geode Nail Art Design
Achieve the beauty of natural geodes with this salon-quality rock-inspired nail art. This design features a photo-realistic rock texture, perfect for a unique and sophisticated look that mimics the earth's natural beauty.
Supplies You'll Need
- Base coat
- Various shades of gray, brown, beige, and white nail polish
- Fine detail brush
- Gold leaf or glitter
- Top coat
How To Recreate It
- Apply a base coat and let it dry completely.
- Create a marbled effect using the various shades of gray, brown, and beige. Apply thin layers, allowing each to partially dry before adding the next.
- Use a fine detail brush to add cracks and crevices with white or light gray polish to mimic rock formations.
- Apply gold leaf or glitter sparingly to add a touch of shimmer and highlight the geode effect.
- Seal the design with a glossy or matte top coat for longevity and desired finish.
Expert Tip
Use a sponge to apply the base colors for a more blended and natural rock look. Remember to build up the layers gradually to achieve the desired depth and texture.
Try These Variations
- →Use different color combinations to mimic various types of rocks and minerals.
- →Incorporate small crystals or rhinestones for added texture and realism.
- →Experiment with different finishes, such as a matte base with glossy highlights.
Aftercare Tips
- ✓Moisturize your cuticles daily with cuticle oil.
- ✓Avoid picking or biting your nails.
- ✓Keep your nails trimmed and shaped.
Safe Removal
- 1.Soak cotton pads in acetone-based nail polish remover.
- 2.Place the soaked pads on your nails and wrap them in foil.
- 3.After 10-15 minutes, remove the foil and gently scrape off the polish.
Quick Facts
Why It's Trending
The natural and earthy aesthetic is in high demand, making rock and geode-inspired designs incredibly popular.
Seasonal Styling
Perfect for fall and winter, reflecting the earthy tones of the seasons. Also great for summer festivals and outdoor events.
Color Variations
Perfect For
Why People Love It
Nail artists and enthusiasts are sharing their rock and geode nail designs on social media, driving popularity and inspiration.
Daily Maintenance
- 💅Apply a top coat every 2-3 days to prevent chipping.
- 💅Avoid harsh chemicals and prolonged exposure to water.
- 💅Use gloves when doing household chores.
Common Issues & Fixes
- ⚠Uneven texture: Apply thin, even layers of polish and allow each layer to dry partially.
- ⚠Lack of depth: Use a variety of shades and layer them strategically to create shadows and highlights.
- ⚠Chipping: Ensure the base coat and top coat are applied correctly and are fully dry.
- ⚠Gold leaf smearing: Apply gold leaf before the top coat and gently pat it down.
Design Inspiration
Inspired by the beauty and complexity of natural rock formations and geodes found in nature.
Explore Similar Designs
Colors in this Design
Techniques Used
Perfect For
Nail Shapes
More Categories to Explore
Popular Colors
Popular Techniques
Perfect Occasions
FAQs
How long does this design last?
With proper care, this design can last up to 2 weeks.
Can I do this design at home?
While challenging, with patience and practice, you can achieve a similar look at home. Professional salon service is recommended.
What's the best way to achieve the marbling effect?
Use a thin brush or toothpick to swirl the colors together while they are still wet. Avoid over-mixing to maintain distinct patterns.
Is this design suitable for short nails?
While possible, the design is best suited for medium to long nails to allow for the full effect of the rock formation.
Can I use gel polish for this design?
Yes, gel polish can be used, but ensure you have a UV or LED lamp for curing.
How do I make the gold leaf stick properly?
Apply a thin layer of nail glue or a tacky base coat before placing the gold leaf. Gently pat it down to secure it.