Photo-real Salon Nature Nails
Nature inspired nail art with clean, photo-real finish and professional salon quality
Created: October 5, 2025 at 12:47 PM
More Nature Designs
More Designs
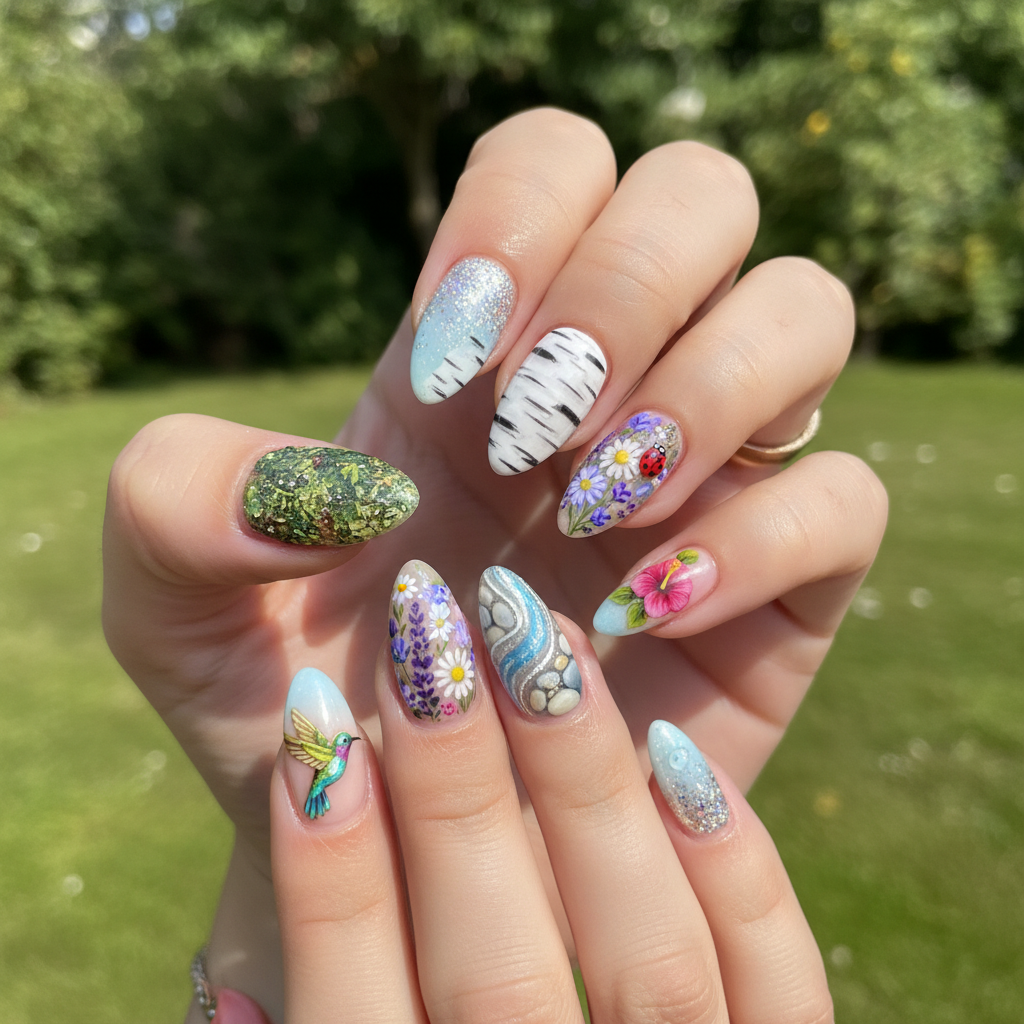
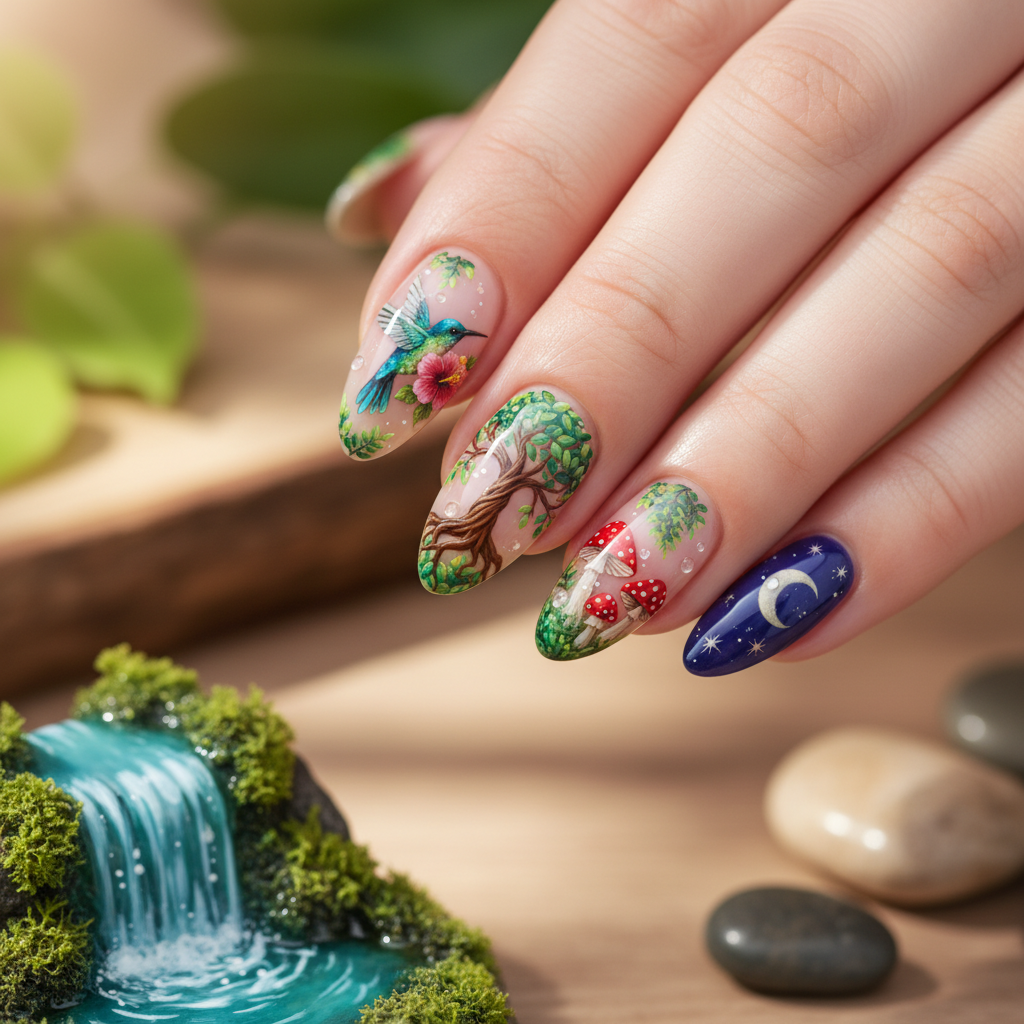
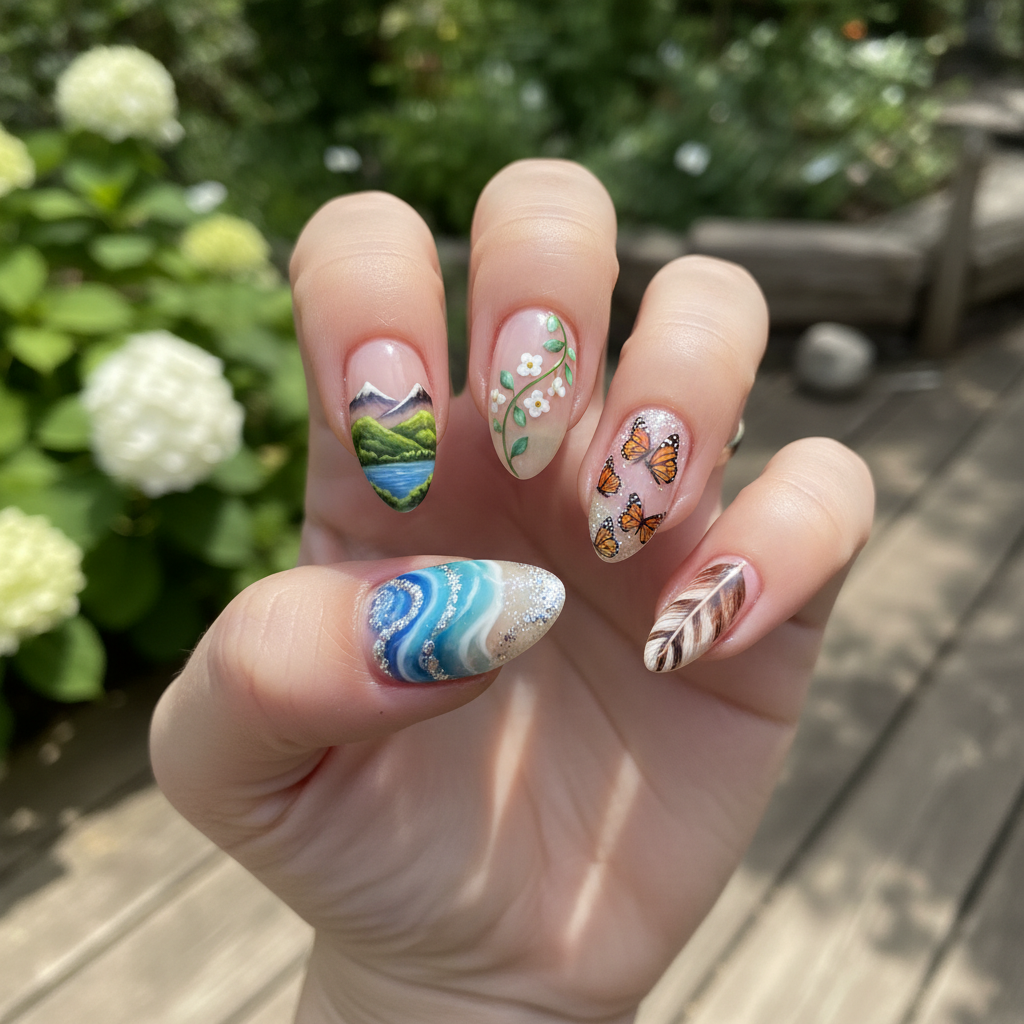
Photo-Real Salon Nature Nails: Stunning Earthy Design
Embrace the beauty of nature with these photo-realistic salon nature nails! This design features meticulously crafted elements that mimic natural textures and colors, delivering a sophisticated and earthy aesthetic. It's a perfect way to showcase your love for the outdoors.
Supplies You'll Need
- Gel polish in moss green, terracotta brown, stone grey, and creamy beige
- Fine detail brushes (various sizes)
- Base coat and top coat
- Nail art palette
- LED/UV lamp
- Detailing tools
How To Recreate It
- Apply a base coat and cure under an LED/UV lamp.
- Create an ombre effect using moss green and terracotta brown as a base.
- Using fine detail brushes, paint realistic textures like wood grain, stone, or leaves onto the nails.
- Add highlights and shadows with stone grey and creamy beige to enhance the 3D effect.
- Apply a glossy top coat for shine or a matte top coat for a more natural finish. Cure under the lamp.
- Clean up any mistakes with a small brush and acetone.
Expert Tip
Use a matte top coat on certain textured areas (like wood grain) to enhance the realism and contrast against glossy areas. Practice your fine detailing on a nail art practice sheet before applying to the nails.
Try These Variations
- →Incorporate gold leaf accents for a luxurious touch.
- →Add tiny rhinestones to mimic dew drops on leaves.
- →Create a landscape scene with miniature mountains and trees.
Aftercare Tips
- ✓Moisturize hands regularly to prevent dryness.
- ✓Consider taking a biotin supplement to strengthen nails.
- ✓Avoid picking at the polish to prolong the design's life.
Safe Removal
- 1.Gently file the top coat to break the seal.
- 2.Soak cotton balls in acetone, place them on the nails, and wrap with foil for 10-15 minutes.
Quick Facts
Why It's Trending
The demand for intricate, hyper-realistic nail art is booming, with clients seeking unique designs that showcase artistic skill.
Seasonal Styling
Perfect for fall and winter, bringing warm and comforting earthy tones to your style. Also great for spring to celebrate the re-emergence of nature.
Color Variations
Perfect For
Why People Love It
This design is trending on Instagram and Pinterest, with users praising its intricate details and realistic nature-inspired look.
Daily Maintenance
- 💅Apply cuticle oil daily to keep nails hydrated.
- 💅Wear gloves when doing housework to prevent chipping.
- 💅Avoid harsh chemicals that can damage the polish.
Common Issues & Fixes
- ⚠
- ⚠
- ⚠
Design Inspiration
Inspired by the intricate textures and colors found in natural landscapes, such as forests, mountains, and stone formations.
Explore Similar Designs
Colors in this Design
Techniques Used
Perfect For
Nail Shapes
More Categories to Explore
Popular Colors
Popular Techniques
Perfect Occasions
FAQs
How long will this nail design last?
With proper care, this gel polish design can last up to 2-3 weeks.
Can I achieve this design with regular nail polish?
While possible, gel polish is recommended for its durability and ability to create fine details.
What brushes are best for detailed nail art?
Fine liner brushes, detail brushes, and angled brushes are ideal for intricate work.
How do I prevent smudging while creating the design?
Allow each layer of polish to dry completely before adding the next. Use thin layers and a steady hand.
Is this design suitable for short nails?
While it looks best on medium to long nails, you can adapt the design to fit shorter nails by simplifying the details.
Can I add embellishments like real dried flowers?
Yes! Adding small, encapsulated dried flowers can enhance the nature theme.