Photo-real Salon Nature Nails
Nature inspired nail art with clean, photo-real finish and professional salon quality
Created: October 5, 2025 at 12:47 PM
More Nature Designs
More Designs
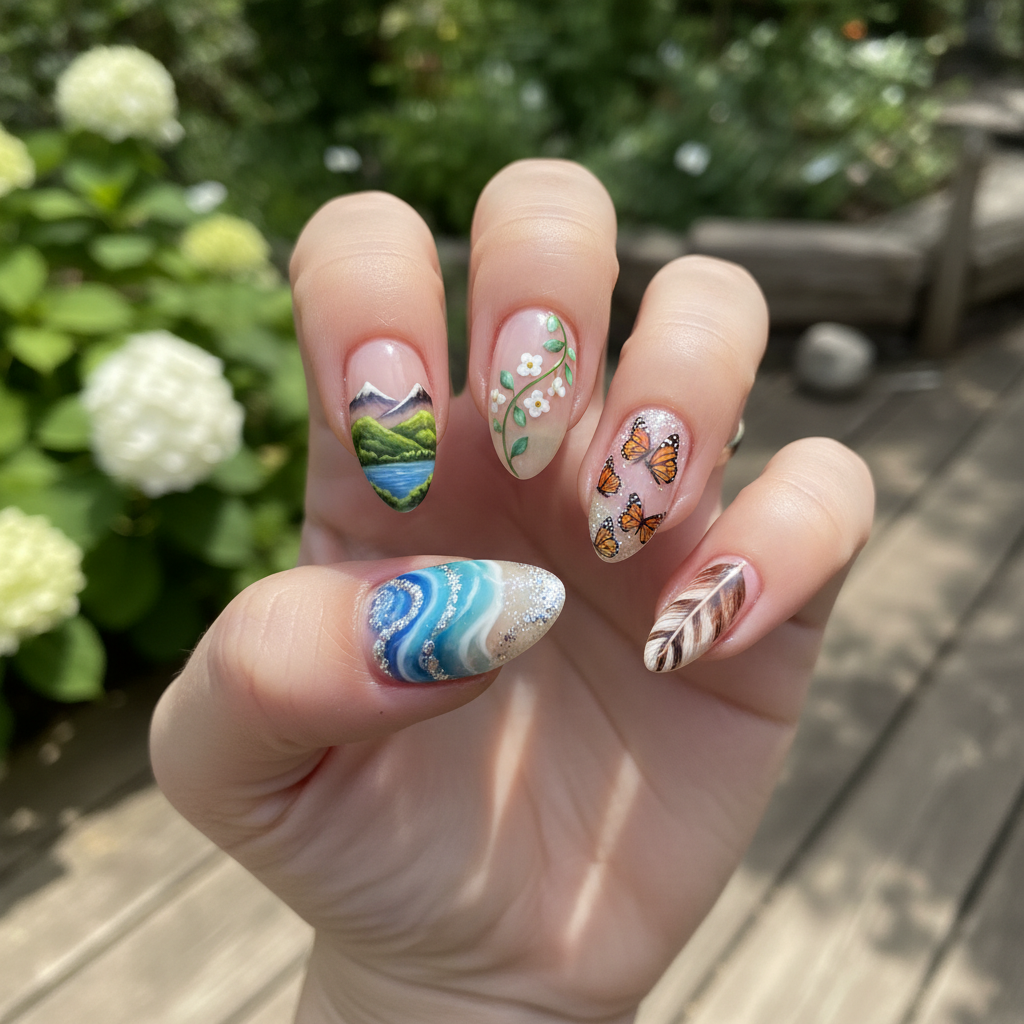
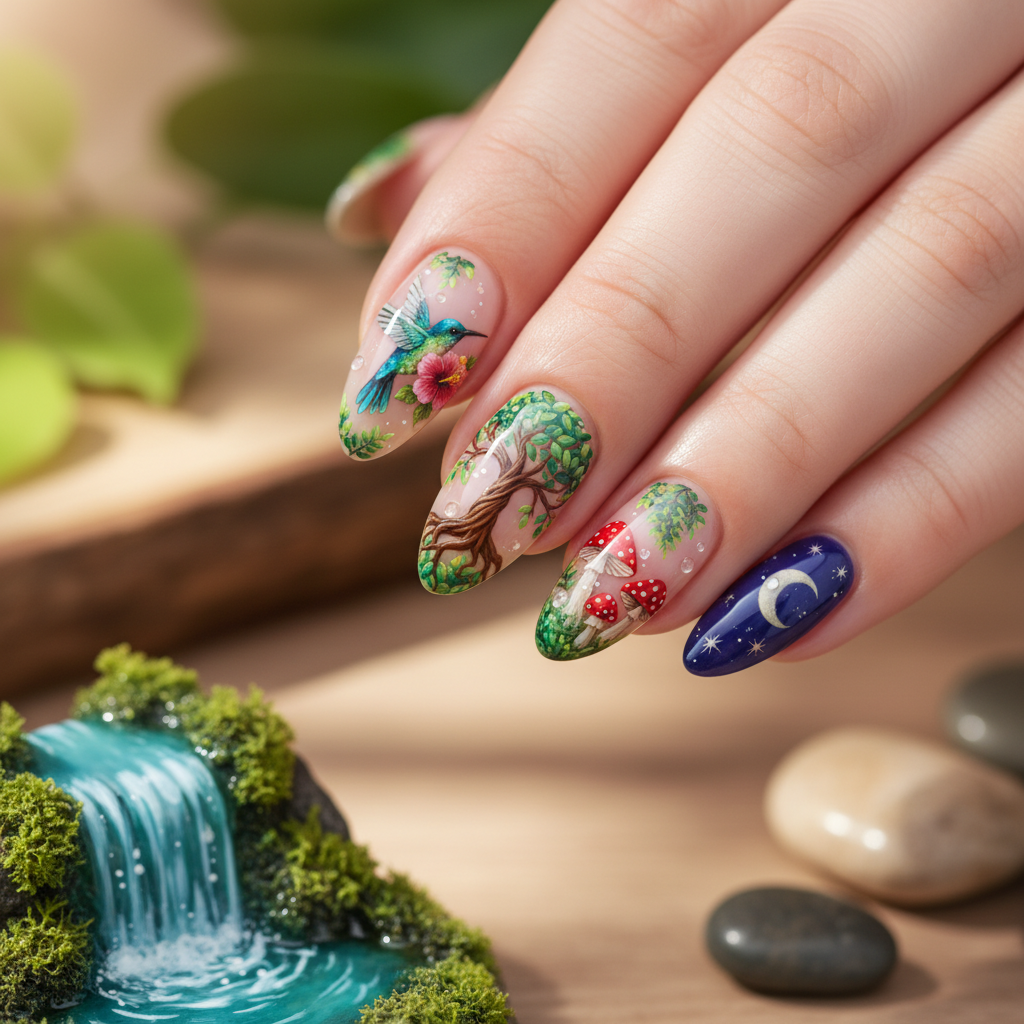
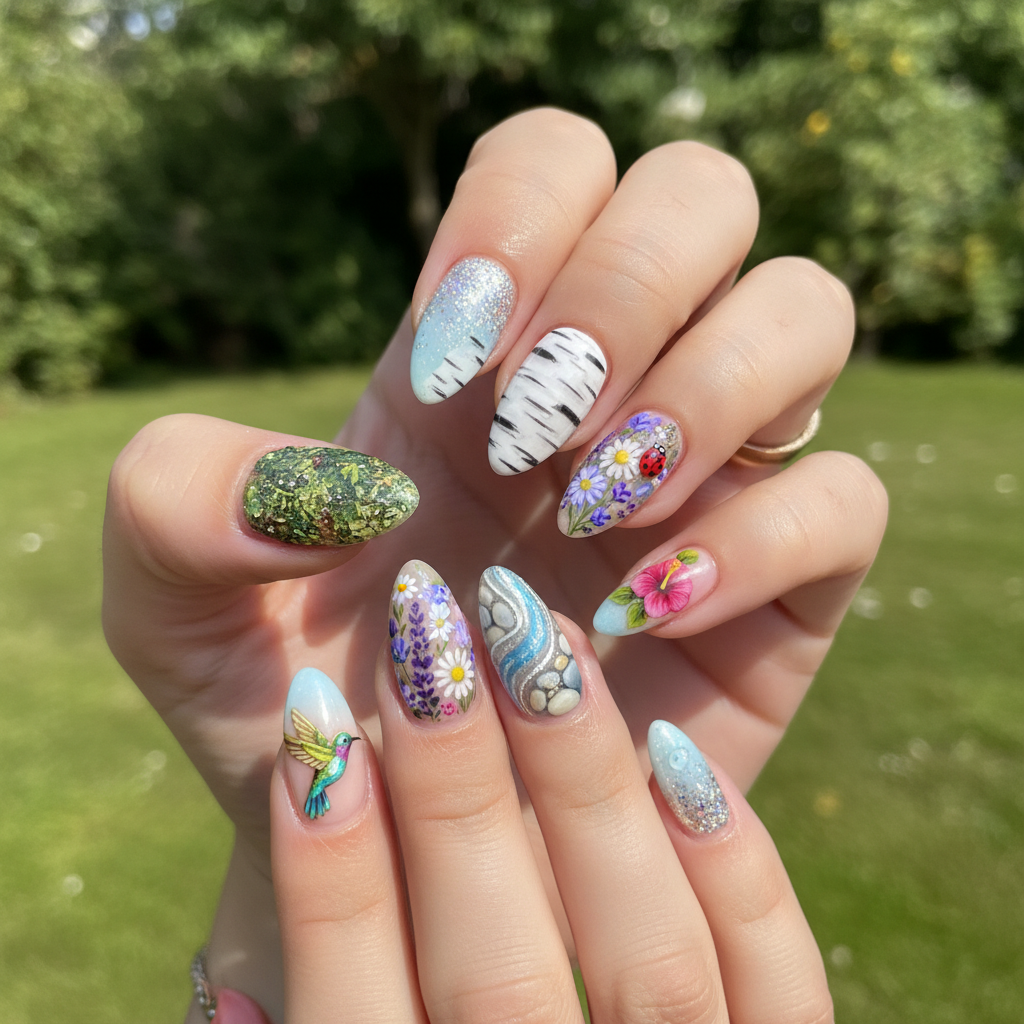
Photo-Real Nature Nails: Salon Quality Botanical Designs
Bring the beauty of the outdoors to your fingertips with these photo-real nature nails. This design captures the intricate details of botanical elements for a sophisticated, salon-worthy look that celebrates the natural world.
Supplies You'll Need
- Gel polish in various green, brown, and beige shades
- Ultra-fine detail brushes
- Photo-real botanical nail decals (optional)
- High-shine gel top coat
- Dotting tool or toothpick
- LED/UV nail lamp
How To Recreate It
- Apply a base coat and cure under a UV/LED lamp.
- Apply a base color (e.g., beige or light brown) and cure.
- Using fine detail brushes, carefully paint botanical elements such as leaves, stems, and flowers. Alternatively, apply photo-real botanical nail decals.
- Cure the design under the lamp.
- Apply a high-shine top coat to seal the design and enhance the photo-real effect.
- Cure the top coat and wipe off any tacky residue.
Expert Tip
Use a magnifying glass or detail lamp to ensure precision when painting intricate details. Practice your brushstrokes on a piece of paper first to perfect your technique.
Try These Variations
- →Monochrome Nature Nails: Use shades of gray for a minimalist, artistic look.
- →Floral Accent Nail: Feature the photo-real nature design on one accent nail per hand.
- →Abstract Nature: Create an abstract interpretation of nature with blended colors and textures.
Aftercare Tips
- ✓Moisturize your hands regularly to keep the skin around your nails hydrated.
- ✓Avoid picking or biting your nails.
- ✓Schedule regular nail appointments to maintain the health of your nails.
Safe Removal
- 1.Gently file the top coat to break the seal.
- 2.Soak cotton balls in acetone and apply them to your nails, securing with foil.
- 3.After 10-15 minutes, gently remove the softened polish with a cuticle pusher.
Quick Facts
Why It's Trending
Nature-inspired beauty trends are booming, and this design allows you to showcase your love for the outdoors in a fashionable way.
Seasonal Styling
Perfect for spring and summer, or anytime you want to add a touch of natural beauty to your look. Consider autumn leaves for fall!
Color Variations
Perfect For
Why People Love It
Instagram and Pinterest are filled with stunning examples of nature-inspired nail art, proving its popularity and visual appeal. Users are constantly seeking fresh and unique nail ideas, and this design delivers a sophisticated and on-trend look.
Daily Maintenance
- 💅Apply cuticle oil daily to keep nails healthy.
- 💅Wear gloves when doing household chores to protect the design.
- 💅Avoid using harsh chemicals that could damage the polish.
- 💅Gently file any snags to prevent further chipping.
Common Issues & Fixes
- ⚠Smudging: Work in thin layers and allow each layer to dry completely before adding more detail.
- ⚠Bleeding colors: Use high-quality gel polishes and avoid over-saturating your brush.
- ⚠Decals not adhering properly: Ensure the nail surface is clean and smooth before applying the decal. Use a rubber-tipped tool to press the decal firmly onto the nail.
- ⚠Bubbles in top coat: Apply the top coat in a thin, even layer and avoid shaking the bottle vigorously before application.
Design Inspiration
The design was inspired by the intricate patterns and vibrant colors found in botanical gardens and the desire to capture the essence of nature in a wearable art form.
Explore Similar Designs
Colors in this Design
Techniques Used
Perfect For
Nail Shapes
More Categories to Explore
Popular Colors
Popular Techniques
Perfect Occasions
FAQs
How long will this design last?
With proper care, a gel polish nature nail design can last up to two weeks without chipping.
Can I use regular nail polish instead of gel polish?
Yes, but gel polish provides a longer-lasting and more durable finish. Regular polish may require more frequent touch-ups.
Can I do this design if I'm a beginner?
While the overall design is advanced, you can start with simpler botanical elements or use nail stickers to get a similar look.
What are the best brushes for detailed nail art?
Look for ultra-fine liner brushes and detail brushes made with synthetic bristles for optimal control.
How do I prevent smudging when painting intricate designs?
Work in thin layers, allow each layer to dry completely, and use a light touch with your brush.