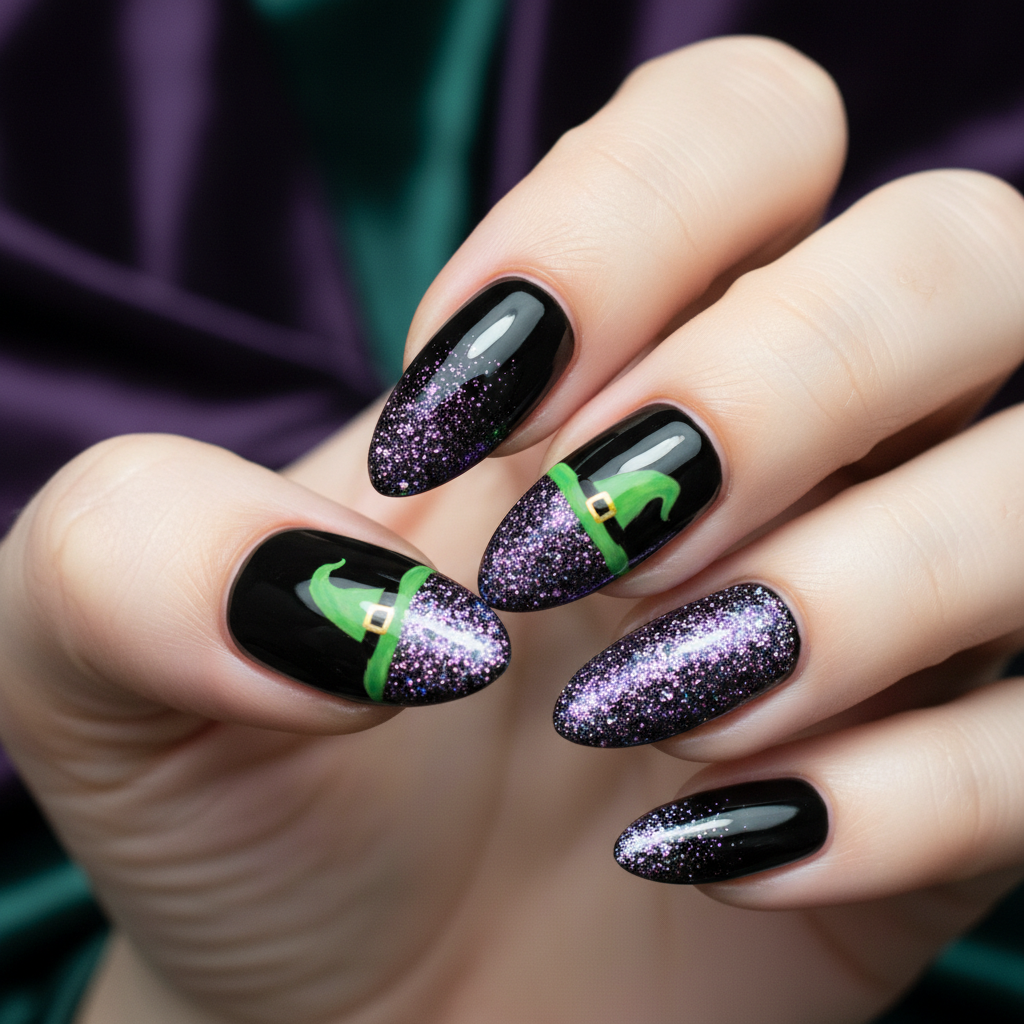
Black Green Witch Hats Purple Glitter Halloween Nails
Spooky Halloween nail art with black base, green witch hats, and purple glitter
Colors
Techniques
Occasions
Created: October 5, 2025 at 11:57 AM
More Halloween Designs
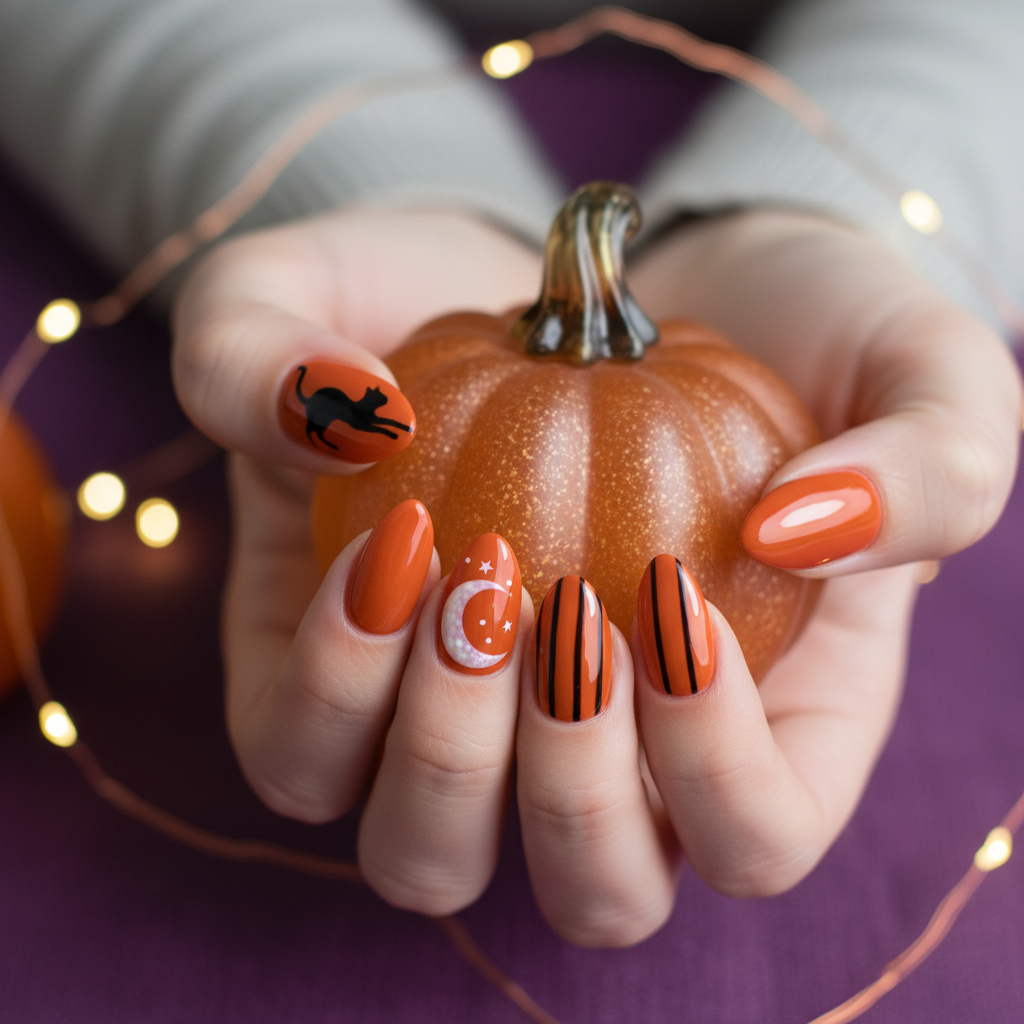
Festive Halloween Orange Black Cats White Halloween Nails
Festive Halloween nails with orange base, black cats, and white moon details
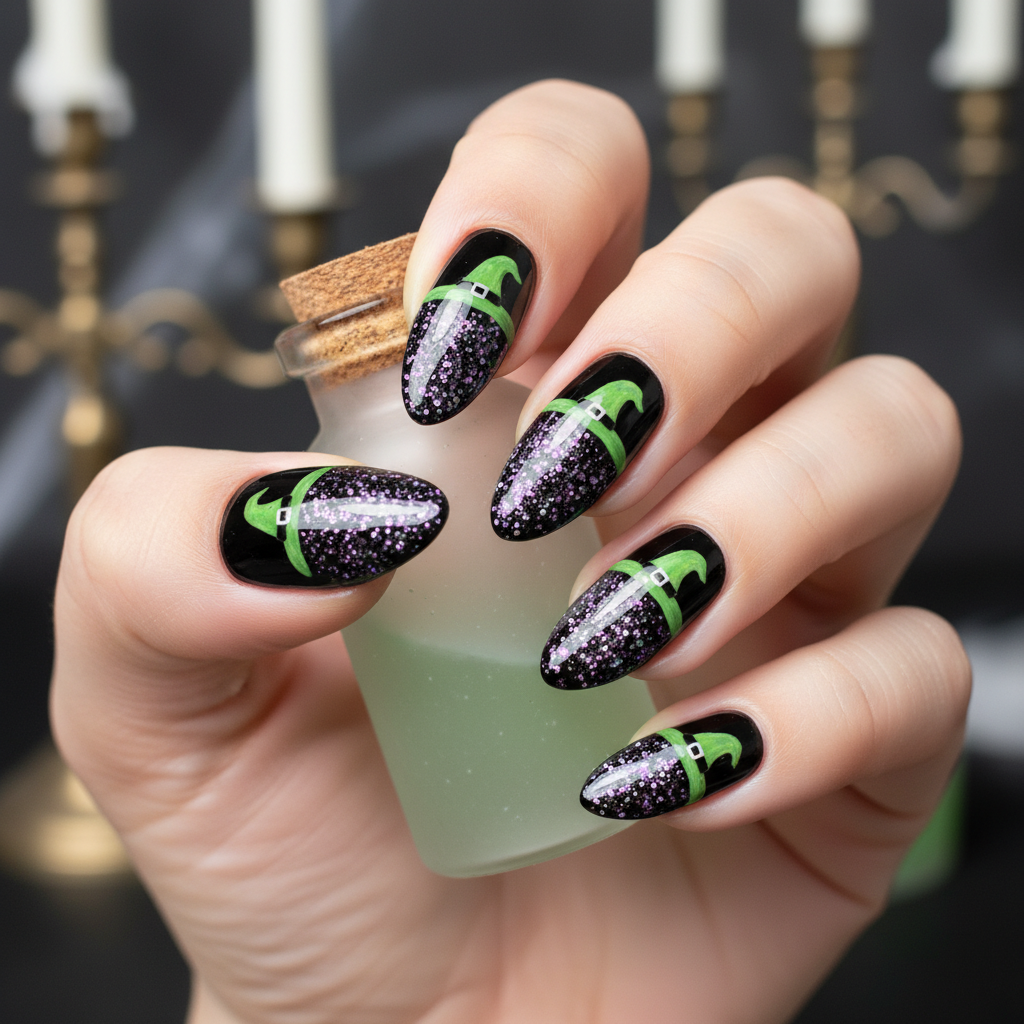
Black Green Witch Hats Purple Glitter Halloween Nails
Spooky Halloween nail art with black base, green witch hats, and purple glitter
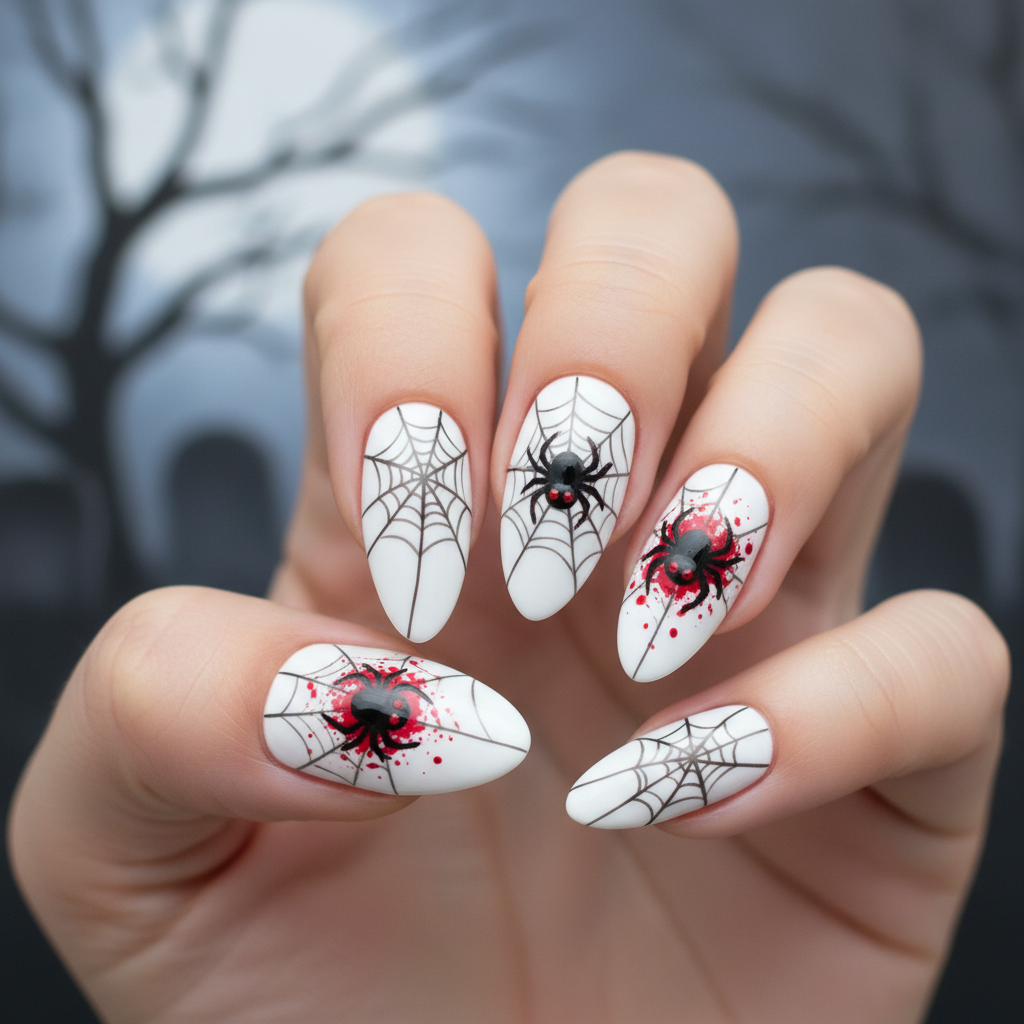
Creepy Halloween White Black Spider Webs Halloween Nails
Creepy Halloween design with white base, black spider webs, and red spider accents
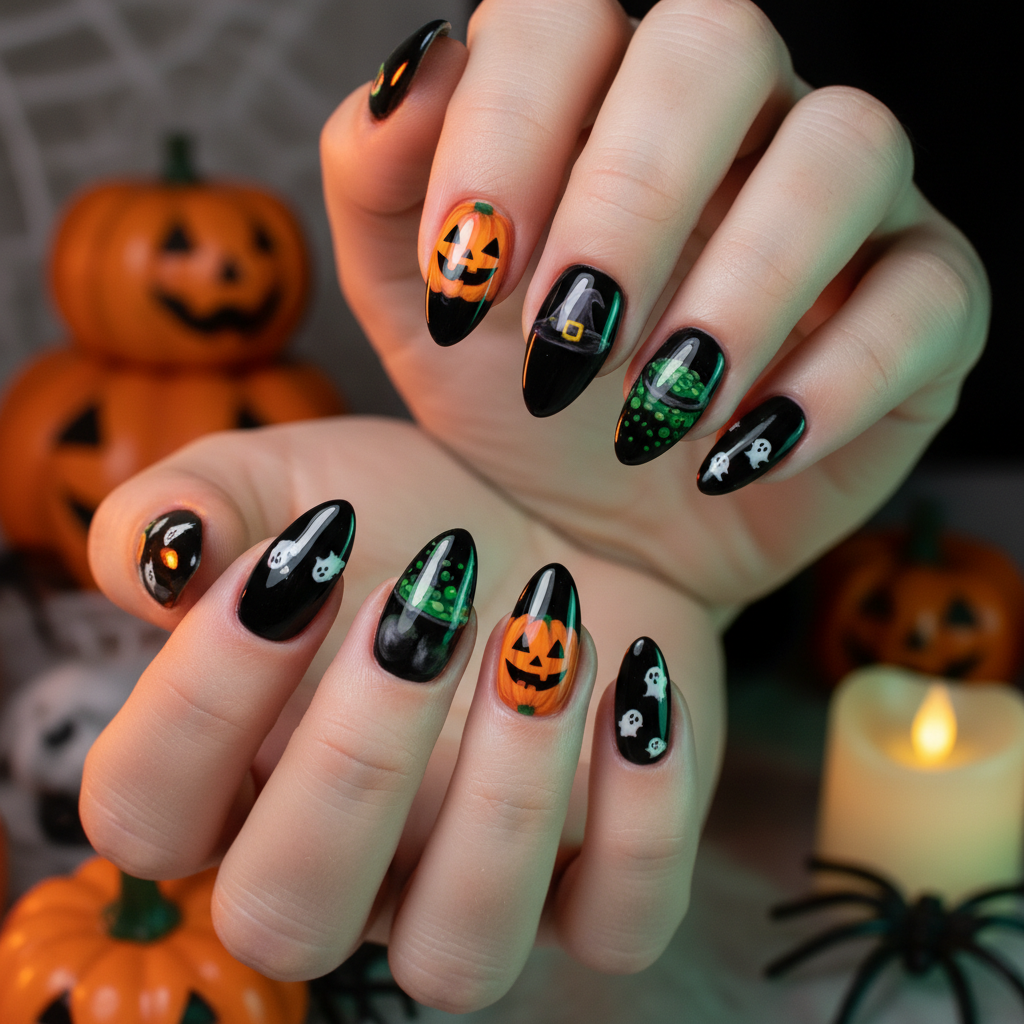
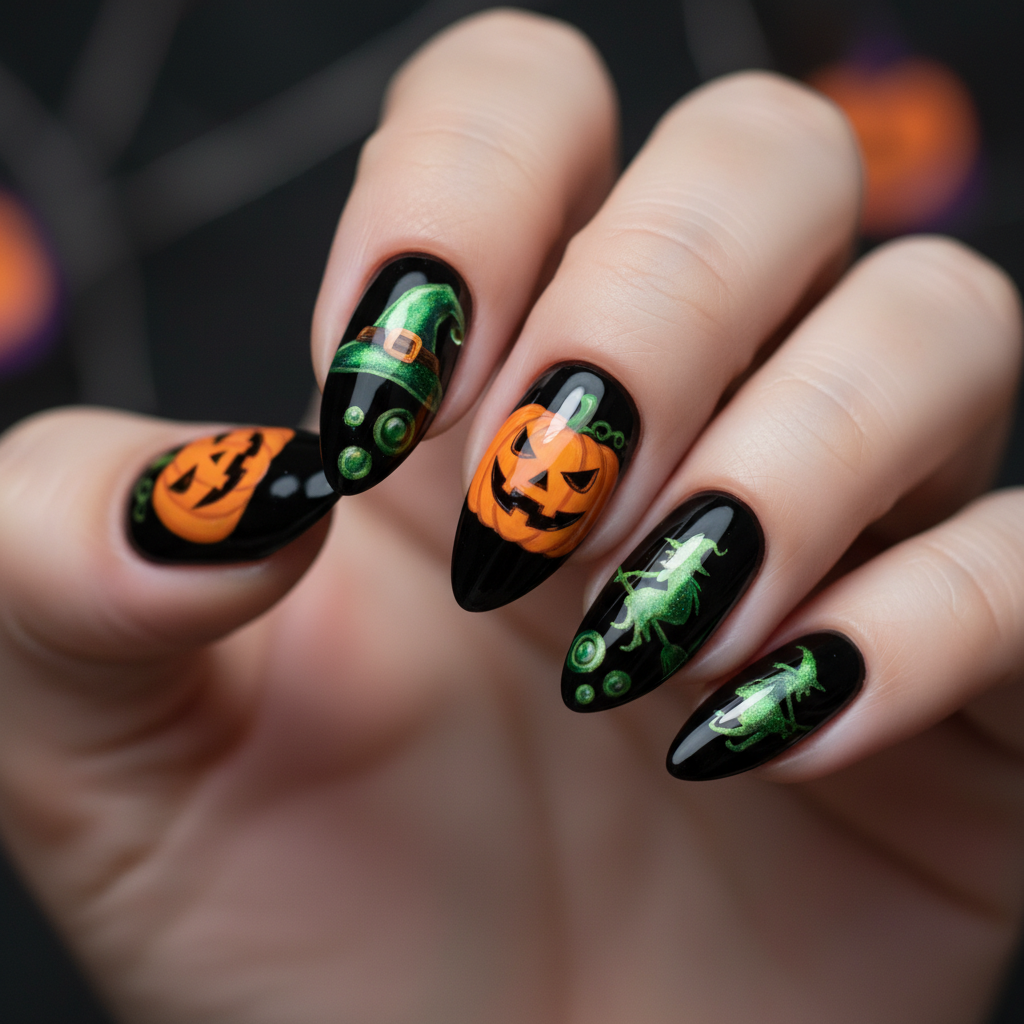
Spooky Halloween Black Orange Pumpkins Green Halloween Nails
Spooky Halloween nails with black base, orange pumpkins, and green witch details
Spooky Halloween Black Orange Pumpkins Green Halloween Nails
Spooky Halloween nails with black base, orange pumpkins, and green witch details
Spooky Halloween Black Orange Pumpkins Green Halloween Nails
Spooky Halloween nails with black base, orange pumpkins, and green witch details
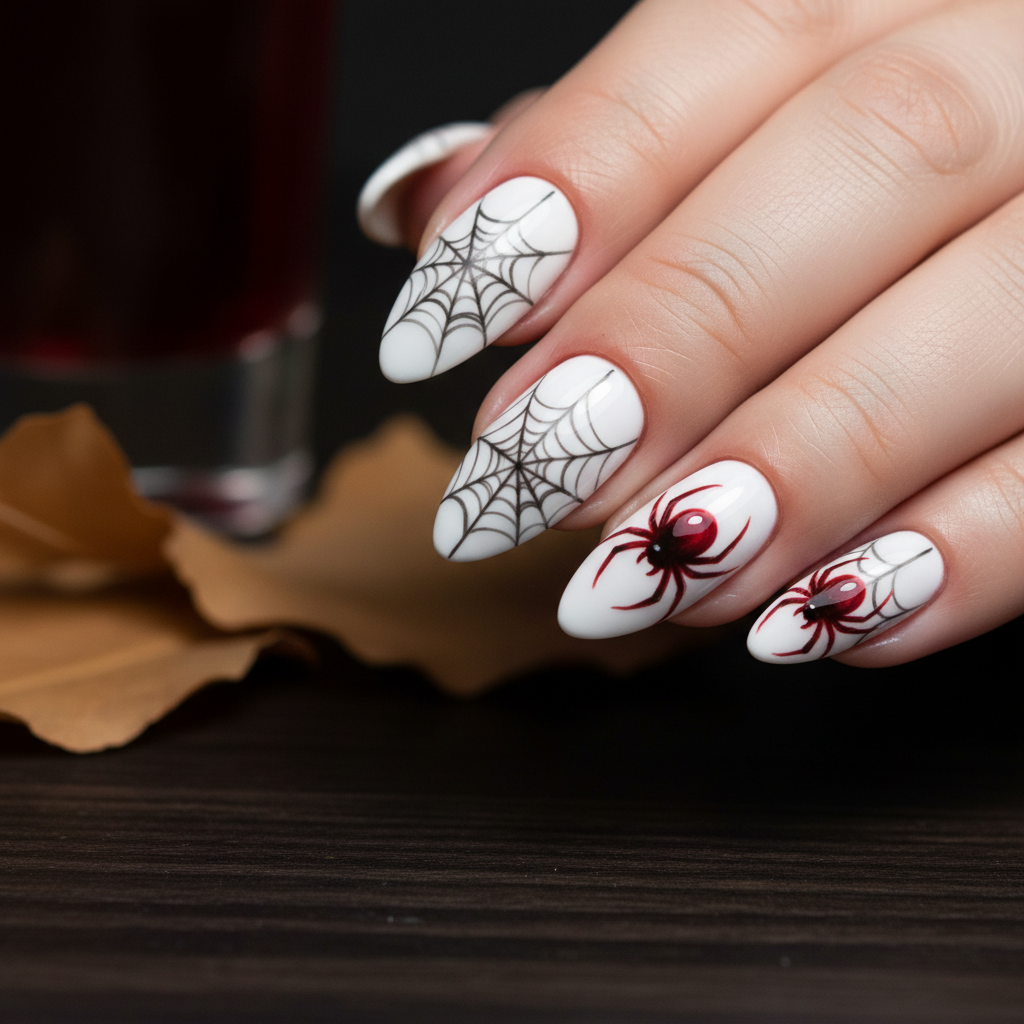
Creepy Halloween White Black Spider Webs Halloween Nails
Creepy Halloween design with white base, black spider webs, and red spider accents
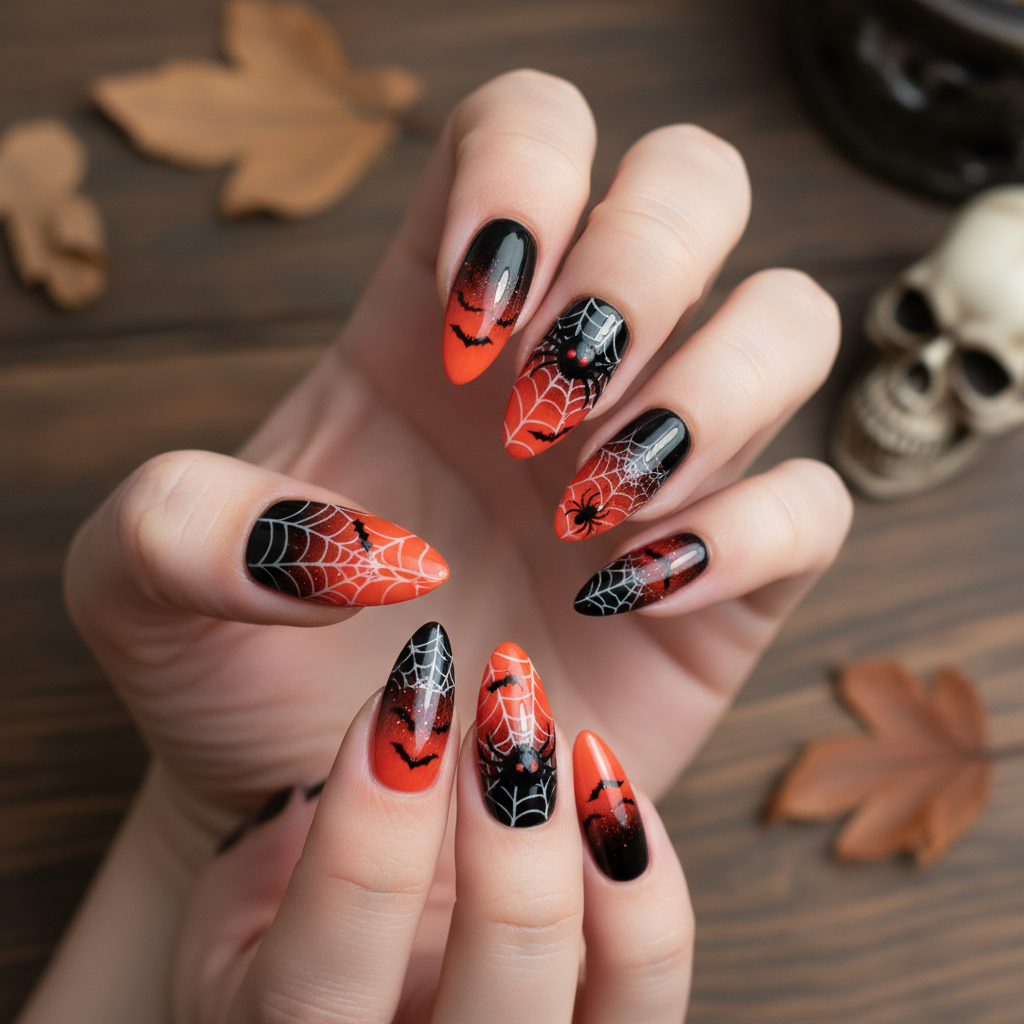
Creepy Halloween Black Orange Gradient Spider Halloween Nails
Creepy Halloween nails with black and orange gradient, spider webs, and tiny bats
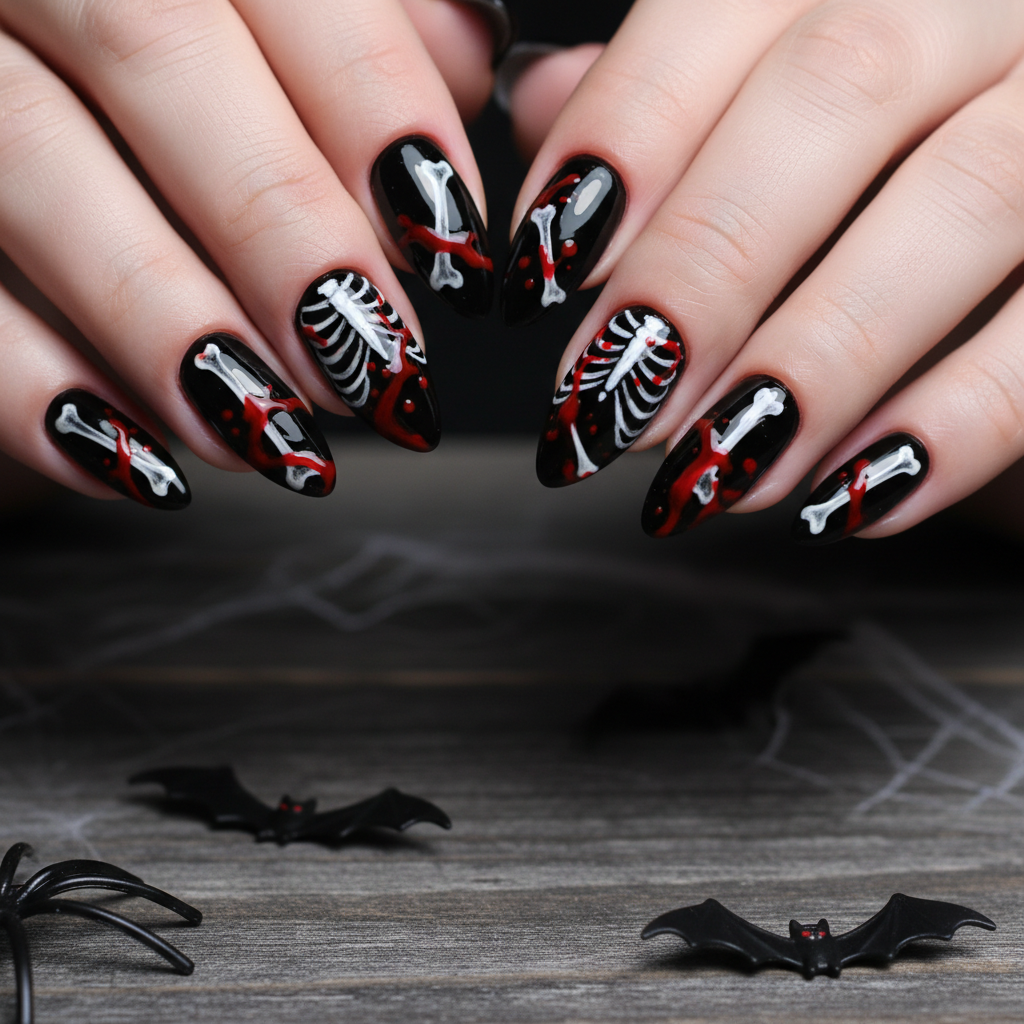
Creepy Halloween Black White Bones Red Halloween Nails
Creepy Halloween design featuring black base, white bones, and red blood splatters
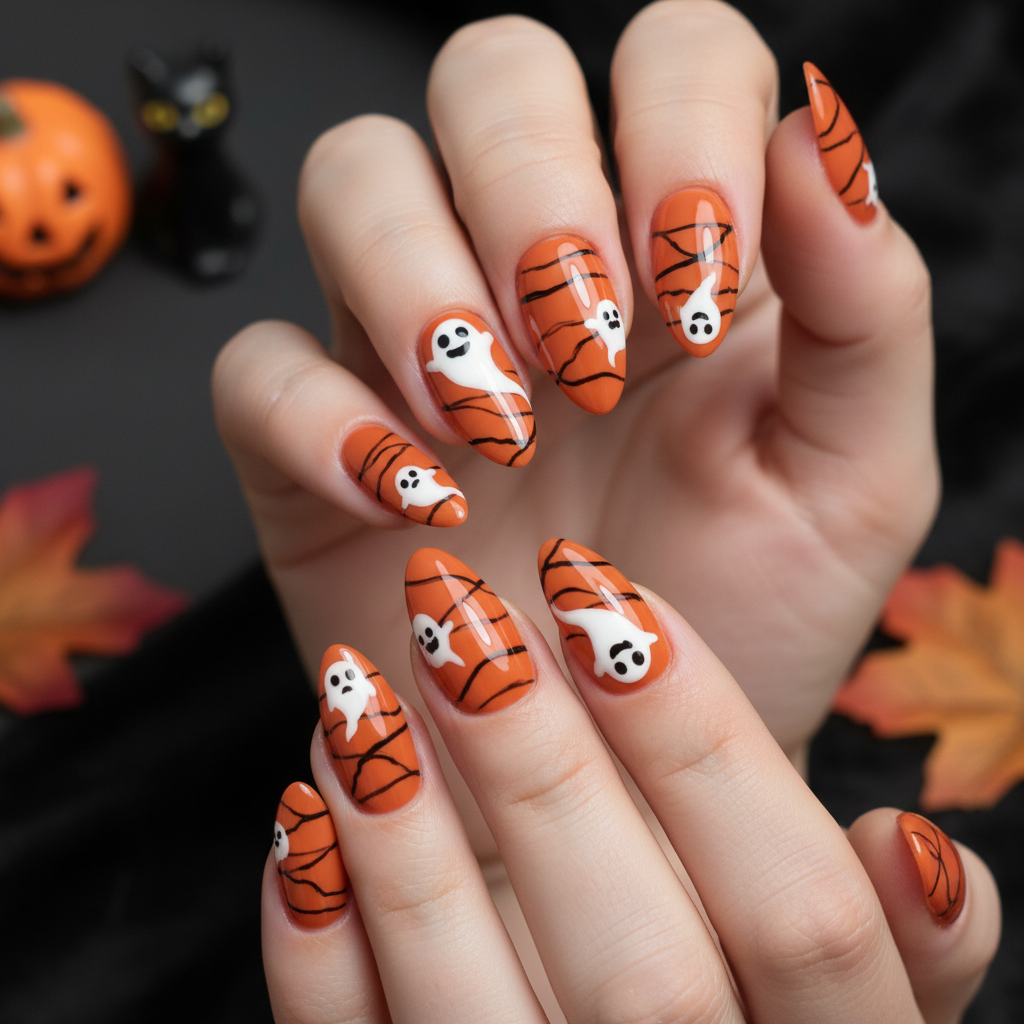
Orange Black Stripes White Ghosts Halloween Nails
Halloween nail art with orange base, black stripes, and tiny white ghosts
More Designs
Witchy Glam: Black & Glitter Halloween Nail Art
Cast a spell with these enchanting Halloween nails! Featuring a sleek black base, whimsical green witch hats, and a touch of magical purple glitter, this design is the perfect spooky-chic statement for October.
Supplies You'll Need
- Black nail polish (matte)
- Green nail polish
- Purple glitter polish or loose glitter
- Thin nail art brush
- Top coat
- Dotting tool
How To Recreate It
- Apply a base coat and then 2 coats of matte black polish. Let dry completely.
- Using a thin nail art brush and green polish, paint witch hat shapes on several nails. Vary the hat size and angle for a whimsical look.
- Apply purple glitter polish to accent nails or use a dotting tool to strategically place glitter around the base of the witch hats.
- Allow the design to dry fully and seal with a top coat to protect the art and add shine (except on the matte base).
- Clean up any mistakes with a small brush dipped in nail polish remover.
Expert Tip
Use a very fine nail art brush for detailing the witch hats. Practice the hat shape on paper first to perfect your technique.
Try These Variations
- →Ombre black to purple glitter base with green witch hat accents.
- →Use glow-in-the-dark green polish for the witch hats for an extra spooky effect.
- →Add small silver stars or moon decals around the glitter for a celestial touch.
Aftercare Tips
- ✓Use cuticle oil regularly to hydrate the skin around your nails.
- ✓Wear gloves when doing housework or gardening.
- ✓Avoid picking or biting your nails.
Safe Removal
- 1.Soak cotton balls in acetone nail polish remover and place them on your nails.
- 2.Wrap each nail with foil and let it sit for 10-15 minutes.
- 3.Gently scrape off the polish with a cuticle pusher or orange wood stick.
Quick Facts
Why It's Trending
Witch-themed designs are massively trending this Halloween, combining spooky and stylish elements.
Seasonal Styling
This design is perfect for Halloween, but you can adapt the colors for a year-round gothic glam look. Consider deep reds and silvers for winter holidays.
Color Variations
Perfect For
Why People Love It
This design is trending on Instagram and TikTok, with users loving the mix of dark and glamorous elements.
Daily Maintenance
- 💅Apply a top coat every 2-3 days to prevent chipping.
- 💅Avoid harsh chemicals that can dull the matte finish.
- 💅Moisturize your cuticles daily to keep your nails healthy.
Common Issues & Fixes
- ⚠Glitter is clumpy.Use a thin brush to spread the glitter evenly, or try using a glitter top coat instead of loose glitter.
- ⚠Witch hats look messy.Practice the hat shape on paper first. Use a very fine brush and take your time.
- ⚠Matte polish is showing fingerprints.Avoid touching the matte finish as much as possible while it's drying. A matte top coat can help reduce this.
Design Inspiration
The design was inspired by classic witch imagery combined with a modern, glamorous aesthetic.
Explore Similar Designs
Colors in this Design
Techniques Used
Perfect For
Nail Shapes
More Categories to Explore
Popular Colors
Popular Techniques
Perfect Occasions
FAQs
Can I use nail stickers instead of painting the witch hats?
Yes, nail stickers are a great alternative for those who aren't comfortable with freehand painting. Look for witch hat or Halloween-themed stickers.
What's the best way to apply glitter?
For fine glitter, use a glitter polish. For chunky glitter, apply a thin layer of clear polish and then gently press the glitter onto the wet polish.
How do I achieve a perfect matte finish?
Use a dedicated matte top coat over your base color. This will remove the shine and create a velvety finish.
Can I do this design on short nails?
Yes, adapt the size of the witch hats to fit your nail length. Smaller hats will work better on shorter nails.
How can I make the glitter last longer?
Encapsulate the glitter with multiple layers of top coat to prevent it from chipping or peeling off.
What's the best type of nail polish to use for this design?
High-quality opaque black nail polish and a good quality glitter polish will give you the best results.