
Photo-real Salon Stamping Nails - Stamping nail art - featuring nail art, red - nail art inspiration and design ideas
Photo-real Salon Stamping Nails
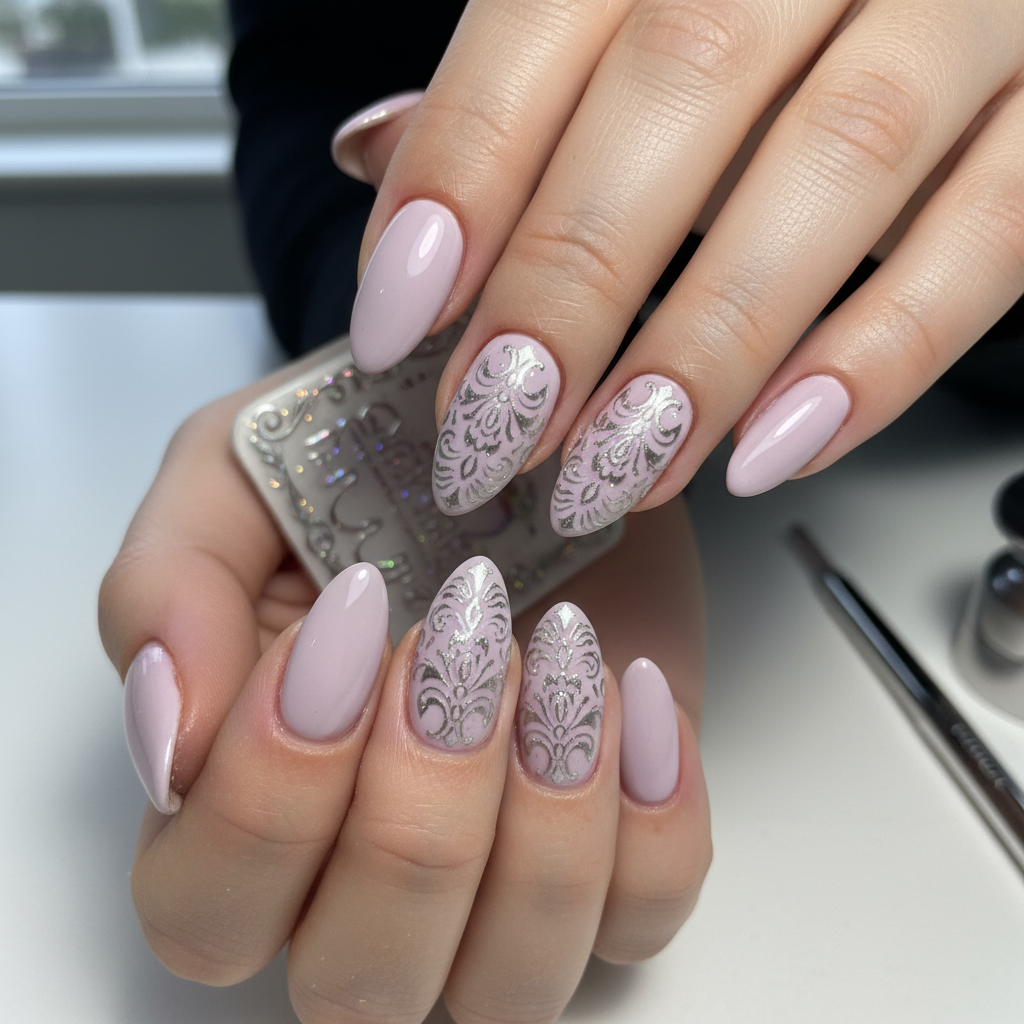
Photo-Real Stamping Nails: Salon-Quality Nail Art
Achieve a flawless, photo-realistic stamping nail art look with this professional salon-inspired design. This technique delivers crisp, clean lines and intricate details that are sure to impress, elevating your nail game to the next level.
Photo-Real Stamping Nails: Salon-Quality Nail Art
Achieve a flawless, photo-realistic stamping nail art look with this professional salon-inspired design. This technique delivers crisp, clean lines and intricate details that are sure to impress, elevating your nail game to the next level.
- Base coat
- Nail polish (neutral color)
- Stamping plate (intricate design)
- Stamping polish (highly pigmented)
- Stamper and scraper
- Top coat
- Apply a base coat to protect your nails and let it dry completely.
- Apply 2-3 coats of your chosen neutral nail polish color, allowing each coat to dry.
- Apply stamping polish to the desired design on the stamping plate, then scrape away excess polish with the scraper.
- Quickly transfer the design from the plate to the stamper by rolling the stamper over the plate.
- Roll the stamper onto your nail to transfer the design.
- Apply a top coat to seal the design and add shine.
Techniques
Expert Tip
Clean your stamping plate and stamper immediately after each use with nail polish remover to prevent polish from drying and ruining the image.
Similar Styles

Beautiful Photo-real Salon Stamping Nails
Stamping inspired nail art with beautiful, photo-real finish and professional salon quality

Gorgeous Photo-real Salon Stamping Nails
Stamping inspired nail art with gorgeous, photo-real finish and professional salon quality

Stunning Photo-real Salon Stamping Nails
Stamping inspired nail art with stunning, photo-real finish and professional salon quality

Sophisticated Photo-real Salon Stamping Nails
Stamping inspired nail art with sophisticated, photo-real finish and professional salon quality

Photo-real Salon Stamping Nails
Stamping inspired nail art with elegant, photo-real finish and professional salon quality

Photo-real Salon Stamping Nails
Stamping inspired nail art with clean, photo-real finish and professional salon quality

Photo-real Salon Stamping Nails
Stamping inspired nail art with clean, photo-real finish and professional salon quality
Explore Similar Designs
Colors in this Design
Techniques Used
Nail Shapes
Frequently Asked Questions
What is the best type of stamping polish to use?
Highly pigmented stamping polishes specifically designed for stamping are recommended for best results.
Can I use regular nail polish for stamping?
While possible, stamping polishes are formulated with higher pigment levels, making them ideal for crisp transfers. Regular polish may not provide the same level of detail.
How do I clean my stamping plate?
Use a lint-free cloth or cotton pad soaked in nail polish remover to wipe the plate clean after each use.
How do I prevent smudging when applying top coat?
Allow the stamped design to dry completely before applying a quick-drying top coat in a single, smooth layer.
Where can I find good stamping plates?
Many online retailers and beauty supply stores offer a wide variety of stamping plates with different designs.
My design isn't transferring from the stamper. What am I doing wrong?
Make sure you're working quickly and with a firm, rolling motion when picking up the design with the stamper. Also ensure you've removed the clear protective film from the stamping plate before use.
Aftercare Tips
- ✓Use cuticle oil daily to keep your nails hydrated.
- ✓Wear gloves when doing household chores.
- ✓Avoid picking at the edges of the polish.
Safe Removal
- 1.Soak a cotton ball in nail polish remover and hold it on the nail for a few seconds.
- 2.Wipe away the polish, repeating if necessary.