
Photo-real Salon Retro Nails - Retro nail art - featuring nail art, red - nail art inspiration and design ideas
Photo-real Salon Retro Nails
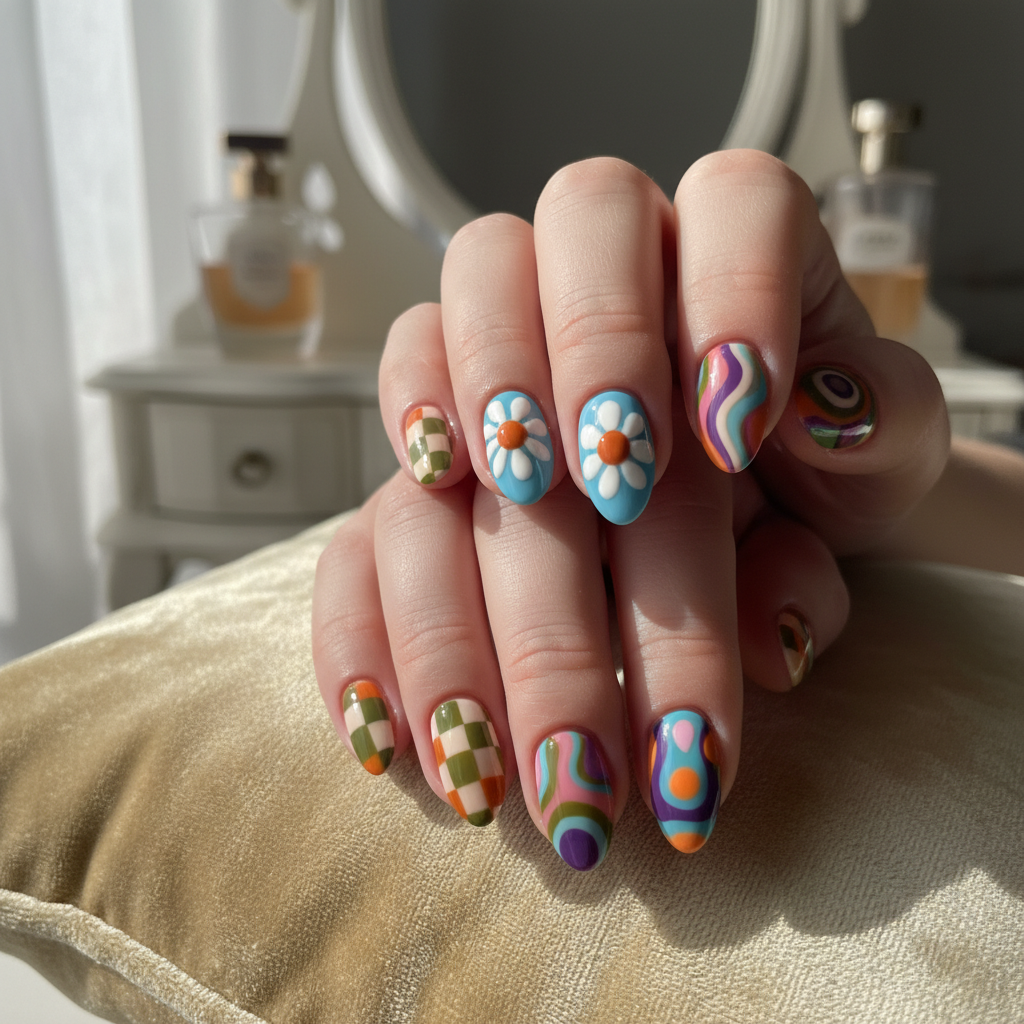
Groovy Retro Nails: Photo-Real Salon Design
Step back in time with these retro-inspired nails! This design features a clean, photo-real finish that brings a professional salon quality to your fingertips, perfect for adding a pop of vintage charm to your look.
Groovy Retro Nails: Photo-Real Salon Design
Step back in time with these retro-inspired nails! This design features a clean, photo-real finish that brings a professional salon quality to your fingertips, perfect for adding a pop of vintage charm to your look.
- Gel polishes in mustard yellow, avocado green, burnt orange, and cream white
- Fine detail brushes
- Base coat and top coat
- LED/UV lamp
- Nail art dotting tool
- Isopropyl alcohol for cleaning
- Apply a base coat and cure under the LED/UV lamp.
- Apply 2-3 thin coats of cream white gel polish as a base color and cure.
- Using fine detail brushes, create geometric patterns with mustard yellow, avocado green, and burnt orange gel polishes.
- Cure each layer of color under the lamp to prevent bleeding.
- Apply a glossy top coat and cure.
- Cleanse the nails with isopropyl alcohol to remove any sticky residue.
Expert Tip
Use high-quality gel polishes and fine detail brushes for sharp, clean lines. Practice your freehand painting skills on a nail wheel before attempting the design on your nails.
Similar Styles


Explore Similar Designs
Colors in this Design
Perfect For
Nail Shapes
Frequently Asked Questions
How long will this design last?
With proper application and aftercare, this gel polish design can last up to 2-3 weeks.
Can I recreate this design with regular nail polish?
While possible, gel polish provides a longer-lasting and more durable finish. The fine details are easier to achieve with the self-leveling properties of gel.
What kind of brushes should I use?
Fine detail brushes with synthetic bristles are ideal for creating precise lines and intricate patterns.
Is it necessary to use a UV/LED lamp?
Yes, a UV/LED lamp is required to cure gel polish and achieve a long-lasting, durable finish.
How do I prevent the colors from bleeding together?
Cure each layer of gel polish under the UV/LED lamp before applying the next layer to prevent bleeding.
What's the best way to clean the brushes?
Use a brush cleaner or isopropyl alcohol to clean your brushes immediately after use to prevent the gel polish from hardening.
Aftercare Tips
- ✓Keep your hands moisturized with a good quality hand cream.
- ✓Avoid picking or peeling off the gel polish.
- ✓Schedule regular salon appointments for professional removal.
Safe Removal
- 1.File off the top coat to break the seal.
- 2.Soak cotton pads in acetone and apply them to the nails, wrapping them in foil. Let sit for 10-15 minutes.
- 3.Gently remove the softened gel polish with a cuticle pusher.