
Beautiful Photo-real Salon Polka Dots Nails - Polka Dots nail art - featuring nail art, red - nail art inspiration and design ideas
Beautiful Photo-real Salon Polka Dots Nails
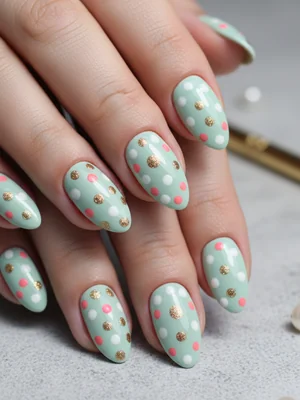
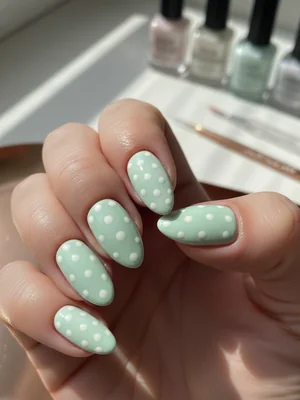
Photo-Real Polka Dots: Salon-Perfect Crisp Nail Art
Step into timeless elegance with our Photo-Real Polka Dots design, where classic charm meets professional precision. This nail art features perfectly round, crisp dots meticulously placed on a smooth, high-gloss base, creating a truly salon-quality finish. It's a chic, sophisticated look that captures the essence of refined simplicity.
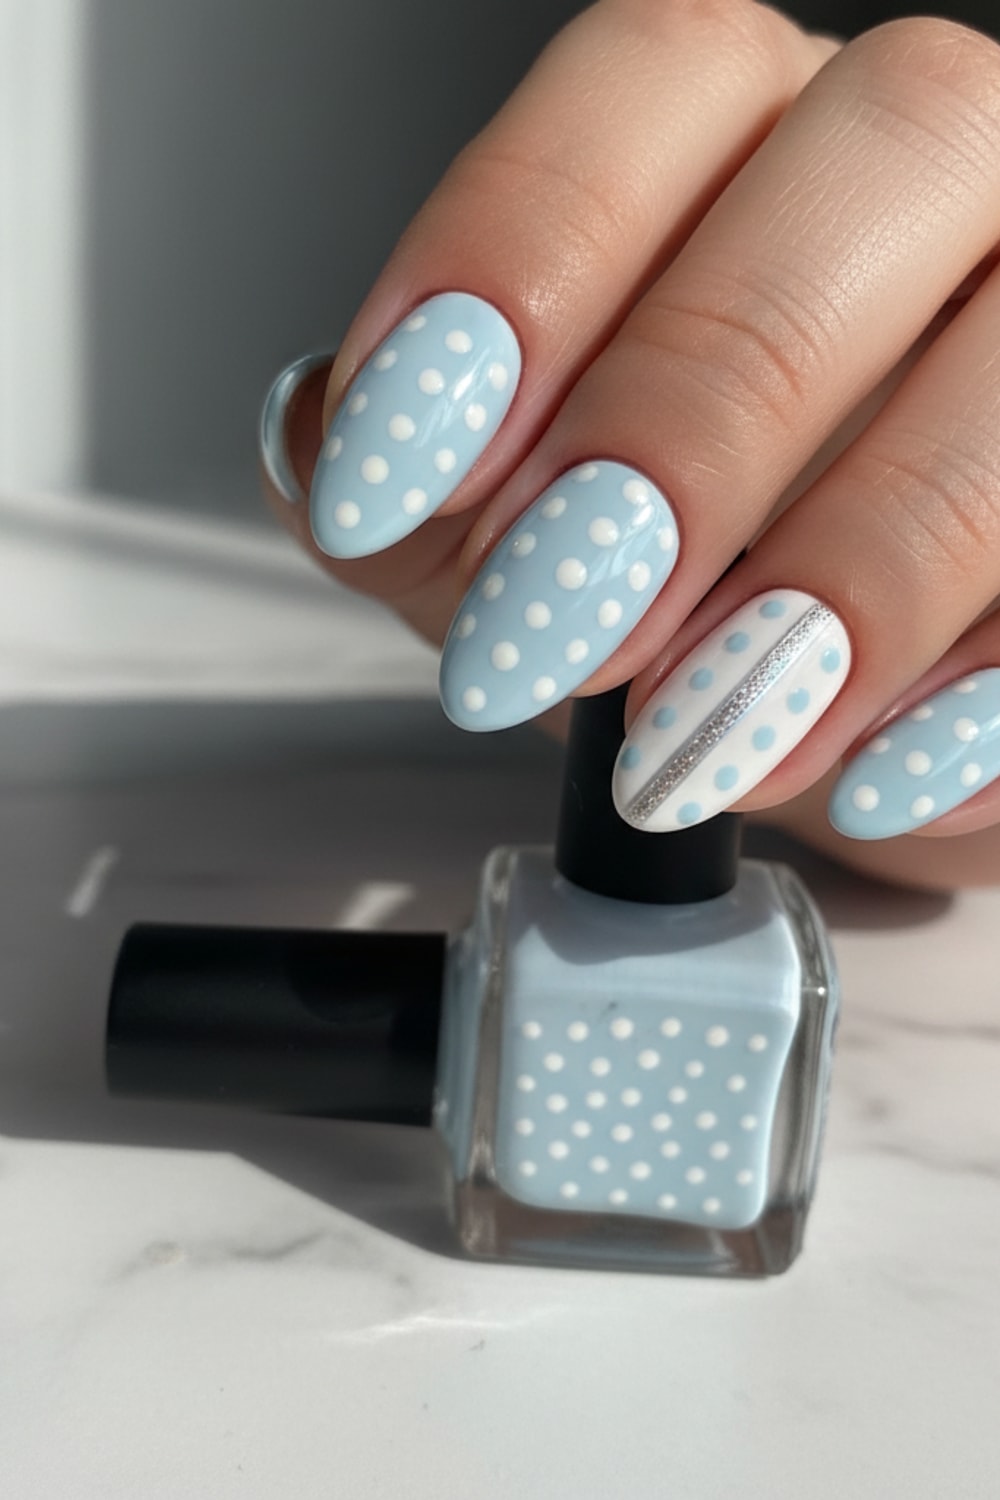
- Gel Base Coat
- Gel Top Coat (High-Shine, Non-Wipe)
- White or Nude Gel Polish
- Black Gel Polish
- Dotting Tools (various sizes for precision)
- Nail Art Detail Brush (for tiny adjustments/cleanup)
- Prep nails: Clean, buff, shape, and apply a dehydrator. Apply a thin layer of gel base coat and cure thoroughly under UV/LED light.
- Apply 1-2 thin, even coats of your chosen base color (e.g., white or nude gel polish), curing each layer completely for maximum opacity and smoothness.
- Dip a clean dotting tool into the contrasting gel polish (e.g., black). Carefully place perfectly round, evenly spaced dots across the nail, ensuring uniform size and crisp, defined edges. Cure immediately after each nail to prevent bleeding.
- Inspect dot perfection. If desired, apply a second, very thin layer of polish to the dots for more opacity and dimension, curing again. Use a detail brush for any minor touch-ups.
- Seal the design with a generous, self-leveling layer of high-shine, non-wipe gel top coat, ensuring all dots are fully encapsulated. Cure completely for a brilliant, 'photo-real' finish.
Expert Tip
For truly 'photo-real' dots, ensure your dotting tool is loaded with just enough polish – too much will create a raised blob, too little will create an uneven dot. Practice perfect pressure and consistency on a swatch stick first to achieve that perfect circle.
Similar Styles

Beautiful Photo-real Salon Polka Dots Nails
Polka Dots inspired nail art with beautiful, photo-real finish and professional salon quality

Gorgeous Photo-real Salon Polka Dots Nails
Polka Dots inspired nail art with gorgeous, photo-real finish and professional salon quality
Stunning Photo-real Salon Polka Dots Nails
Polka Dots inspired nail art with stunning, photo-real finish and professional salon quality

Stunning Photo-real Salon Polka Dots Nails
Polka Dots inspired nail art with stunning, photo-real finish and professional salon quality

Photo-real Salon Polka Dots Nails
Polka Dots inspired nail art with elegant, photo-real finish and professional salon quality
Sophisticated Photo-real Salon Polka Dots Nails
Polka Dots inspired nail art with sophisticated, photo-real finish and professional salon quality

Sophisticated Photo-real Salon Polka Dots Nails
Polka Dots inspired nail art with sophisticated, photo-real finish and professional salon quality

Photo-real Salon Polka Dots Nails
Polka Dots inspired nail art with elegant, photo-real finish and professional salon quality

Photo-real Salon Polka Dots Nails
Polka Dots inspired nail art with elegant, photo-real finish and professional salon quality
Photo-real Salon Polka Dots Nails
Polka Dots inspired nail art with clean, photo-real finish and professional salon quality
Photo-real Salon Polka Dots Nails
Polka Dots inspired nail art with clean, photo-real finish and professional salon quality
Photo-real Salon Polka Dots Nails
Polka Dots inspired nail art with clean, photo-real finish and professional salon quality
Explore Similar Designs
Colors in this Design
Perfect For
Nail Shapes
Frequently Asked Questions
How can I ensure my dots are perfectly round and uniform?
The key is to use a clean dotting tool, load it with a consistent, small amount of polish, and apply gentle, even pressure straight down and lift straight up. Practice on a nail swatch stick first to perfect your technique.
Can I achieve this 'photo-real' look with regular nail polish?
While possible, gel polish is highly recommended for its self-leveling properties, crisp lines, and incredibly high-shine, durable finish, which contributes significantly to the 'photo-real' quality. Regular polish may smudge easier before drying.
What's the best spacing for the polka dots?
For a classic, balanced look, aim for even spacing that allows each dot to stand out without feeling crowded. You can lightly mark your pattern with a dry detail brush and base coat if you need guidance.
How long does this precise polka dot design typically last?
With proper application and diligent aftercare using quality gel products, your Photo-Real Polka Dots manicure can last 2-3 weeks without chipping or dulling, maintaining its pristine, salon-fresh look.
Are tiny or large dots better for this 'photo-real' design?
The 'photo-real' effect can be achieved with various dot sizes. Smaller, more numerous dots often create a delicate, intricate look, while larger, fewer dots make a bolder statement. Both can be photo-real if perfectly executed and uniform.
Is this design suitable for short nails?
Absolutely! Photo-Real Polka Dots look incredibly chic and sophisticated on short nails, adding a touch of classic elegance and pattern without overwhelming the nail plate.
Aftercare Tips
- ✓Avoid exposing your freshly cured gel manicure to excessive moisture or harsh chemicals for the first 24 hours to ensure optimal adhesion.
- ✓Do not pick or peel your gel polish, as this can severely damage your natural nail plate and lead to thinning or breakage.
- ✓Moisturize your hands and nails regularly, especially after washing, to maintain the integrity and appearance of your polished look and healthy skin.
Safe Removal
- 1.Gently buff the entire top layer of the gel polish with a fine-grit nail file (180-240 grit) to break the top coat seal.
- 2.Soak cotton pads in 100% pure acetone, place them directly on each nail, and wrap tightly with foil for 10-15 minutes.
- 3.Carefully push off the softened gel with an orange wood stick or metal pusher. Never force or scrape. Gently buff any remaining residue, then rehydrate with cuticle oil.