Beautiful Photo-real Salon Half Moon Nails - Half Moon nail art - featuring nail art, red - nail art inspiration and design ideas
Beautiful Photo-real Salon Half Moon Nails
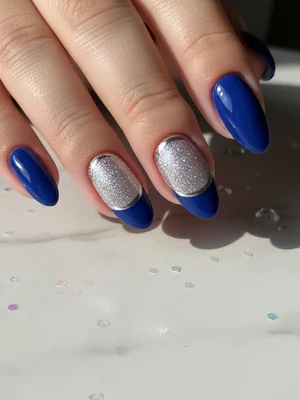
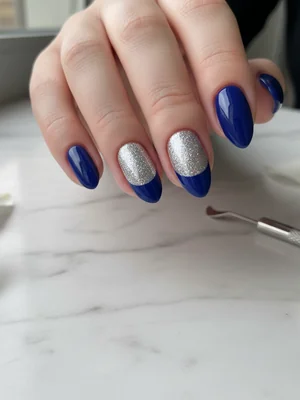
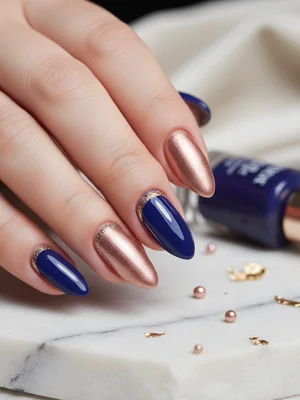
Photo-Real Salon Half Moon Nails: Timeless Elegance
Experience the epitome of classic sophistication with our Photo-Real Salon Half Moon Nails. This design features a perfectly sculpted crescent at the nail base, offering a clean, incredibly precise finish that exudes professional salon quality. It's a subtle yet impactful look, designed for those who appreciate timeless beauty and flawless execution.
- Base Coat
- Soft Nude Pink Polish (Base Color)
- Crisp Opaque White Polish (Crescent Color)
- Half-Moon Nail Guides/Stencils
- Fine-Tip Nail Art Brush (optional for touch-ups)
- High-Gloss Top Coat
- Prepare nails: File, buff, push back cuticles. Apply a thin layer of base coat and cure if gel, or let dry if lacquer.
- Apply base color: Apply 2 thin coats of soft nude pink polish, allowing each to fully dry/cure. This ensures a smooth, opaque foundation.
- Position guides: Once base color is completely dry, carefully place half-moon nail guides or stencils at the base of each nail, creating a perfectly curved crescent shape.
- Apply crescent color: Apply 1-2 thin, even coats of crisp opaque white polish over the exposed crescent area above the guide. Gently remove guides immediately while polish is still wet.
- Refine and seal: Use a fine-tip brush with a tiny bit of base color for any necessary clean-up. Finish with a generous layer of high-gloss top coat to seal and add shine, curing if gel.
- Final cure/dry: Ensure nails are fully cured under UV/LED light for gel or completely dry for lacquer, to prevent smudging and maximize longevity.
Expert Tip
The secret to a truly photo-real Half Moon design is extreme patience and precise placement of your half-moon guides. For the sharpest line, remove the guide immediately after applying the crescent color, before it sets completely, to avoid smudging or sticky residue.
Similar Styles
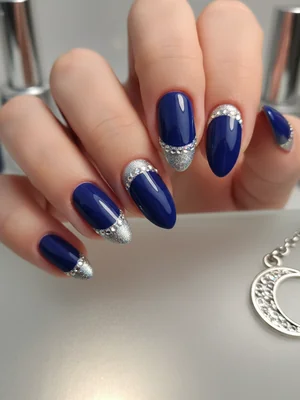
Gorgeous Photo-real Salon Half Moon Nails
Half Moon inspired nail art with gorgeous, photo-real finish and professional salon quality
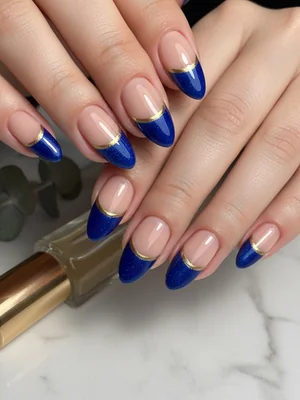
Beautiful Photo-real Salon Half Moon Nails
Half Moon inspired nail art with beautiful, photo-real finish and professional salon quality

Beautiful Photo-real Salon Half Moon Nails
Half Moon inspired nail art with beautiful, photo-real finish and professional salon quality

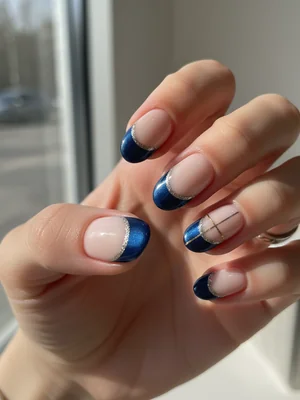
Stunning Photo-real Salon Half Moon Nails
Half Moon inspired nail art with stunning, photo-real finish and professional salon quality
Sophisticated Photo-real Salon Half Moon Nails
Half Moon inspired nail art with sophisticated, photo-real finish and professional salon quality

Gorgeous Photo-real Salon Half Moon Nails
Half Moon inspired nail art with gorgeous, photo-real finish and professional salon quality
Gorgeous Photo-real Salon Half Moon Nails
Half Moon inspired nail art with gorgeous, photo-real finish and professional salon quality

Photo-real Salon Half Moon Nails
Half Moon inspired nail art with elegant, photo-real finish and professional salon quality
Stunning Photo-real Salon Half Moon Nails
Half Moon inspired nail art with stunning, photo-real finish and professional salon quality

Stunning Photo-real Salon Half Moon Nails
Half Moon inspired nail art with stunning, photo-real finish and professional salon quality
Sophisticated Photo-real Salon Half Moon Nails
Half Moon inspired nail art with sophisticated, photo-real finish and professional salon quality
Sophisticated Photo-real Salon Half Moon Nails
Half Moon inspired nail art with sophisticated, photo-real finish and professional salon quality
Explore Similar Designs
Colors in this Design
Perfect For
Nail Shapes
Frequently Asked Questions
How long does a Half Moon manicure typically last?
With proper application and maintenance (especially with gel polish), this design can last 2-3 weeks without chipping.
Can I do this Photo-Real Half Moon design at home?
Yes, with patience and the right tools like half-moon guides, it's achievable at home. However, for true 'photo-real salon quality,' a professional application is recommended.
What's the best way to get a perfectly curved line for the crescent?
Nail art guides are your best friend! Alternatively, a very steady hand with a fine-tip brush and a clean-up brush dipped in acetone can achieve excellent results.
Does this design work on short nails?
Absolutely! The Half Moon design is incredibly flattering on shorter nails, enhancing their natural shape and adding a touch of elegance.
How often should I reapply my top coat?
For maximum shine and chip prevention, reapply a thin layer of top coat every 3-5 days, especially if you use your hands frequently.
Is 'Half Moon' the same as a 'Reverse French' manicure?
While both involve the base of the nail, a Half Moon specifically highlights the lunula (the white crescent at the nail base), whereas a Reverse French often outlines the entire cuticle area, sometimes with a more dramatic 'smile line' at the base.
Aftercare Tips
- ✓Allow adequate drying time: For lacquer, avoid heavy-duty tasks for at least 2-3 hours; for gel, ensure complete curing.
- ✓Moisturize hands regularly, paying special attention to cuticles and surrounding skin.
- ✓Schedule touch-ups or professional reapplication every 2-3 weeks, depending on growth and wear.
- ✓Avoid picking or peeling your polish, as this can damage your natural nails.
Safe Removal
- 1.Gel polish: Gently file the top coat layer, then soak cotton pads in acetone and secure on nails with foil for 10-15 minutes.
- 2.Lacquer polish: Soak cotton pads in non-acetone or acetone remover and hold on nail for 10-20 seconds before wiping away.
- 3.Gently push off softened polish with an orange wood stick. Never force or scrape harshly. Moisturize nails and cuticles after removal.