Photo-real Salon Glitter Application Nails - Glitter Application nail art - featuring nail art, glitter, red - nail art inspiration and design ideas
Photo-real Salon Glitter Application Nails
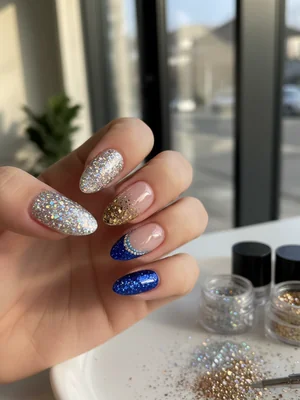
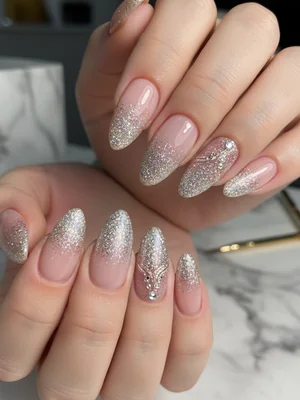
Dazzling Salon Glitter Application Nails: Photo-Real Finish
Achieve salon-worthy glitter nails at home with this stunning design. This glitter application technique offers a clean, photo-real finish that's sure to turn heads, providing maximum sparkle.
Dazzling Salon Glitter Application Nails: Photo-Real Finish
Achieve salon-worthy glitter nails at home with this stunning design. This glitter application technique offers a clean, photo-real finish that's sure to turn heads, providing maximum sparkle.
- Base Coat
- Gel Polish (clear or color of choice)
- Fine Glitter
- Top Coat (gel or regular)
- Nail Brush
- UV/LED Lamp (if using gel polish)
- Apply a thin layer of base coat and cure (if using gel).
- Apply a thin layer of gel polish (if desired) and cure. For optimal glitter coverage, choose a color that complements the glitter.
- Using a nail brush, apply a thin, even layer of glitter over the entire nail while the polish is still tacky or apply a thin layer of clear gel polish.
- Cure (if using gel) and remove excess glitter with a soft brush. Repeat for fuller coverage.
- Apply a generous layer of top coat to encapsulate the glitter and create a smooth, photo-real finish. Cure (if using gel).
- Cleanse the nail with alcohol to remove any sticky residue.
Colors in This Design
Expert Tip
For a smoother, photo-real finish, gently press the glitter into the gel polish before curing. This helps to embed the glitter and prevent it from feeling rough.
Similar Styles
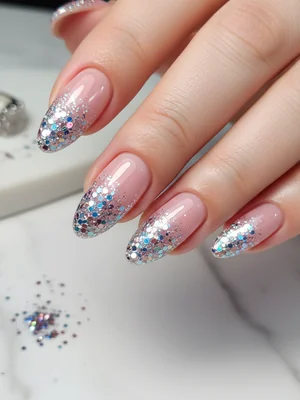
Beautiful Photo-real Salon Glitter Application Nails
Glitter Application inspired nail art with beautiful, photo-real finish and professional salon quality
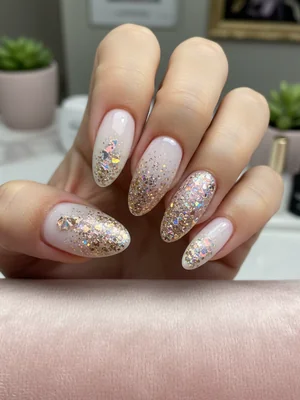
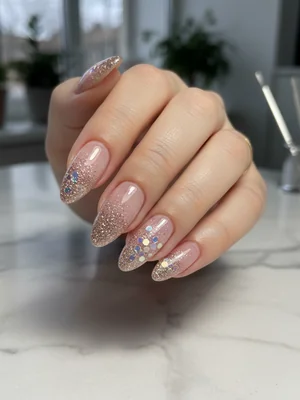
Gorgeous Photo-real Salon Glitter Application Nails
Glitter Application inspired nail art with gorgeous, photo-real finish and professional salon quality
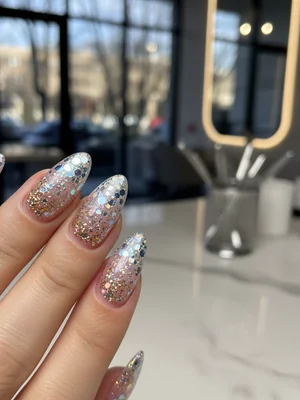
Stunning Photo-real Salon Glitter Application Nails
Glitter Application inspired nail art with stunning, photo-real finish and professional salon quality
Sophisticated Photo-real Salon Glitter Application Nails
Glitter Application inspired nail art with sophisticated, photo-real finish and professional salon quality
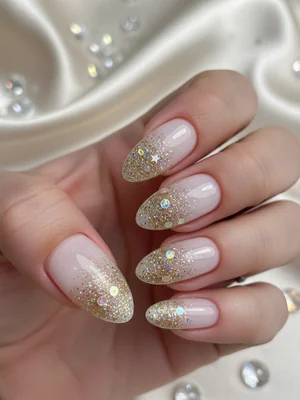
Photo-real Salon Glitter Application Nails
Glitter Application inspired nail art with elegant, photo-real finish and professional salon quality

Photo-real Salon Glitter Application Nails
Glitter Application inspired nail art with clean, photo-real finish and professional salon quality
Photo-real Salon Glitter Application Nails
Glitter Application inspired nail art with clean, photo-real finish and professional salon quality
Explore Similar Designs
Colors in this Design
Techniques Used
Nail Shapes
Frequently Asked Questions
What type of glitter is best for this design?
Fine glitter is recommended for achieving a smooth, photo-real finish. Chunky glitter can also be used for a more textured look.
How do I prevent the glitter from feeling rough?
Apply multiple layers of top coat to fully encapsulate the glitter. Also, pressing the glitter into the gel while it's still tacky helps.
Can I use regular nail polish instead of gel?
Yes, but gel polish is recommended for longer wear and durability. If using regular polish, allow each layer to dry completely before applying the next.
How long does this design last?
With proper application and care, gel glitter nails can last up to two weeks or more. Regular polish may last up to a week.
What if I don't have a UV/LED lamp?
You'll need to use regular nail polish and allow each layer to dry completely before applying the next. Drying time is crucial for preventing smudging.
Can I mix different glitter colors?
Absolutely! Experiment with mixing different glitter colors for a unique and personalized look.
Aftercare Tips
- ✓Moisturize hands and cuticles daily.
- ✓Avoid picking or peeling at the glitter.
- ✓File any rough edges gently to prevent snags.
Safe Removal
- 1.File off the top layer of topcoat to break the seal.
- 2.Soak cotton balls in acetone and place them on your nails, securing with foil for 10-15 minutes.