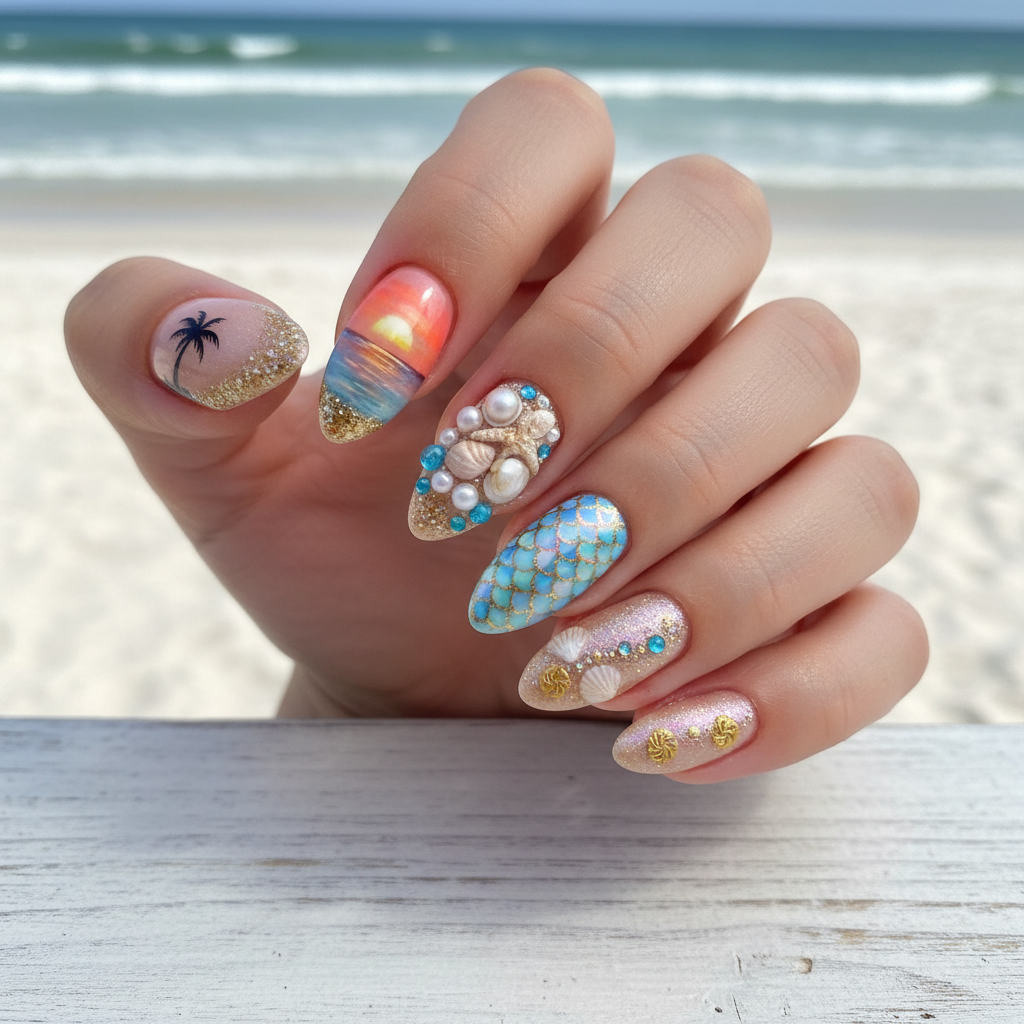
Stunning Photo-real Salon Beach Nails
Beach inspired nail art with stunning, photo-real finish and professional salon quality
Created: October 5, 2025 at 02:09 PM
More Beach Designs
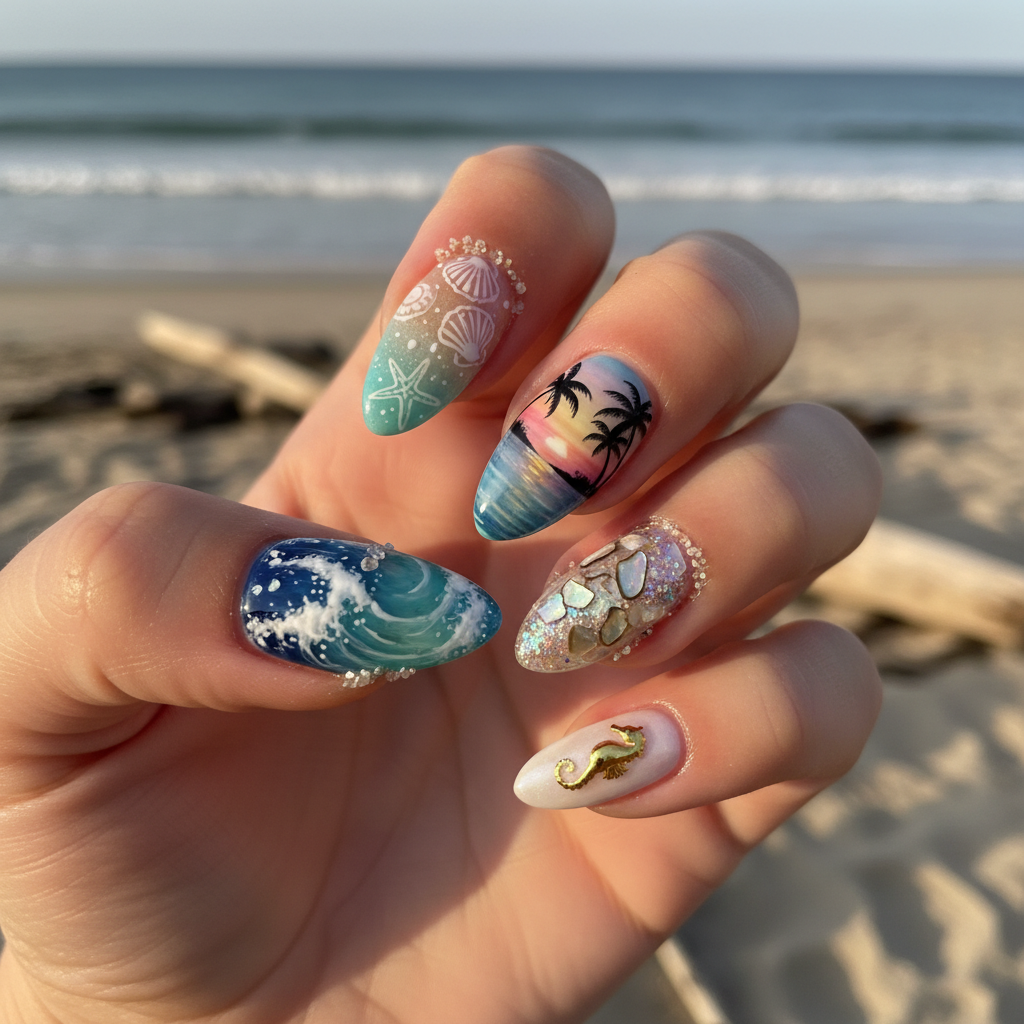
Sophisticated Photo-real Salon Beach Nails
Beach inspired nail art with sophisticated, photo-real finish and professional salon quality
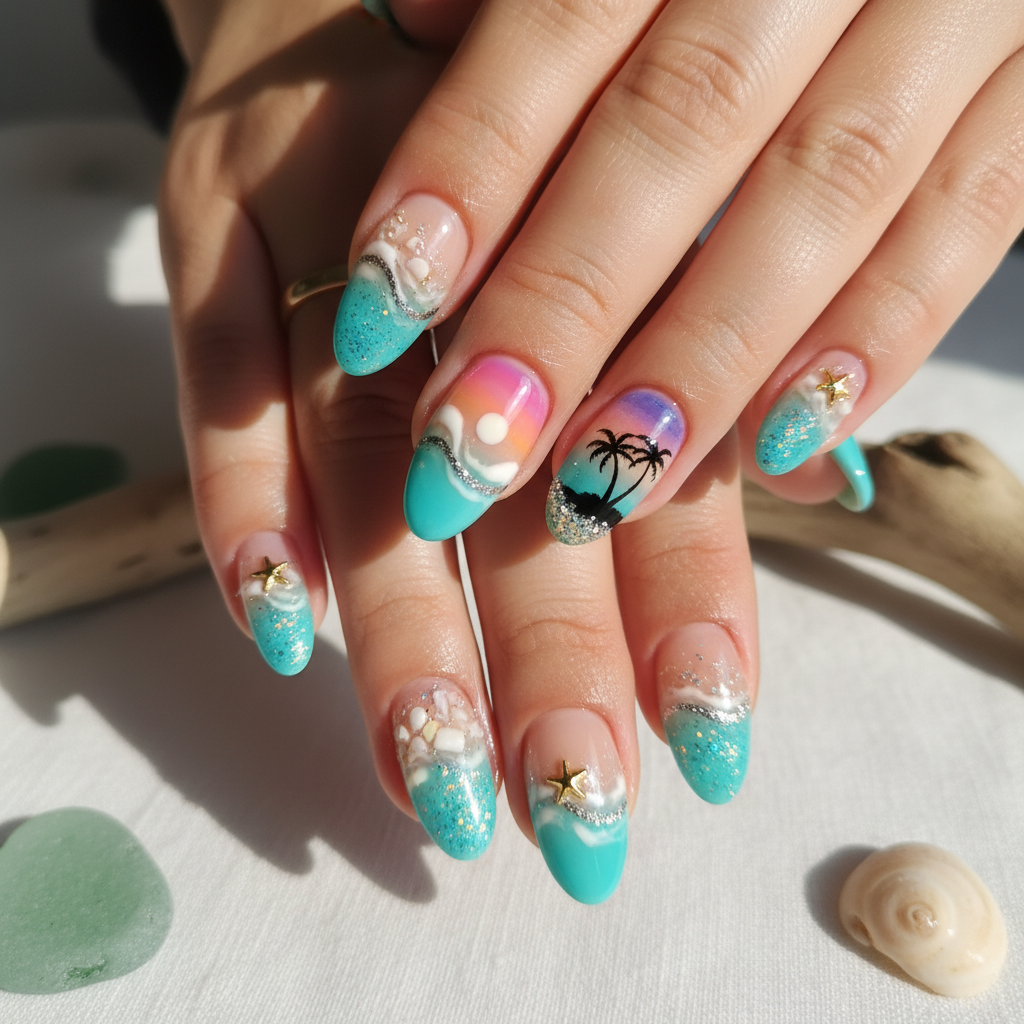
Photo-real Salon Beach Nails
Beach inspired nail art with elegant, photo-real finish and professional salon quality
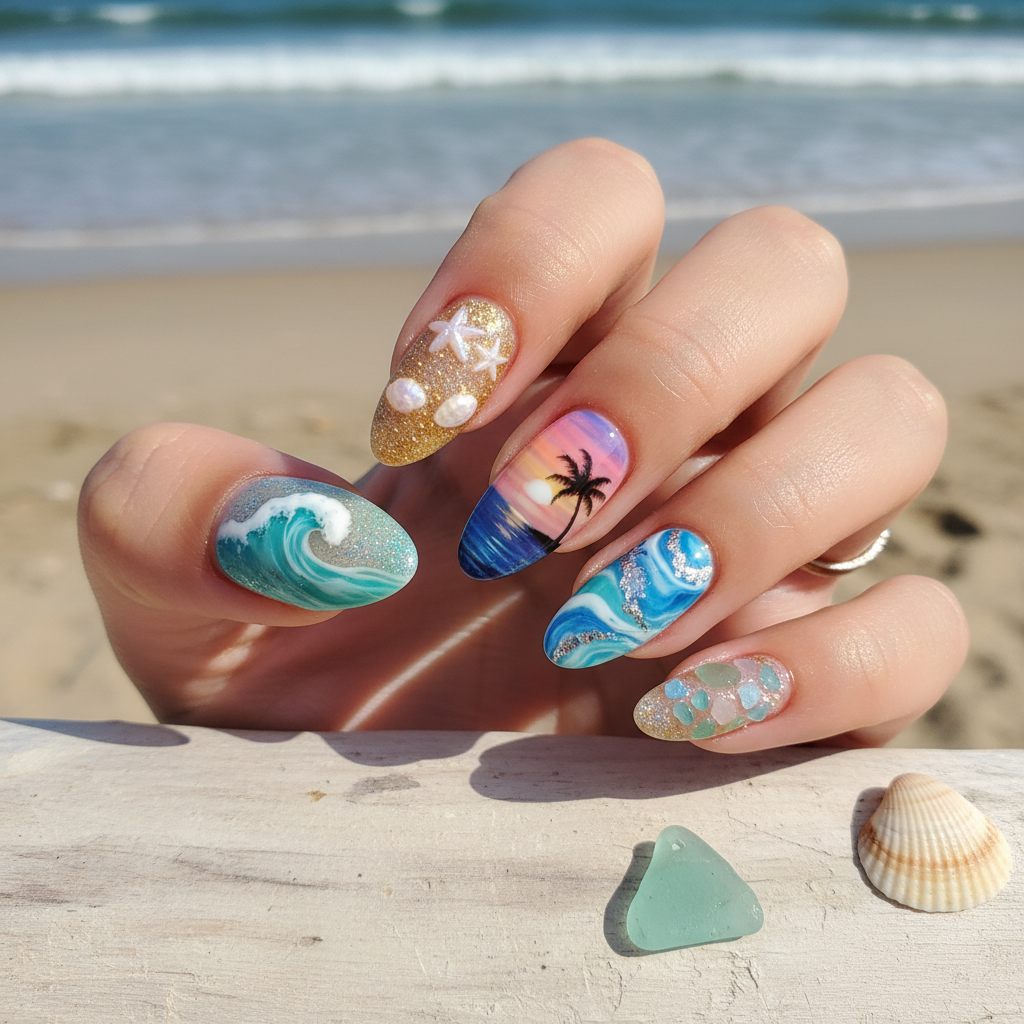
Photo-real Salon Beach Nails
Beach inspired nail art with clean, photo-real finish and professional salon quality
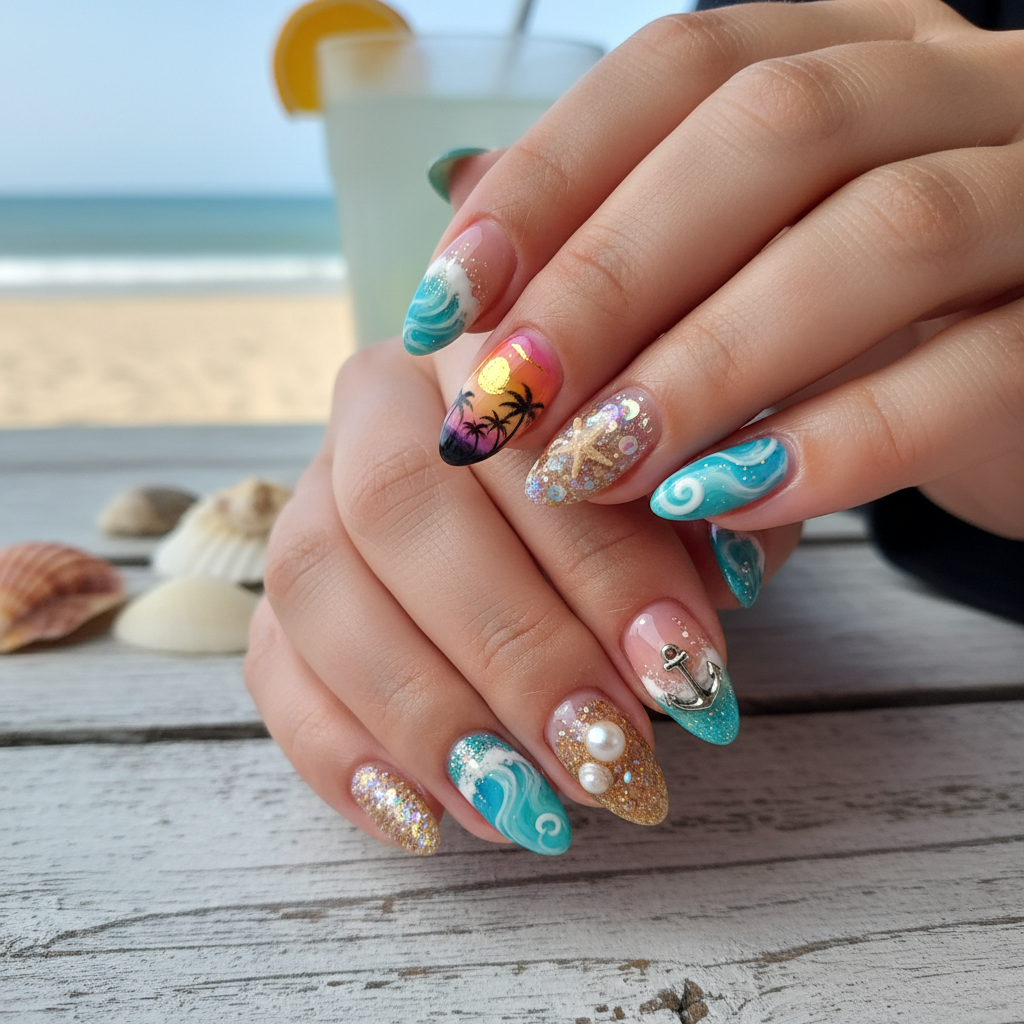
Photo-real Salon Beach Nails
Beach inspired nail art with clean, photo-real finish and professional salon quality
More Designs
Beach Bliss Nails: Photo-Real Salon Red Nail Art Design
Escape to the seaside with these stunning beach-inspired nails. Featuring a photo-realistic design, these nails bring the ocean's beauty right to your fingertips, offering a salon-quality look in a unique Red Nail Art.
Supplies You'll Need
- Gel polish (red, blue, sand, white, yellow)
- Fine detail brushes
- Airbrush system (optional)
- Top coat
- Base coat
- Nail art stickers or stencils (beach theme)
How To Recreate It
- Apply base coat and cure under UV/LED lamp.
- Apply a base color of light blue or sand color gel polish and cure.
- Using fine detail brushes and an airbrush (optional), create the beach scene with layers of color to achieve depth and realism.
- Incorporate red accents, such as a beach umbrella or a starfish. Cure each layer.
- Apply beach themed nail stickers or stencils if desired.
- Seal with a glossy top coat and cure for a long-lasting finish.
Expert Tip
Use thin layers of gel polish and cure thoroughly between each layer to prevent bubbling and ensure a smooth photo-realistic finish. Practice on a nail art practice wheel first to master the technique.
Try These Variations
- →Sunset Beach: Incorporate oranges and purples for a sunset effect.
- →Underwater Scene: Change the theme to an underwater scene with coral and fish.
- →Red Ombre Beach: Blend red polish into the beach scene for a vibrant ombre effect.
Aftercare Tips
- ✓Moisturize hands regularly.
- ✓Avoid picking or peeling the nail polish.
- ✓Use a gentle nail cleanser to maintain hygiene.
Safe Removal
- 1.File off the top coat to break the seal.
- 2.Soak nails in acetone for 10-15 minutes until the gel polish softens.
Quick Facts
Why It's Trending
Photo-real nail art is trending due to its intricate detail and unique personalized look, offering a tiny canvas for impressive artistry. It’s a showstopper!
Seasonal Styling
Ideal for spring and summer to match vacation vibes. Perfect for beach trips and pool parties.
Color Variations
Perfect For
Why People Love It
These stunning nails are frequently seen on Instagram and Pinterest, showcasing intricate designs and photo-realistic imagery. Nail art enthusiasts love the attention to detail and unique look.
Daily Maintenance
- 💅Apply cuticle oil daily to keep nails hydrated.
- 💅Wear gloves when doing household chores to protect the design.
- 💅Avoid harsh chemicals that can damage the polish.
- 💅Consider a gel overlay to extend wear time.
Common Issues & Fixes
- ⚠Bubbling in the gel polish.Apply thinner layers of polish and ensure proper curing time.
- ⚠Smudging of the design.Allow each layer to fully dry and cure before applying the next.
- ⚠Peeling of the polish.Ensure proper nail prep and use a quality base and top coat.
- ⚠Uneven color blendingUse a makeup sponge or fine brush for smooth transitions.
Design Inspiration
Inspired by the serene beauty of tropical beaches and the intricate detail of photo-realism art, this design combines vibrant colors with relaxing imagery. It's also inspired by popular salon-quality Nails Design trends.
Explore Similar Designs
Colors in this Design
Techniques Used
Perfect For
Nail Shapes
More Categories to Explore
Popular Colors
Popular Techniques
Perfect Occasions
FAQs
How long does this design last?
With proper application and care, this design can last up to 2-3 weeks.
Can I do this at home?
While possible, this design requires advanced nail art skills and may be best achieved by a professional.
What if I don't have an airbrush?
You can use fine detail brushes to achieve a similar effect, but it will require more time and patience.
Are gel polishes necessary?
Gel polishes are recommended for durability and a glossy finish, but regular nail polish can be used with appropriate drying time.
How do I protect the photo-realistic details?
Use a high-quality top coat and avoid harsh chemicals that can fade or damage the design.
What if I make a mistake?
Wipe the uncured gel with a lint-free wipe and start over before curing. Patience is key!