Stunning Photo-real Salon 3D Nails - 3D nail art - featuring nail art, red - nail art inspiration and design ideas
Stunning Photo-real Salon 3D Nails
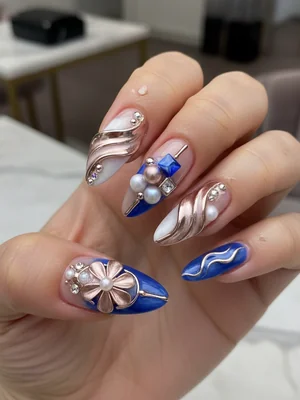
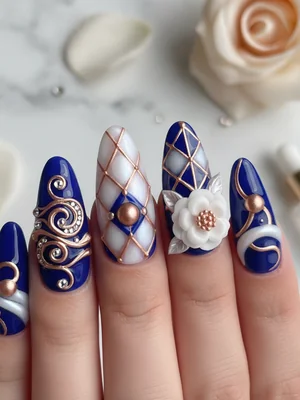
Photo-Real 3D Nail Art: Sculpted Salon Masterpiece
Experience the ultimate in bespoke nail artistry with our Photo-Real 3D Nails, where intricate sculpted elements come to life on your fingertips. This design transforms your manicure into a captivating, miniature work of art, boasting stunning depth and lifelike detail that exudes professional salon quality.
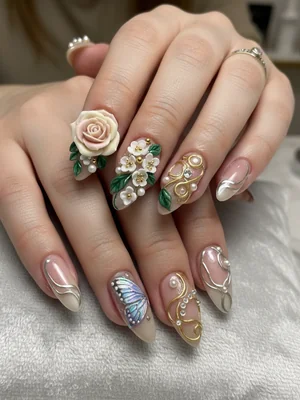
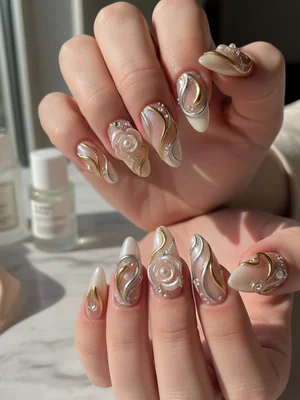
- 3D Sculpting Gel (or Acrylic Powder & Liquid)
- Fine Detail Brushes (000, Liner)
- LED/UV Curing Lamp
- Highly Pigmented Gel Polishes (various colors for shading)
- Non-Wipe Glossy Top Coat
- Sculpting Tools (dotting tools, spatulas)
- 1. Perform comprehensive nail prep (clean, file, buff) and apply a durable base coat, curing under LED/UV lamp.
- 2. Apply 2-3 coats of your chosen background gel polish, curing each layer to create a flawless canvas.
- 3. Using 3D sculpting gel and fine tools, meticulously sculpt the desired photo-real elements onto the nail surface, building up layers for depth and dimension. Cure after each significant addition to lock in the form.
- 4. Hand-paint intricate details, shadows, and highlights onto the sculpted elements using highly pigmented gel polishes and ultra-fine brushes to enhance the photo-realism and lifelike textures.
- 5. Carefully encapsulate the entire design with a high-shine, durable top coat, ensuring it flows around and protects the 3D elements without obscuring any intricate detail. Cure fully for optimal shine and longevity.
- 6. Cleanse with 99% isopropyl alcohol to remove any sticky residue and apply nourishing cuticle oil for a perfect finish.
Expert Tip
Achieving a truly photo-real finish requires meticulous attention to light and shadow; use very fine brushes and highly diluted gel paints to create subtle gradients, lifelike textures, and convincing depth on your sculpted forms.
Similar Styles
Beautiful Photo-real Salon 3D Nails
3D inspired nail art with beautiful, photo-real finish and professional salon quality
Gorgeous Photo-real Salon 3D Nails
3D inspired nail art with gorgeous, photo-real finish and professional salon quality
Beautiful Photo-real Salon 3D Nails
3D inspired nail art with beautiful, photo-real finish and professional salon quality
Stunning Photo-real Salon 3D Nails
3D inspired nail art with stunning, photo-real finish and professional salon quality

Gorgeous Photo-real Salon 3D Nails
3D inspired nail art with gorgeous, photo-real finish and professional salon quality
Beautiful Photo-real Salon 3D Nails
3D inspired nail art with beautiful, photo-real finish and professional salon quality
Sophisticated Photo-real Salon 3D Nails
3D inspired nail art with sophisticated, photo-real finish and professional salon quality
Stunning Photo-real Salon 3D Nails
3D inspired nail art with stunning, photo-real finish and professional salon quality

Gorgeous Photo-real Salon 3D Nails
3D inspired nail art with gorgeous, photo-real finish and professional salon quality
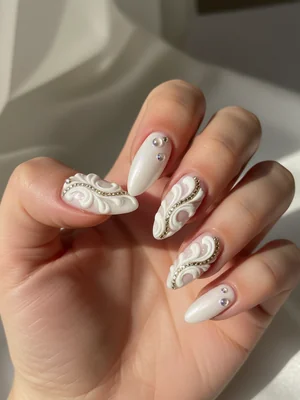
Photo-real Salon 3D Nails
3D inspired nail art with elegant, photo-real finish and professional salon quality
Sophisticated Photo-real Salon 3D Nails
3D inspired nail art with sophisticated, photo-real finish and professional salon quality
Photo-real Salon 3D Nails
3D inspired nail art with elegant, photo-real finish and professional salon quality
Explore Similar Designs
Colors in this Design
Perfect For
Nail Shapes
Frequently Asked Questions
How long do photo-real 3D nails typically last?
With proper care and professional application, these intricate designs can last 3-4 weeks, depending on your natural nail growth and daily activities.
Are the 3D elements uncomfortable or prone to snagging?
Professional application ensures the 3D elements are smoothly integrated and not overly bulky, maintaining comfort while being visually stunning. They are designed for wear, but mindful handling is always recommended.
Can this design be done on shorter nails?
While technically possible, medium to long nail lengths provide the ideal canvas for showcasing the intricate detail, depth, and full artistry required for truly photo-real 3D designs.
Is it difficult to remove photo-real 3D nail art?
Removal of such complex designs requires a professional approach, typically involving careful filing to reduce the bulk and then soaking to safely preserve the natural nail underneath. Avoid picking or forcing removal.
What's the main difference between 3D and traditional 2D nail art?
3D nail art involves elements that literally stand up from the nail surface, creating texture, depth, and dimension, unlike flat 2D designs which are painted entirely on the nail plane.
Can I customize the theme or object for my 3D design?
Absolutely! Photo-real 3D art is highly customizable, allowing for unique themes like specific floral arrangements, miniature animals, abstract formations, or even tiny landscapes, all rendered with lifelike precision.
Aftercare Tips
- ✓Keep nails moisturized with a high-quality cuticle oil to prevent dryness and maintain the integrity of the design.
- ✓Be gentle with your hands; avoid harsh chemicals or excessive pressure directly on the sculpted areas.
- ✓Protect your manicure from prolonged water exposure, which can weaken adhesion over time.
- ✓Avoid picking or biting at the 3D elements, as this can cause damage to both the art and your natural nail.
Safe Removal
- 1.1. Gently file down the glossy top coat and the majority of the 3D sculpted elements, being extremely careful not to file into the natural nail.
- 2.2. Soak cotton pads in pure acetone, place them directly on the nails, and wrap securely with foil for 15-20 minutes to allow the remaining product to soften.
- 3.3. Carefully push off the dissolved product with a wooden cuticle stick and gently buff any residual material, then hydrate thoroughly with cuticle oil.