Sophisticated Photo-real Salon Sponge Nails - Sponge nail art - featuring nail art, red - nail art inspiration and design ideas
Sophisticated Photo-real Salon Sponge Nails
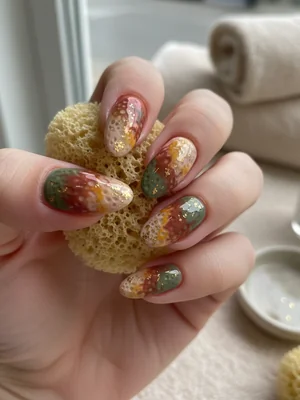
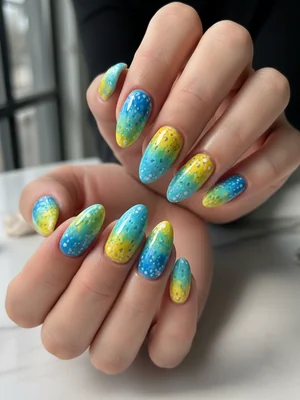
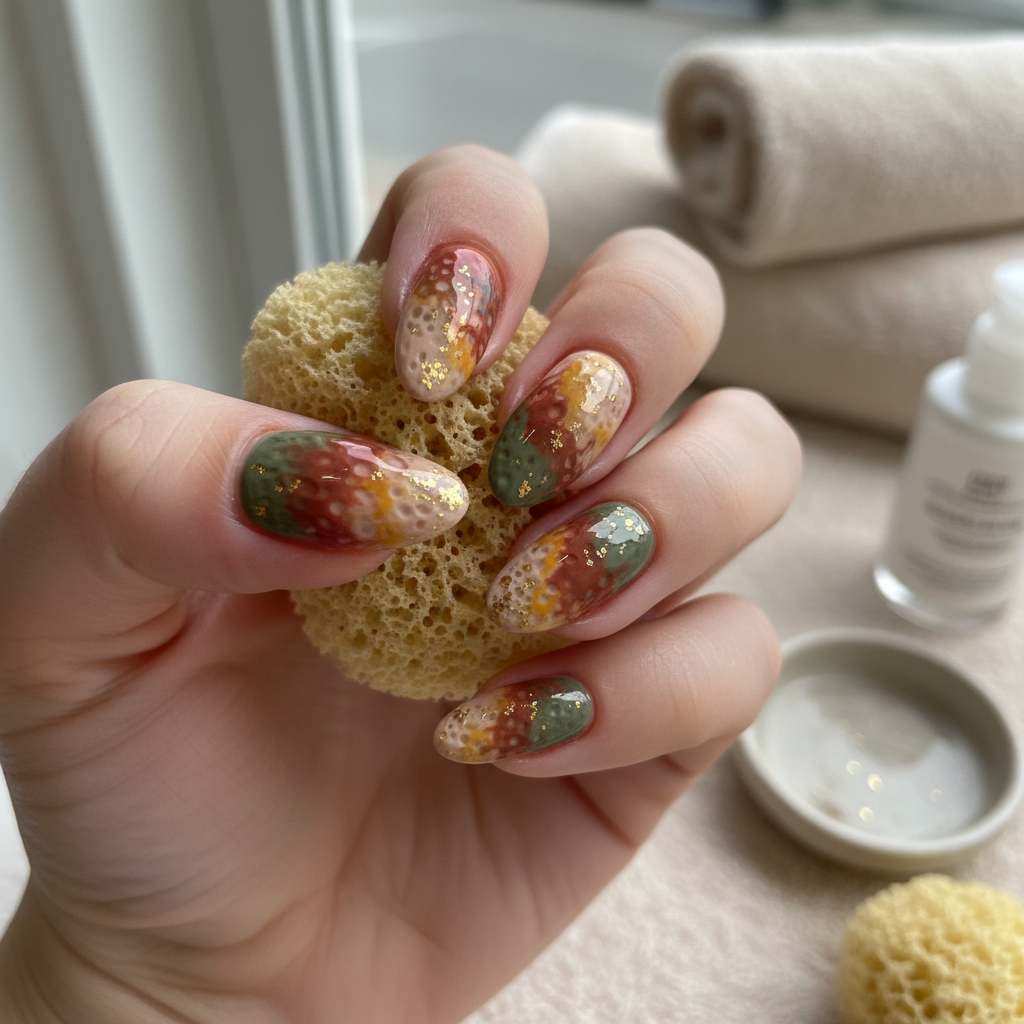
Sophisticated Photo-Real Sponge Nails: Salon Quality Design
Experience the refined elegance of our Sophisticated Photo-real Sponge Nails, a design that transcends basic texture. This artful technique masterfully blends colors for a seamless, almost photographic effect, delivering unparalleled professional salon quality right at your fingertips. It's an elevated take on the classic sponge method, perfect for a chic and memorable statement.
- Cosmetic wedge sponges or specialized nail art sponges
- Selection of high-quality gel polishes (3-4 coordinating shades)
- Base Coat & Non-Wipe Glossy Top Coat
- UV/LED Curing Lamp
- Lint-free wipes and Isopropyl Alcohol
- Cuticle oil
- After nail prep (shaping, buffing, cuticle care), apply a thin layer of base coat and cure under UV/LED lamp.
- Apply one or two thin coats of your lightest base color (e.g., cream or lightest grey) and cure each layer.
- Dab small amounts of your chosen coordinating gel polish shades onto a clean cosmetic sponge, ensuring colors are close but not fully mixed.
- Gently and repeatedly dab the sponge onto the nail, building up the 'photo-real' blended effect. Focus on creating seamless transitions and cure after each layer of sponging to lock in the blend.
- Once desired depth and blend are achieved, apply a generous layer of non-wipe glossy top coat, encapsulating the design for a smooth, professional finish, and cure thoroughly.
- Cleanse any residue if necessary, and nourish cuticles with a rich cuticle oil.
Expert Tip
Achieving the 'photo-real' quality is all about controlled layering and gentle dabbing. Load your sponge sparingly with multiple colors, then dab lightly and build intensity gradually. For the most sophisticated blend, ensure each layer is thin and cured properly before adding more to prevent a muddy or bumpy finish.
Similar Styles
Beautiful Photo-real Salon Sponge Nails
Sponge inspired nail art with beautiful, photo-real finish and professional salon quality

Beautiful Photo-real Salon Sponge Nails
Sponge inspired nail art with beautiful, photo-real finish and professional salon quality
Gorgeous Photo-real Salon Sponge Nails
Sponge inspired nail art with gorgeous, photo-real finish and professional salon quality
Gorgeous Photo-real Salon Sponge Nails
Sponge inspired nail art with gorgeous, photo-real finish and professional salon quality
Stunning Photo-real Salon Sponge Nails
Sponge inspired nail art with stunning, photo-real finish and professional salon quality
Stunning Photo-real Salon Sponge Nails
Sponge inspired nail art with stunning, photo-real finish and professional salon quality
Sophisticated Photo-real Salon Sponge Nails
Sponge inspired nail art with sophisticated, photo-real finish and professional salon quality
Photo-real Salon Sponge Nails
Sponge inspired nail art with elegant, photo-real finish and professional salon quality
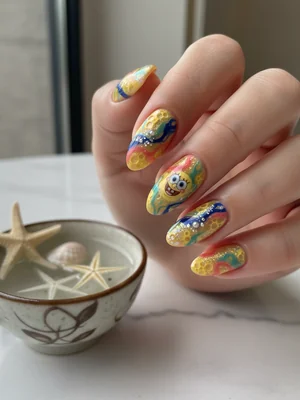
Photo-real Salon Sponge Nails
Sponge inspired nail art with elegant, photo-real finish and professional salon quality

Photo-real Salon Sponge Nails
Sponge inspired nail art with clean, photo-real finish and professional salon quality

Photo-real Salon Sponge Nails
Sponge inspired nail art with clean, photo-real finish and professional salon quality

Photo-real Salon Sponge Nails
Sponge inspired nail art with clean, photo-real finish and professional salon quality
Explore Similar Designs
Colors in this Design
Techniques Used
Perfect For
Nail Shapes
Frequently Asked Questions
How is the 'photo-real' effect achieved with a sponge?
The 'photo-real' effect is achieved through careful layering of multiple coordinating gel polish colors. By gently dabbing and building subtle gradients, we mimic the seamless transitions and depth seen in photography, rather than sharp, distinct lines.
Will my nails feel bumpy or rough with this sponge technique?
Absolutely not! With proper application of thin layers and a high-quality, smooth top coat, the finish will be impeccably smooth and professional, just like any other salon-quality gel manicure.
How long does this sophisticated sponge design typically last?
When applied professionally and maintained with proper aftercare, this gel design can last beautifully for 2-3 weeks, much like any standard gel manicure.
Can I choose different colors for my photo-real sponge nails?
Yes, absolutely! The beauty of this sophisticated technique is its adaptability. We can create stunning 'photo-real' effects using a wide range of elegant and coordinating color palettes to match your personal style or season.
Is this design suitable for shorter nails?
While longer nails provide a larger canvas for intricate blending, the sophisticated sponge effect can still be beautifully rendered on shorter nails. The key is to select a simpler blend of 2-3 colors for a refined, impactful look.
What makes this 'salon quality' compared to a home attempt?
Salon quality for this design comes from the precise application of thin, even layers, expert blending to achieve seamless gradients, thorough curing for durability, and the flawless, streak-free finish provided by professional-grade products and techniques. It's about precision and longevity.
Aftercare Tips
- ✓Immediately after your appointment, avoid prolonged exposure to hot water or steam for at least 24 hours.
- ✓Apply a high-quality cuticle oil twice daily to keep nails hydrated and flexible.
- ✓Gently cleanse under nails with a soft brush and mild soap; avoid aggressive scrubbing.
- ✓For maximum durability, consider applying a thin layer of clear top coat every few days, especially if you're very active.
Safe Removal
- 1.Gently file away the glossy top coat to break the seal, being careful not to file into your natural nail.
- 2.Soak cotton pads in 100% pure acetone, place them on each nail, and wrap tightly with foil for 10-15 minutes.
- 3.Carefully scrape off the softened gel with a wooden pusher. If gel doesn't come off easily, re-soak; never force or peel the product.