
Silver Snowflakes Red Berries Gold Glitter Christmas Nails - Christmas Nail Art nail art - featuring nail art, glitter, almond, red, white - nail art inspiration and design ideas
Silver Snowflakes Red Berries Gold Glitter Christmas Nails
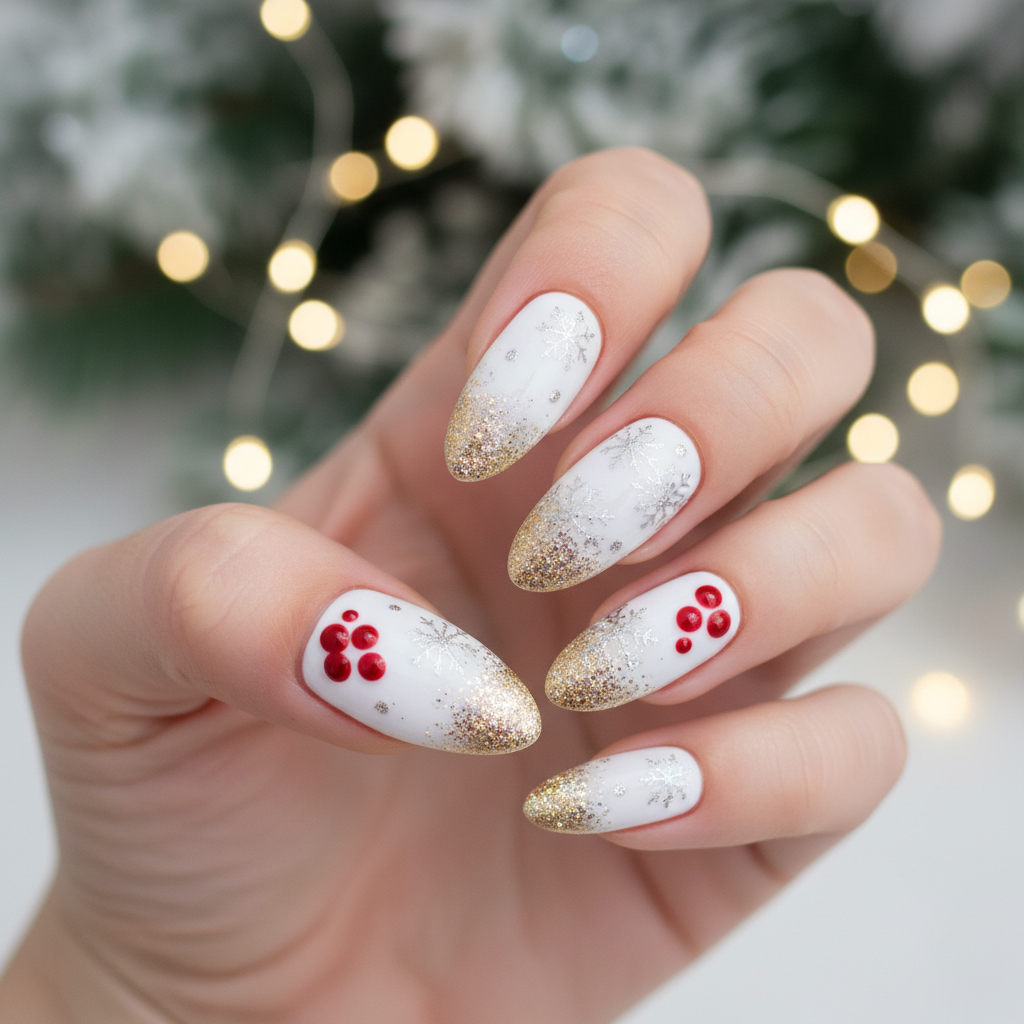
Festive Silver Snowflakes & Berries Christmas Nail Art
Embrace the holiday spirit with these stunning Christmas nails! Featuring delicate silver snowflakes, vibrant red berries, and sparkling gold glitter tips, this design is perfect for adding a touch of elegance to your Christmas celebrations.
Festive Silver Snowflakes & Berries Christmas Nail Art
Embrace the holiday spirit with these stunning Christmas nails! Featuring delicate silver snowflakes, vibrant red berries, and sparkling gold glitter tips, this design is perfect for adding a touch of elegance to your Christmas celebrations.
- Red nail polish
- White nail polish
- Silver glitter polish or acrylic paint
- Gold glitter top coat
- Fine detail brush
- Dotting tool
- Apply two coats of red nail polish as a base and let dry completely.
- Using white nail polish and a fine detail brush, create delicate snowflake designs on a few nails.
- With the fine detail brush, carefully paint small red berries around the snowflakes using red polish.
- Apply a thin layer of gold glitter top coat to the tips of all nails, creating a gradient effect.
- Allow all layers to dry completely, then apply a glossy top coat for added shine and protection.
- Clean up any smudges with a nail polish remover and a fine brush.
Colors in This Design
Expert Tip
Use a toothpick or dotting tool to create the red berries for precise placement and a uniform size. Apply thin layers of glitter to avoid a bulky finish.
Similar Styles

Gold Red Christmas Metallic Ornaments Sparkly Christmas Nails
Luxurious gold and red Christmas nails with metallic finish, tiny ornaments, and sparkly glitter

Cable Knit Red White Stripes Gold Christmas Nails
Cozy Christmas sweater nail art with cable knit patterns, red and white stripes, and gold details

Cable Knit Red White Stripes Gold Christmas Nails
Cozy Christmas sweater nail art with cable knit patterns, red and white stripes, and gold details

Silver Snowflakes Red Berries Gold Glitter Christmas Nails
White Christmas nail art with silver snowflakes, red berries, and gold glitter tips on almond-shaped nails

Gold Red Christmas Metallic Ornaments Sparkly Christmas Nails
Luxurious gold and red Christmas nails with metallic finish, tiny ornaments, and sparkly glitter

French Christmas Nude Red Gold Lights Christmas Nails
Elegant Christmas nail design with nude base, red French tips, and tiny gold Christmas lights

Green Gradient Gold Star Ring Finger Christmas Nails
Christmas tree nail art with green gradient, gold star on ring finger, and tiny presents on thumb

Cable Knit Red White Stripes Gold Christmas Nails
Cozy Christmas sweater nail art with cable knit patterns, red and white stripes, and gold details

Red Gold Glitter Snowflake Christmas Tree Christmas Nails
Elegant Christmas nail art with red and gold glitter, snowflake patterns, and tiny Christmas tree details on a white base
Explore Similar Designs
Techniques Used
Nail Shapes
Frequently Asked Questions
Can I use nail stickers instead of hand-painting the snowflakes?
Yes, snowflake nail stickers or decals are a great alternative for those who are not comfortable with hand-painting.
What type of red nail polish is best for this design?
A classic, creamy red nail polish works best. Avoid sheer or glittery reds for the base.
How do I make the gold glitter tips look even?
Apply the glitter polish with a sponge for a more even distribution and a smoother finish.
Can I use gel polish for this design?
Yes, you can use gel polish. Remember to cure each layer under a UV/LED lamp.
How long will this nail art last?
With proper application and maintenance, this nail art can last up to two weeks.
Is this design suitable for short nails?
While almond-shaped nails are ideal, this design can be adapted for shorter nails by adjusting the size of the snowflakes and berries.
Aftercare Tips
- ✓Moisturize your hands and cuticles regularly.
- ✓Avoid using your nails as tools.
- ✓Wear gloves when doing household chores.
Safe Removal
- 1.Soak cotton balls in nail polish remover and place them on each nail.
- 2.Wrap each nail in foil and let sit for 10-15 minutes.
- 3.Remove the foil and cotton balls, gently scraping off any remaining polish.