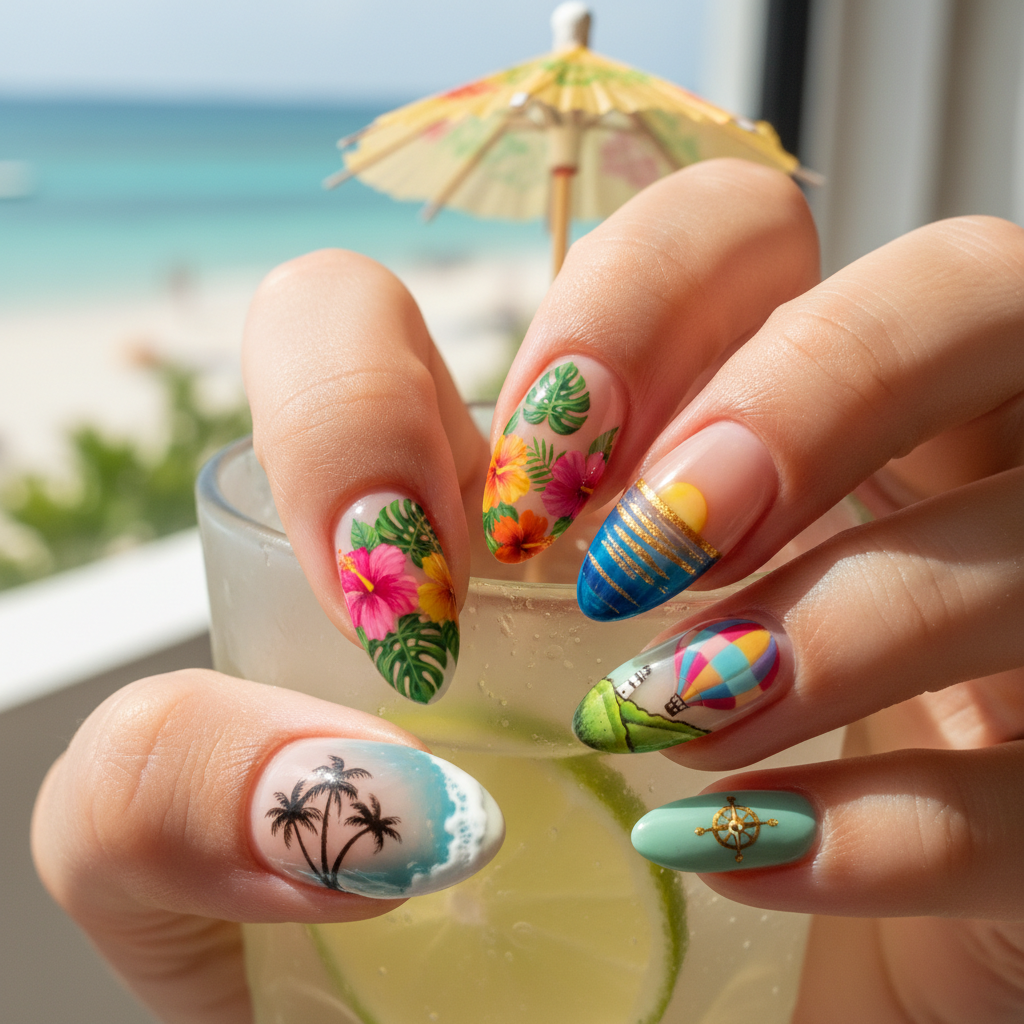
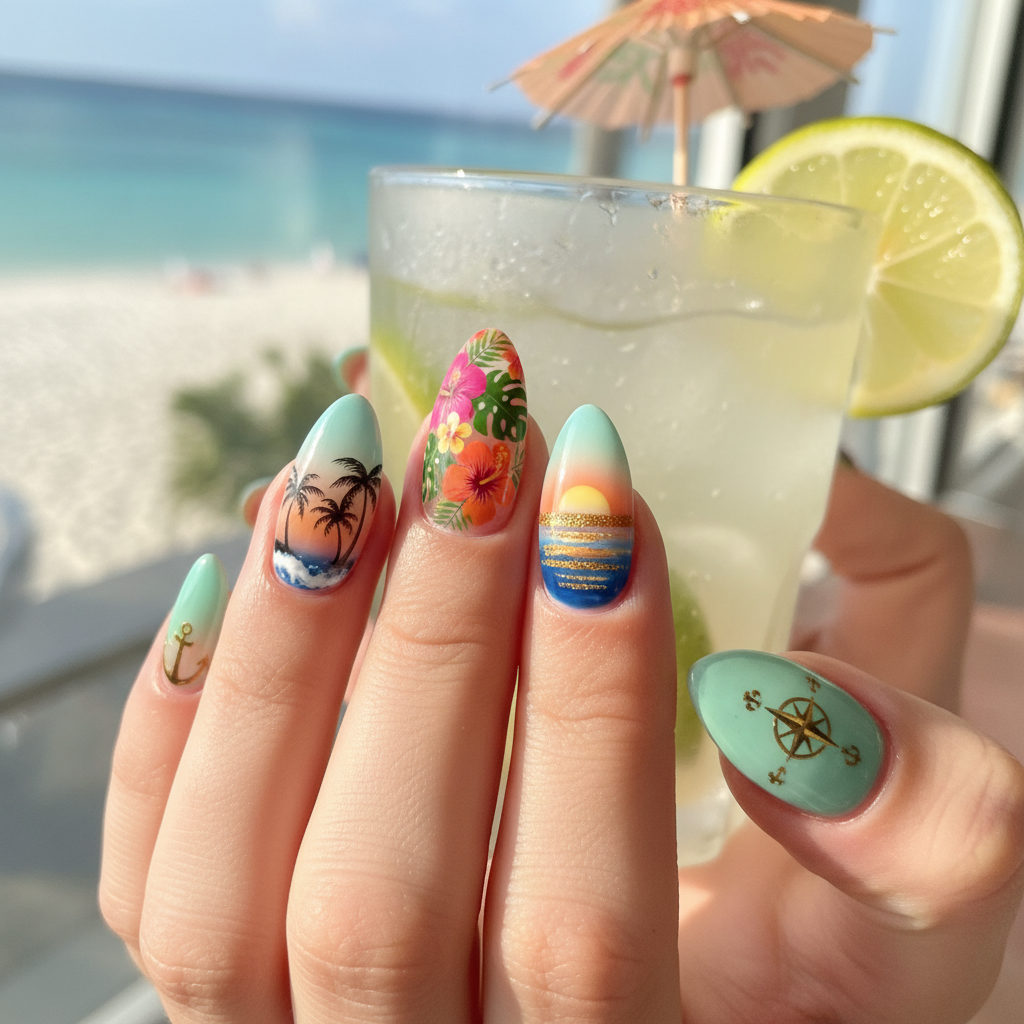
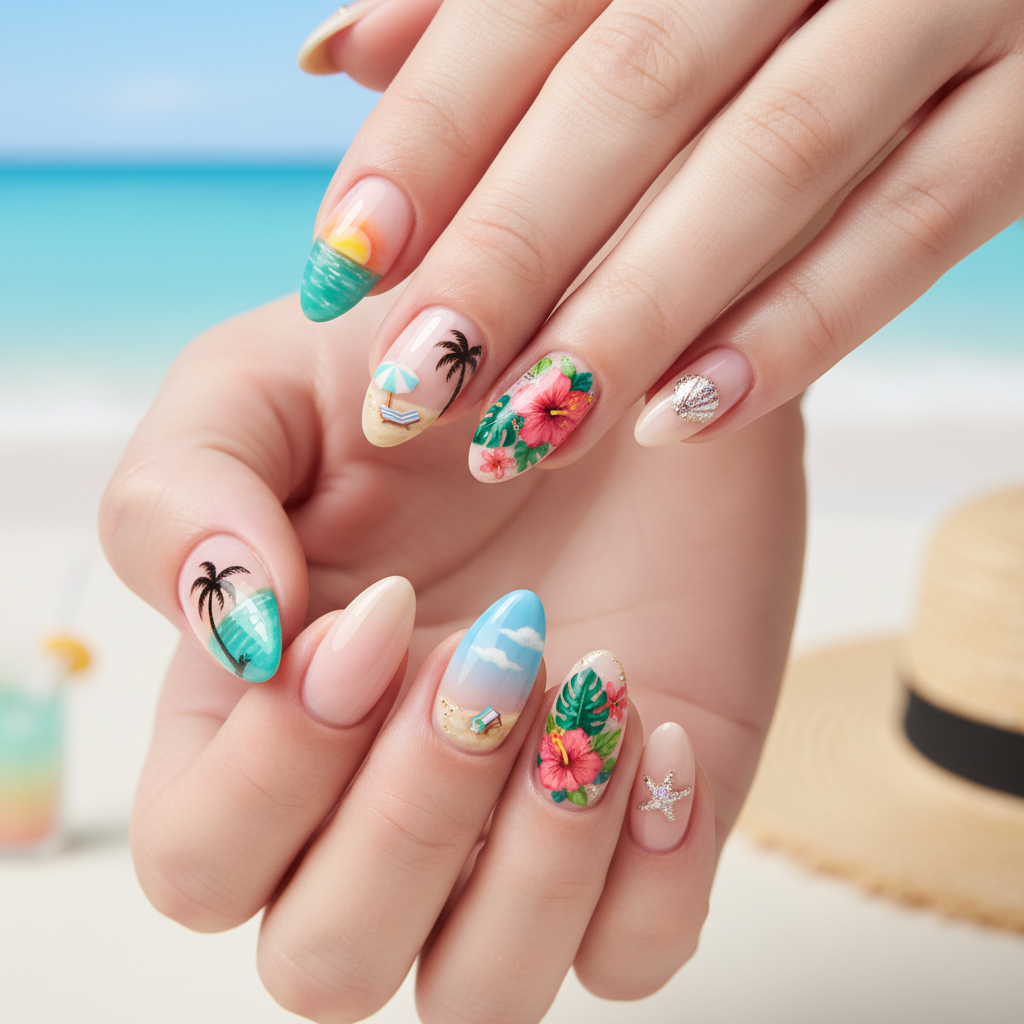
Photo-real Salon Vacation Nails
Vacation inspired nail art with clean, photo-real finish and professional salon quality
Created: October 5, 2025 at 12:15 PM
More Vacation Designs
More Designs
Photo-Real Vacation Nails: Salon Quality Design
Escape to paradise with these photo-real vacation nails. This design brings a professional salon finish to your fingertips, capturing the essence of your dream getaway with stunning clarity and detail.
Supplies You'll Need
- Gel polish in various vacation-themed colors
- Fine-tipped nail art brushes
- Airbrush system (optional)
- Photo-real nail stickers or decals
- Top coat (glossy)
- Detailing tools (dotting tool, toothpick)
How To Recreate It
- Apply a base coat and cure under a UV/LED lamp.
- Apply a base color, such as sky blue, and cure.
- Using fine-tipped brushes or an airbrush, create realistic scenery like palm trees, beaches, or ocean waves.
- Alternatively, apply photo-real nail stickers and smooth them carefully.
- Seal the design with a glossy top coat and cure.
- Clean up any excess polish around the edges.
Expert Tip
For crisp, clean lines, use thin layers of gel polish and cure each layer thoroughly. Practice your hand-painting skills on a nail art practice sheet first to perfect your technique.
Try These Variations
- →Sunset Ombre Nails: Blend orange, pink, and yellow for a stunning sunset effect.
- →Underwater Scene Nails: Create a miniature underwater world with fish, coral, and bubbles.
- →Cityscape Silhouette Nails: Paint a black silhouette of a famous city skyline against a colorful background.
Aftercare Tips
- ✓Moisturize hands regularly to prevent dryness.
- ✓Use a gentle nail brush to clean under the nails.
- ✓Avoid using your nails as tools.
Safe Removal
- 1.Gently file off the top coat to break the seal.
- 2.Soak cotton pads in acetone and apply to each nail, securing with foil.
- 3.After 10-15 minutes, gently remove the softened gel polish with a cuticle pusher.
Quick Facts
Why It's Trending
Photo-realism in nail art is surging in popularity, with people wanting to express their personal style and travel dreams through unique, eye-catching designs.
Seasonal Styling
Ideal for summer getaways, spring breaks, or even winter escapes to warmer climates. Also suitable for travel-themed events any time of year.
Color Variations
Perfect For
Why People Love It
These photo-real vacation nails are all over Instagram and TikTok, with users showing off their intricate and creative travel-inspired designs.
Daily Maintenance
- 💅Avoid harsh chemicals and prolonged water exposure.
- 💅Wear gloves when doing chores to protect the nail art.
- 💅Apply cuticle oil daily to keep nails hydrated.
- 💅Avoid picking or peeling at the design.
Common Issues & Fixes
- ⚠Bubbles in the gel polish.Apply thin layers of gel polish and avoid shaking the bottle vigorously. Tap the bottle gently on a flat surface to release air bubbles.
- ⚠Smudging of the photo-real design.Allow each layer of paint to dry completely before adding details. Seal the design with a high-quality top coat.
- ⚠Lifting of nail stickers.Ensure the nail surface is clean and dry before applying stickers. Press the sticker firmly onto the nail and seal with a top coat.
- ⚠Uneven airbrush application.Practice your airbrushing technique on a test surface. Adjust the air pressure and distance to achieve a smooth, even application.
Design Inspiration
Inspired by the desire to capture the beauty and excitement of travel on a small canvas, these nails evoke a sense of wanderlust and adventure.
Explore Similar Designs
Colors in this Design
Techniques Used
Perfect For
Nail Shapes
More Categories to Explore
Popular Colors
Popular Techniques
Perfect Occasions
FAQs
How long will this design last?
With proper application and care, this design can last up to 2-3 weeks.
Can I use regular nail polish instead of gel polish?
While you can, gel polish provides a more durable and long-lasting finish, essential for intricate designs. Regular polish might chip more easily.
Are photo-real nail stickers easy to apply?
Some practice may be needed, but generally, they are easier than hand-painting. Ensure the nail surface is smooth and clean before application.
What if I don't have an airbrush system?
You can achieve similar results with fine-tipped brushes and a steady hand. Alternatively, focus on detailed sticker application.
Can I customize the design with my own vacation photos?
Yes! You can find custom nail stickers or decals online that allow you to incorporate personal photos into your design.
Will this design damage my natural nails?
If applied and removed correctly, gel polish should not cause significant damage. Always moisturize your nails and cuticles after removal.