Photo-real Salon Sponge Nails - Sponge nail art - featuring nail art, elegant, red - nail art inspiration and design ideas
Photo-real Salon Sponge Nails
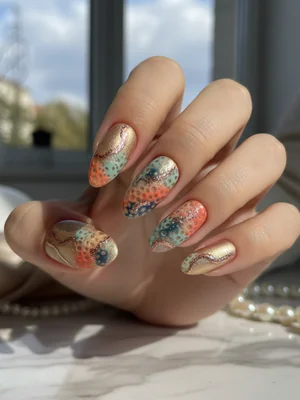
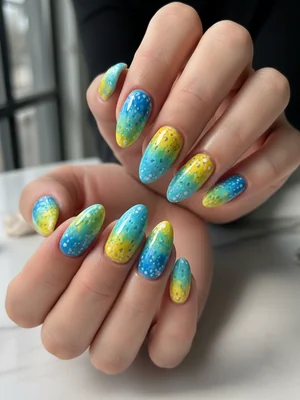
Elegant Salon Sponge Nails: Photo-Real Gradient Artistry
Experience the sophisticated allure of our Salon Sponge Nails, featuring a seamless, photo-real gradient achieved with a unique sponging technique. This design offers an elegant blend of colors, creating a soft, ethereal transition that exudes professional salon quality. It's a chic way to add depth and artistic refinement to your fingertips.
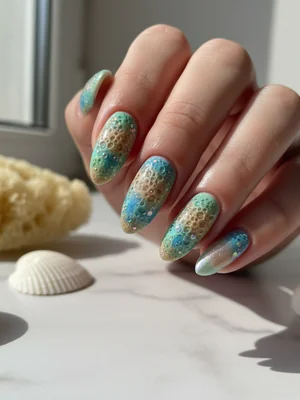
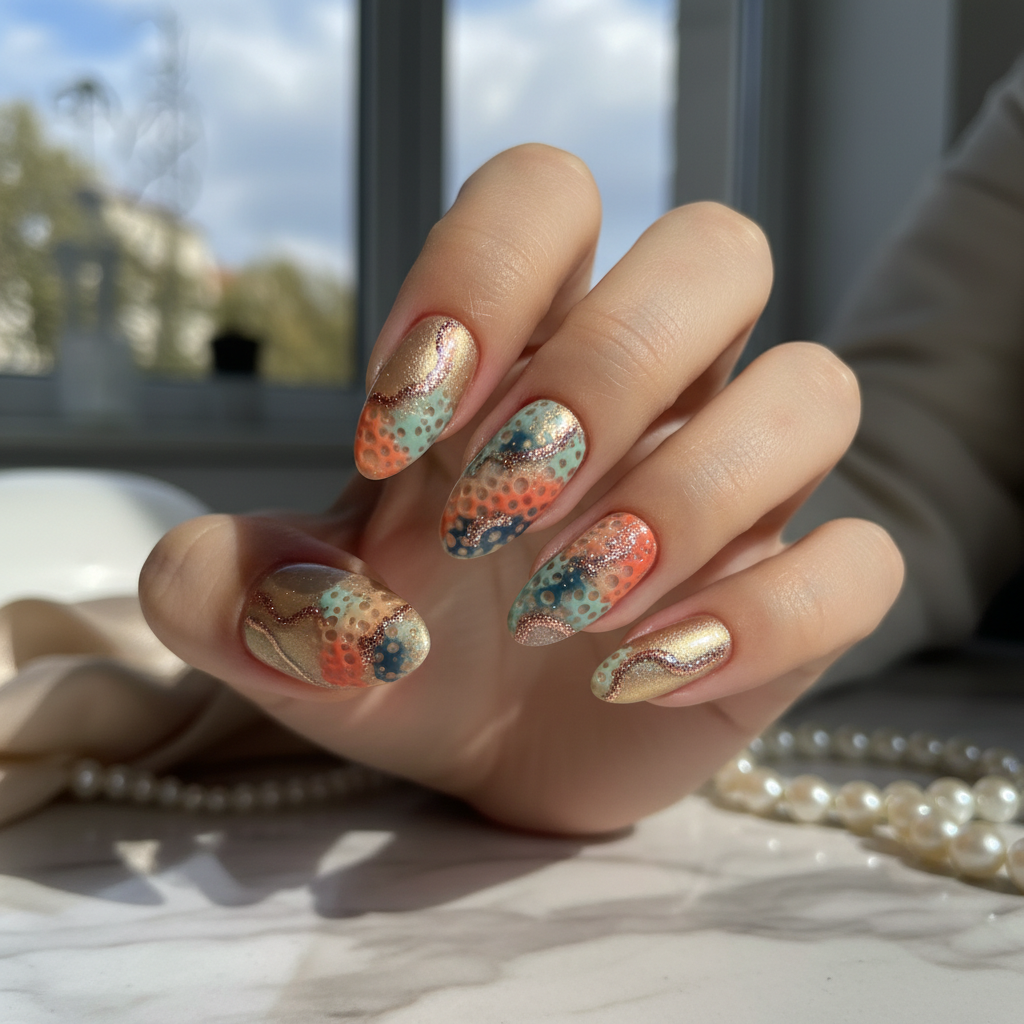
- Gel polishes (2-3 blending colors)
- Nail art sponge (fine-pore makeup wedge)
- Gel base coat
- No-wipe gel top coat
- LED/UV nail lamp
- Lint-free wipes & Isopropyl alcohol
- Prepare nails by filing, buffing, and cuticle care. Apply a thin layer of gel base coat and cure under LED/UV lamp.
- Apply your lightest chosen gel polish color as a base. Cure. Apply a second thin layer if needed and cure again.
- Dab small amounts of your blending colors onto a palette. Using a fresh piece of the nail sponge, lightly dab and blend the colors onto the nail, creating a soft gradient effect. Cure.
- Repeat the sponging step 2-3 more times with thin layers, building up the color opacity and smoothing the blend for a truly photo-real, seamless transition. Cure each layer.
- Apply a generous layer of no-wipe gel top coat, ensuring full coverage and a smooth surface. Cure thoroughly for a high-gloss finish.
Expert Tip
For that truly photo-real effect and professional salon quality, build your sponge layers thinly and allow each to cure slightly before adding the next. Use a clean, fresh edge of the sponge for each blending pass to prevent muddiness.
Similar Styles
Beautiful Photo-real Salon Sponge Nails
Sponge inspired nail art with beautiful, photo-real finish and professional salon quality

Beautiful Photo-real Salon Sponge Nails
Sponge inspired nail art with beautiful, photo-real finish and professional salon quality
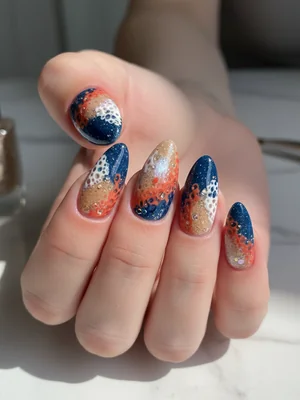
Gorgeous Photo-real Salon Sponge Nails
Sponge inspired nail art with gorgeous, photo-real finish and professional salon quality
Gorgeous Photo-real Salon Sponge Nails
Sponge inspired nail art with gorgeous, photo-real finish and professional salon quality
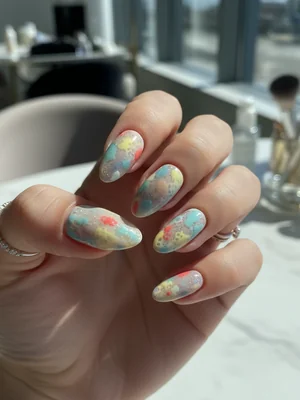
Stunning Photo-real Salon Sponge Nails
Sponge inspired nail art with stunning, photo-real finish and professional salon quality
Stunning Photo-real Salon Sponge Nails
Sponge inspired nail art with stunning, photo-real finish and professional salon quality
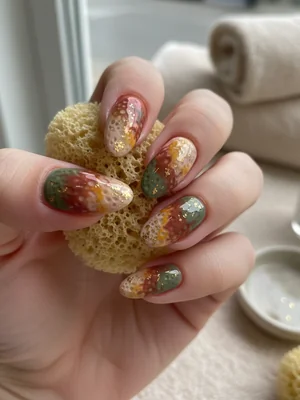
Sophisticated Photo-real Salon Sponge Nails
Sponge inspired nail art with sophisticated, photo-real finish and professional salon quality
Sophisticated Photo-real Salon Sponge Nails
Sponge inspired nail art with sophisticated, photo-real finish and professional salon quality
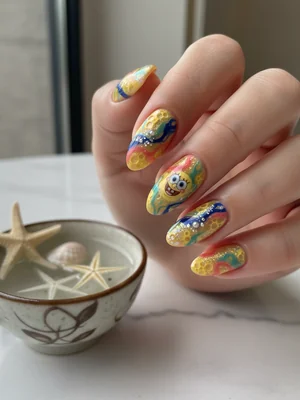
Photo-real Salon Sponge Nails
Sponge inspired nail art with elegant, photo-real finish and professional salon quality

Photo-real Salon Sponge Nails
Sponge inspired nail art with clean, photo-real finish and professional salon quality

Photo-real Salon Sponge Nails
Sponge inspired nail art with clean, photo-real finish and professional salon quality

Photo-real Salon Sponge Nails
Sponge inspired nail art with clean, photo-real finish and professional salon quality
Explore Similar Designs
Colors in this Design
Techniques Used
Perfect For
Nail Shapes
Frequently Asked Questions
How long does this Salon Sponge Nails design typically last?
With proper application and aftercare, this gel-based design can last beautifully for 2-3 weeks without chipping.
Can I achieve this photo-real sponged look at home?
While possible with practice and the right tools, achieving the professional salon quality and seamless photo-real blend requires advanced skill and patience.
What makes this design 'photo-real'?
The 'photo-real' aspect comes from the meticulous, multi-layered blending technique with a sponge, creating incredibly smooth and subtle color transitions that mimic the depth and detail of a photograph.
Is the sponging technique damaging to my natural nails?
No, when applied and removed correctly by a professional using quality gel products, the sponging technique itself is not damaging to your natural nails.
Can I use regular nail polish for this elegant sponge design?
While you can attempt it, gel polishes are highly recommended for the best photo-real effect, better blendability, and significantly longer durability.
Can I customize the colors for my Salon Sponge Nails?
Absolutely! This design is highly customizable. You can choose any combination of 2-4 colors that blend harmoniously to create your unique elegant gradient.
Aftercare Tips
- ✓Keep nails completely dry for at least an hour after application to allow for full setting.
- ✓Avoid picking or peeling at the polish, which can damage your natural nails.
- ✓Regularly moisturize your hands and cuticles to maintain healthy nails.
- ✓Schedule your next appointment for professional removal and reapplication within 2-3 weeks.
Safe Removal
- 1.Gently file off the top coat to break the seal of the gel polish.
- 2.Soak nails in acetone for 10-15 minutes, ensuring cotton pads are fully saturated and wrapped.
- 3.Gently scrape or push off the softened gel polish with an orange wood stick or metal pusher, being careful not to damage the natural nail.