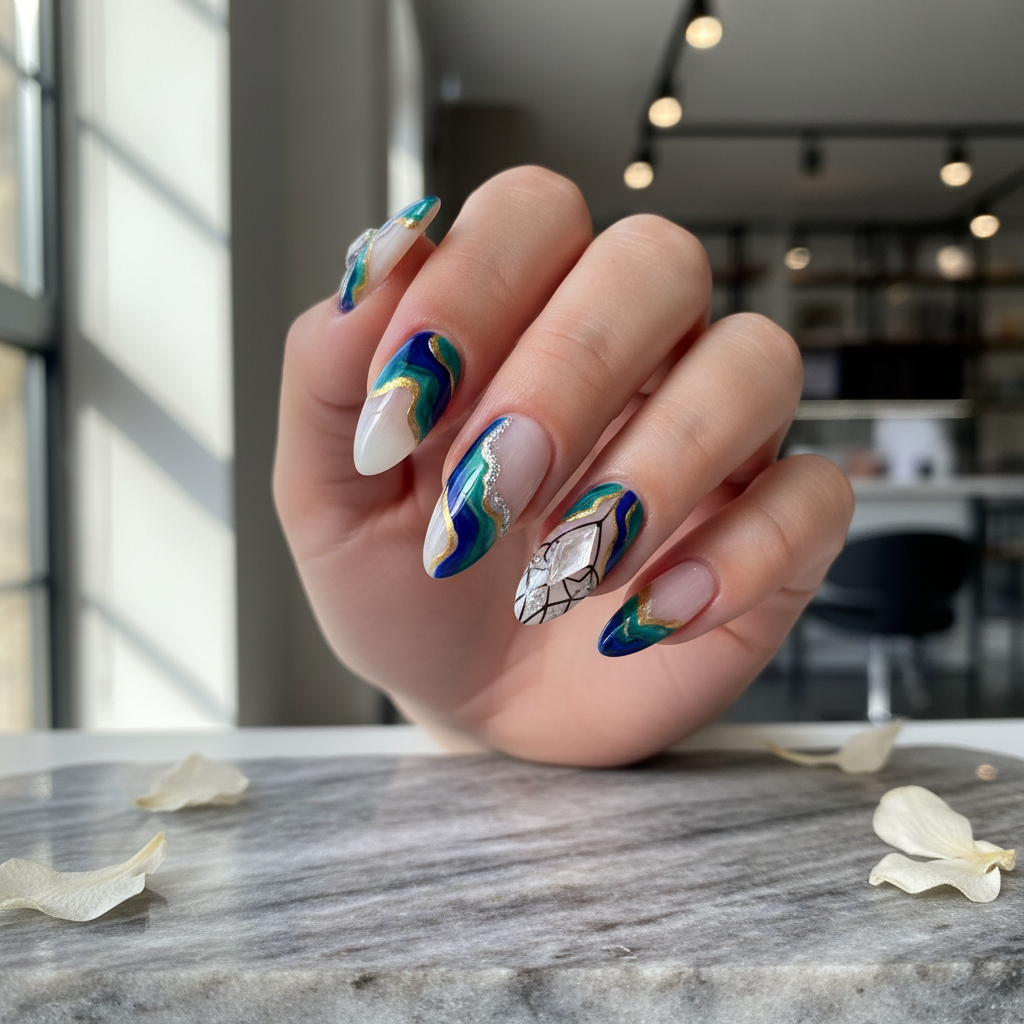
Photo-real Salon Extended Nails
Extended inspired nail art with clean, photo-real finish and professional salon quality
Created: October 5, 2025 at 01:25 PM
More Extended Designs
More Designs
Photo-Real Salon Extended Nails: Pro-Level Nail Art
Achieve salon-quality extended nails with this photo-real design. These nails boast a flawless finish, emphasizing clean lines and professional techniques for a stunning, long-lasting look.
Supplies You'll Need
- Acrylic or Gel Nail Extension Kit
- Nail Forms or Tips
- Professional Nail File and Buffer
- High-Quality Nail Primer
- Nude or Pastel Gel Polish
- High-Shine Gel Top Coat
How To Recreate It
- Prepare the natural nails by cleaning, filing, and buffing.
- Apply nail forms or tips and sculpt the acrylic or gel extension to the desired length and shape.
- File and shape the extensions to create a smooth, even surface.
- Apply a thin layer of nail primer followed by 2-3 coats of nude or pastel gel polish, curing between each layer.
- Finish with a high-shine gel top coat and cure for a glossy, photo-real finish.
- Cleanse the nails to remove any sticky residue.
Expert Tip
To achieve a truly photo-real finish, focus on flawless application and precise filing. Ensure the extensions are perfectly smooth and the gel polish is applied evenly without any streaks or bubbles.
Try These Variations
- →Ombre Extension: Blend different shades of nude or pastel colors for a gradient effect.
- →French Extension: Classic French manicure with a crisp white tip on the extended nail.
- →Subtle Glitter Accent: Add a touch of fine glitter to the base or tip for added sparkle.
Aftercare Tips
- ✓Wear gloves when doing household chores to protect the nails from harsh chemicals.
- ✓Avoid prolonged exposure to water to prevent lifting of the extensions.
- ✓Use a gentle nail brush to clean under the nails.
Safe Removal
- 1.File down the top layer of the gel top coat.
- 2.Soak the nails in acetone for 15-20 minutes or until the acrylic/gel softens.
- 3.Gently remove the softened acrylic/gel with a cuticle pusher or orangewood stick.
Quick Facts
Why It's Trending
Extended nails are back in style, and this design delivers a professional, photo-real look that's highly sought after on social media for its impeccable finish and salon-worthy results.
Seasonal Styling
Perfect for any season, but especially stunning for spring and summer events where you want a polished, photo-ready look. Adjust color palettes for fall and winter to complement seasonal wardrobes.
Color Variations
Perfect For
Why People Love It
Nail art influencers and celebrities are showcasing this refined extended nail look, making it a popular choice for those seeking a flawless, photo-ready appearance.
Daily Maintenance
- 💅Apply cuticle oil daily to keep the skin around the nails hydrated.
- 💅Avoid using your nails as tools to prevent chipping or breakage.
- 💅Schedule regular salon visits every 2-3 weeks for fills and maintenance.
Common Issues & Fixes
- ⚠Lifting of the extensionsEnsure proper nail preparation and use a high-quality primer. Avoid prolonged water exposure.
- ⚠Uneven application of gel polishApply thin, even coats of gel polish, curing each layer properly. Use a fine brush to correct any imperfections.
- ⚠Chipping or breakageAvoid using nails as tools and apply a strengthener. Use a durable gel or acrylic formula.
Design Inspiration
Inspired by the desire to create a flawless, salon-quality nail extension that looks effortlessly chic and camera-ready.
Explore Similar Designs
Colors in this Design
Techniques Used
Perfect For
Nail Shapes
More Categories to Explore
Popular Colors
Popular Techniques
Perfect Occasions
FAQs
How long do extended nails typically last?
With proper care, extended nails can last up to 2-3 weeks before requiring a fill or maintenance.
Can I achieve this look at home?
While possible, this design is best achieved by a professional nail technician due to the advanced techniques involved.
What is the best way to prevent lifting?
Thorough nail preparation, high-quality primer, and avoiding prolonged water exposure are key to preventing lifting.
Are extended nails damaging to my natural nails?
When applied and removed properly by a professional, damage can be minimized. Proper aftercare and hydration are essential.
How often should I get a fill for extended nails?
It is recommended to get a fill every 2-3 weeks to maintain the integrity of the extensions and prevent lifting or breakage.
What shape is best for extended nails?
Almond and square are popular choices, but the best shape depends on your personal preference and nail bed shape. Talk to your nail tech for the best recommendation.