Beautiful Photo-real Salon Sponging Nails - Sponging nail art - featuring nail art, red - nail art inspiration and design ideas
Beautiful Photo-real Salon Sponging Nails
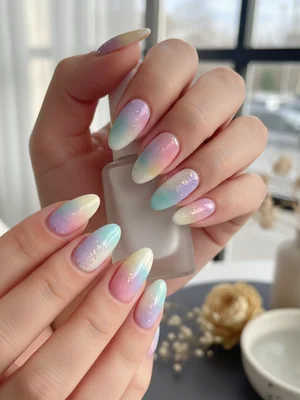
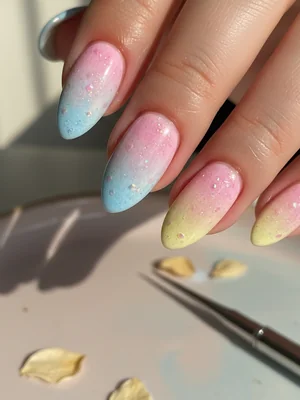
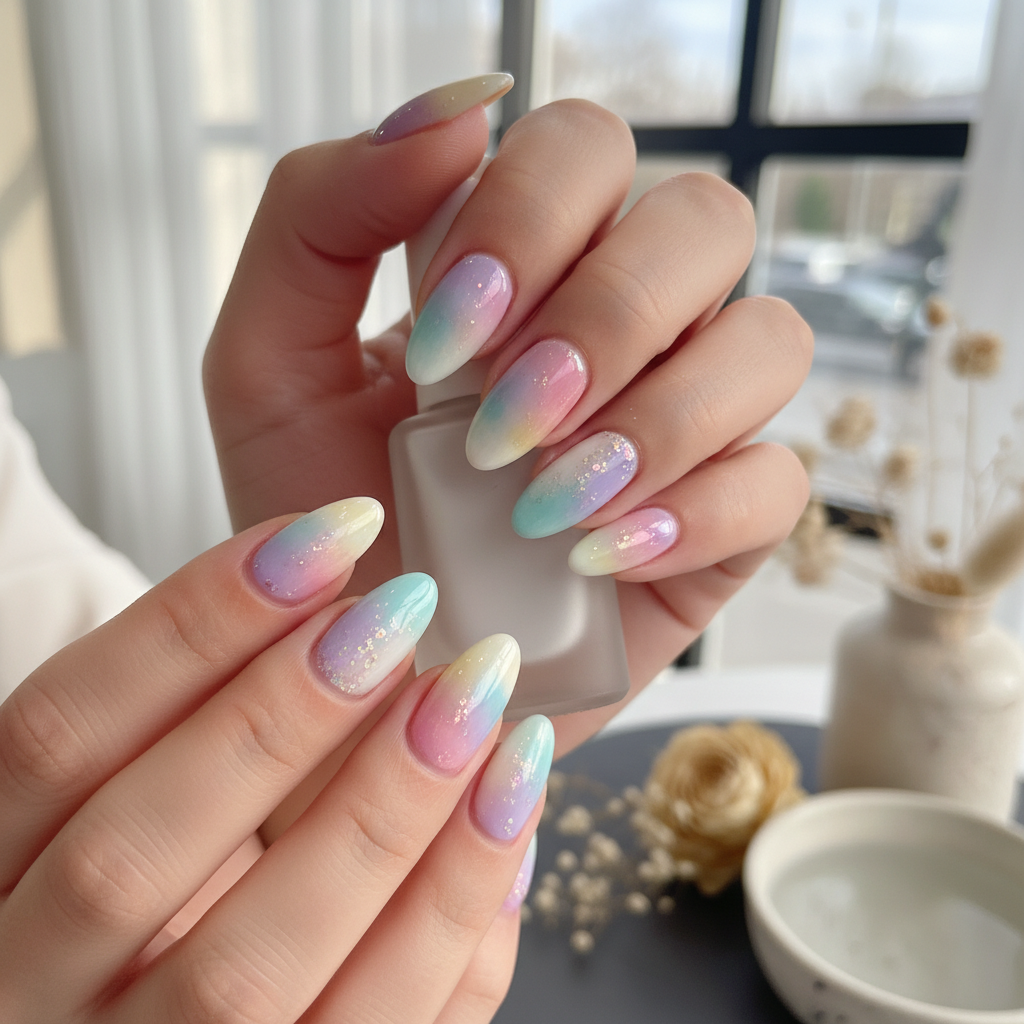
Photo-Real Salon Sponging Nails: Gradient Artistry
Immerse your nails in the artistic depth of our Photo-Real Salon Sponging Design. This technique masterfully blends colors to create a seamless, multi-dimensional gradient that looks like a miniature canvas of blended light and shadow, achieving a professional finish that truly stands out.
- Gel Base Coat
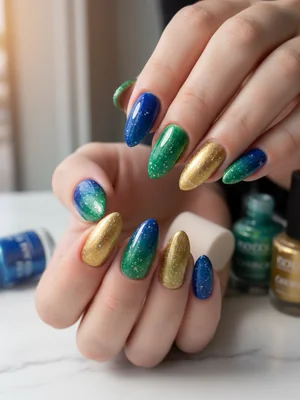
- 3-4 Complementary Gel Polishes (e.g., navy, royal blue, aquamarine)
- Non-Latex Makeup Sponge or Fine-Pore Nail Art Sponge
- Liquid Latex or Peel-Off Base Coat (for skin protection)
- Detail Brush and Acetone (for cleanup)
- High-Shine Gel Top Coat
- Prep nails, apply base coat, and cure. Apply the lightest base color polish to the entire nail and cure.
- Apply liquid latex around the cuticles and sidewalls of each nail to protect skin.
- Dab the chosen gradient colors (e.g., navy, royal blue, aquamarine) onto the sponge, ensuring they slightly overlap. Gently and repeatedly dab the sponge onto the nail, moving it slightly to blend.
- Cure the first sponged layer. Repeat the sponging process 2-3 more times, using thinner coats and gentle dabbing, curing between each layer until the desired opacity and 'photo-real' blend is achieved.
- Carefully remove the liquid latex. Use a detail brush dipped in acetone to clean any polish from the skin around the nails. Apply a high-shine gel top coat and cure for a smooth, durable finish.
Expert Tip
Achieving that coveted 'photo-real' finish requires very thin layers of polish and a super-fine pore sponge. Dab lightly and build up color gradually, allowing each layer to partially dry to prevent muddiness and ensure a truly seamless transition without visible sponge texture.
Similar Styles
Beautiful Photo-real Salon Sponging Nails
Sponging inspired nail art with beautiful, photo-real finish and professional salon quality
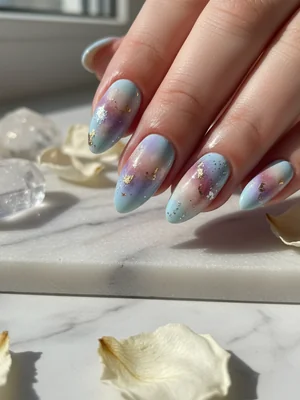
Gorgeous Photo-real Salon Sponging Nails
Sponging inspired nail art with gorgeous, photo-real finish and professional salon quality
Gorgeous Photo-real Salon Sponging Nails
Sponging inspired nail art with gorgeous, photo-real finish and professional salon quality
Stunning Photo-real Salon Sponging Nails
Sponging inspired nail art with stunning, photo-real finish and professional salon quality

Stunning Photo-real Salon Sponging Nails
Sponging inspired nail art with stunning, photo-real finish and professional salon quality

Sophisticated Photo-real Salon Sponging Nails
Sponging inspired nail art with sophisticated, photo-real finish and professional salon quality
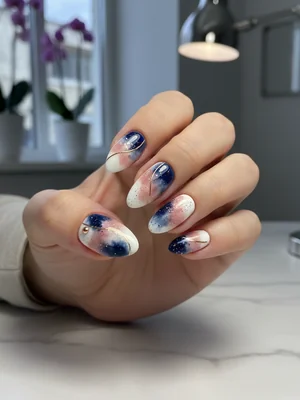
Photo-real Salon Sponging Nails
Sponging inspired nail art with elegant, photo-real finish and professional salon quality
Sophisticated Photo-real Salon Sponging Nails
Sponging inspired nail art with sophisticated, photo-real finish and professional salon quality
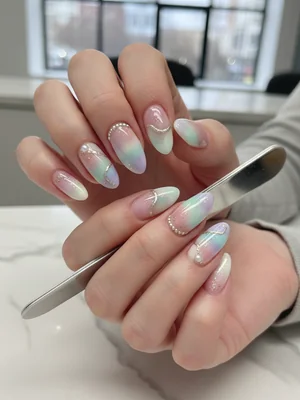
Photo-real Salon Sponging Nails
Sponging inspired nail art with elegant, photo-real finish and professional salon quality

Photo-real Salon Sponging Nails
Sponging inspired nail art with clean, photo-real finish and professional salon quality

Photo-real Salon Sponging Nails
Sponging inspired nail art with clean, photo-real finish and professional salon quality

Photo-real Salon Sponging Nails
Sponging inspired nail art with clean, photo-real finish and professional salon quality
Explore Similar Designs
Colors in this Design
Techniques Used
Nail Shapes
Frequently Asked Questions
How long does a Photo-Real Sponging manicure last?
With proper application and aftercare, a gel-based Photo-Real Sponging manicure can last 2-3 weeks without chipping.
Can I achieve this look at home?
While possible, the 'photo-real' salon quality finish requires practice, specialized tools, and precise technique to avoid visible sponge marks and achieve a seamless blend. It's often best left to advanced DIYers or professionals.
Is sponging damaging to nails?
No, the sponging technique itself is not damaging. Damage usually comes from improper nail preparation, aggressive removal, or picking at the polish.
What type of sponge is best for this design?
A high-density, fine-pore makeup sponge (like a beauty blender) or a specific nail art blending sponge is ideal for achieving a smooth, 'photo-real' finish without chunky texture.
Can I choose any colors for this gradient?
Absolutely! The beauty of this design is its full customizability. We recommend choosing 2-4 complementary or contrasting colors that blend well together for the most striking effect.
How is the 'photo-real' aspect achieved?
It's achieved through meticulous layering of very thin, carefully blended coats of polish, using a fine-pore sponge and curing each layer to build up a smooth, deep gradient without harsh lines or visible texture, mimicking an airbrushed effect.
Aftercare Tips
- ✓Avoid excessive exposure to hot water or strong chemicals immediately after your appointment.
- ✓Be gentle with your nails; avoid using them as tools to prevent chipping or lifting.
- ✓Keep hands and nails well-hydrated to prevent dryness and maintain the integrity of the polish.
Safe Removal
- 1.For gel polish, gently buff the top coat to break the seal.
- 2.Soak cotton balls in 100% acetone, place them on each nail, and wrap with foil for 10-15 minutes.
- 3.Gently push off softened polish with an orange wood stick; never scrape or force it off.