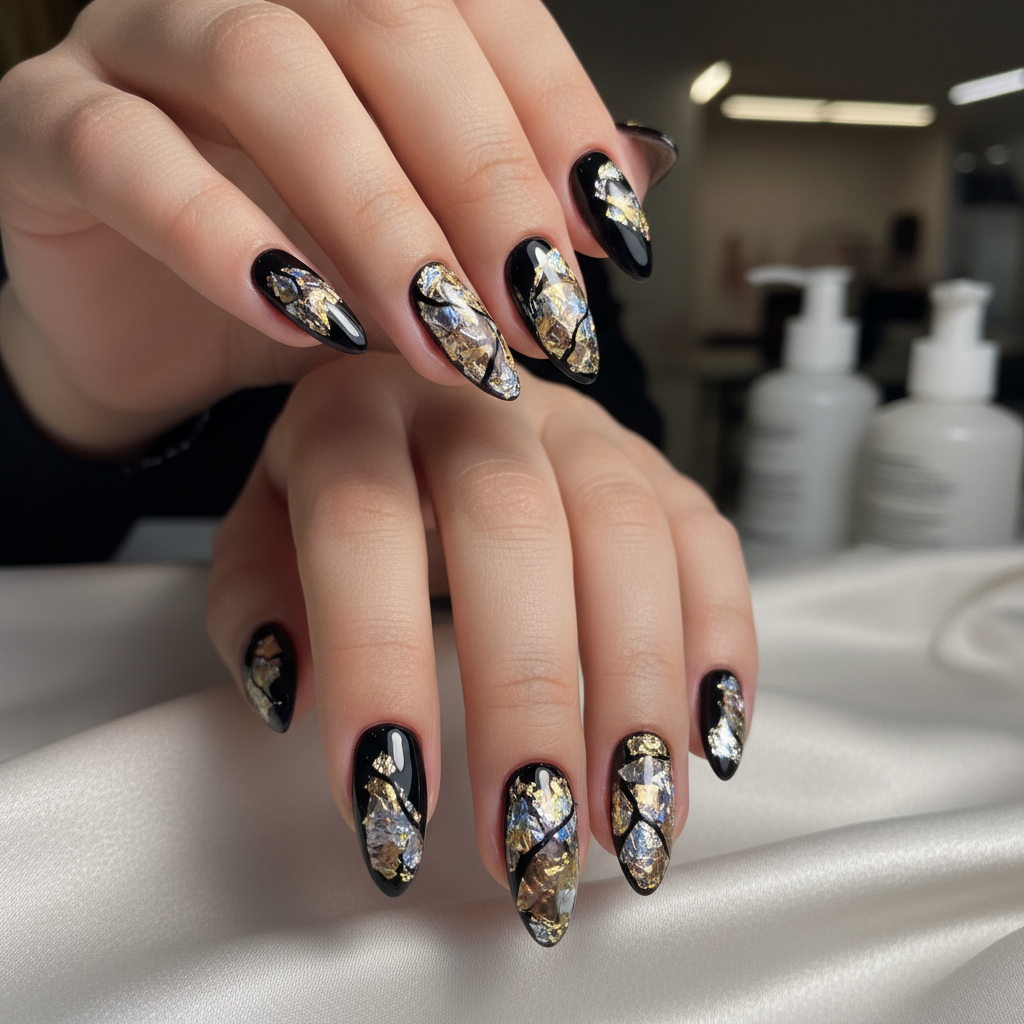
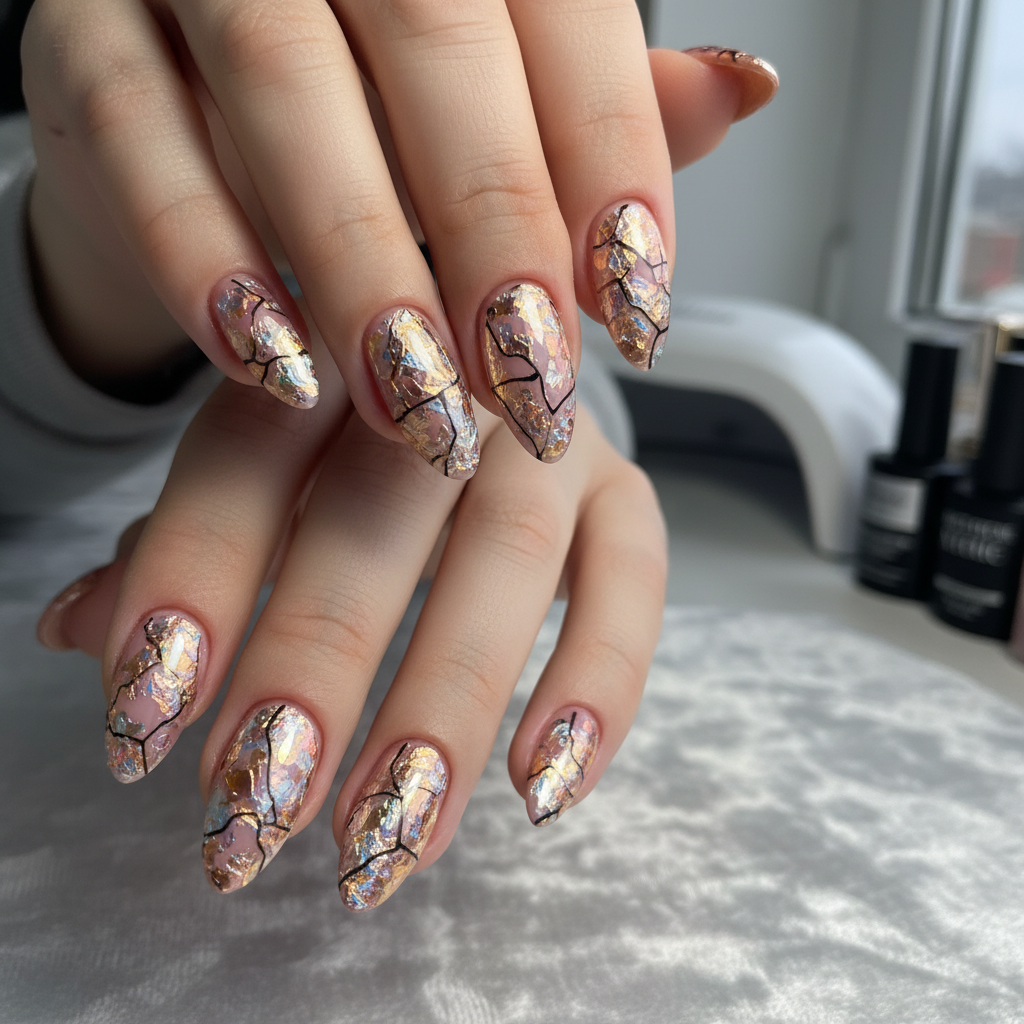
Photo-real Salon Foil Nails
Foil inspired nail art with clean, photo-real finish and professional salon quality
Techniques
Created: October 5, 2025 at 12:04 PM
More Foil Designs
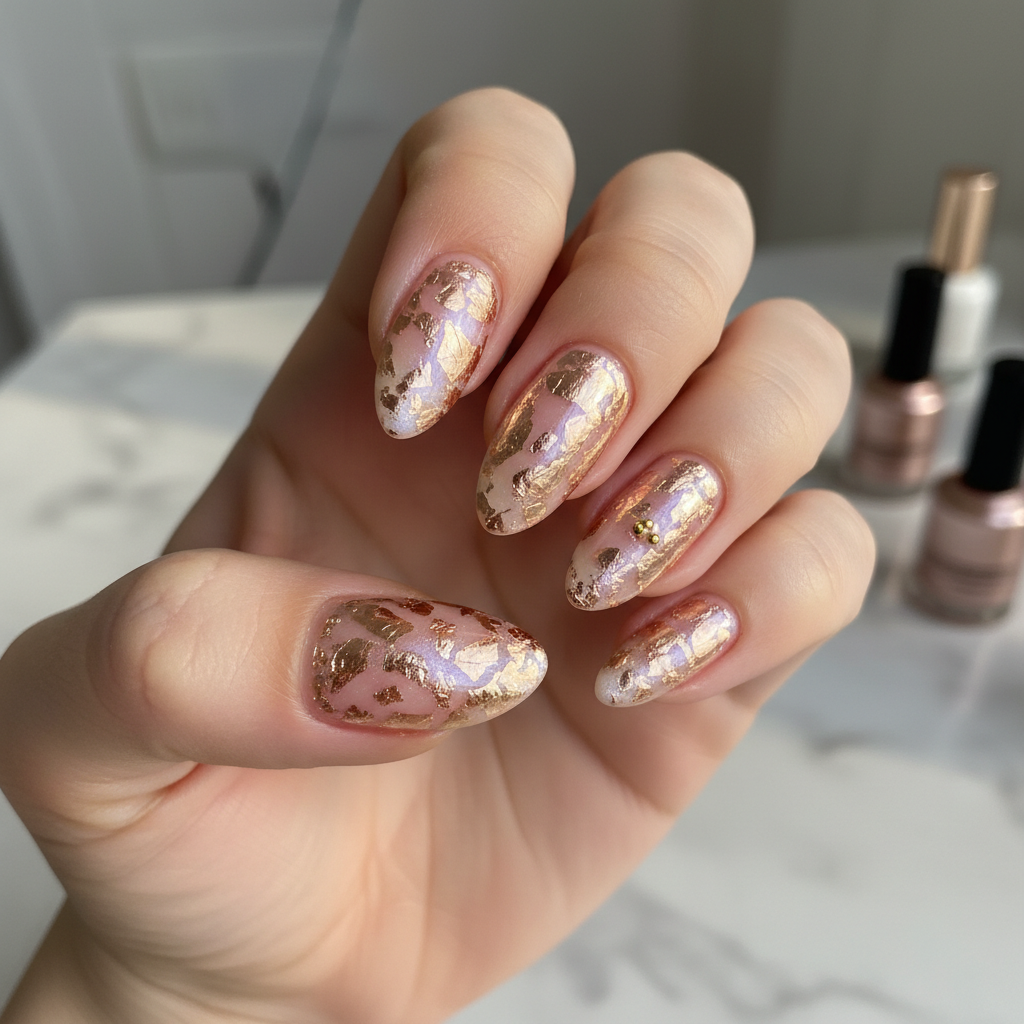
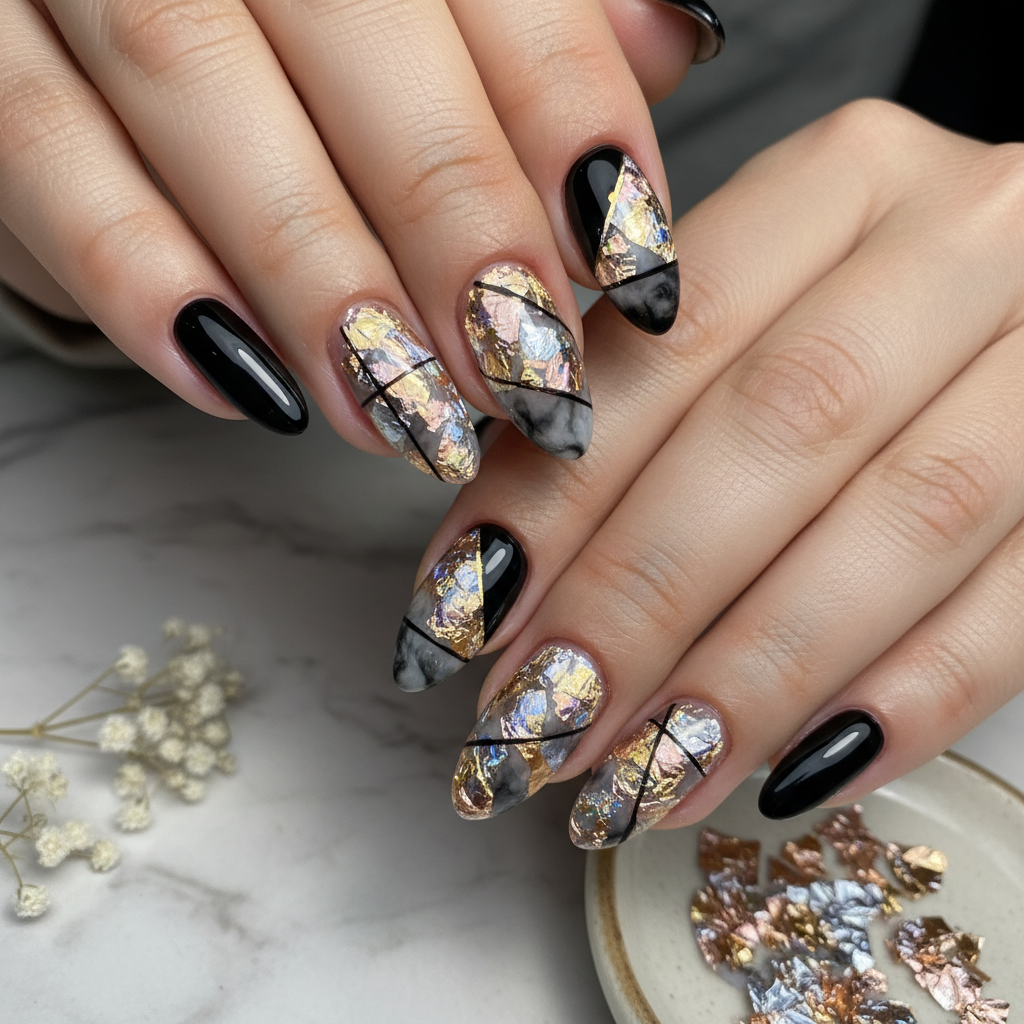
Beautiful Photo-real Salon Foil Nails
Foil inspired nail art with beautiful, photo-real finish and professional salon quality
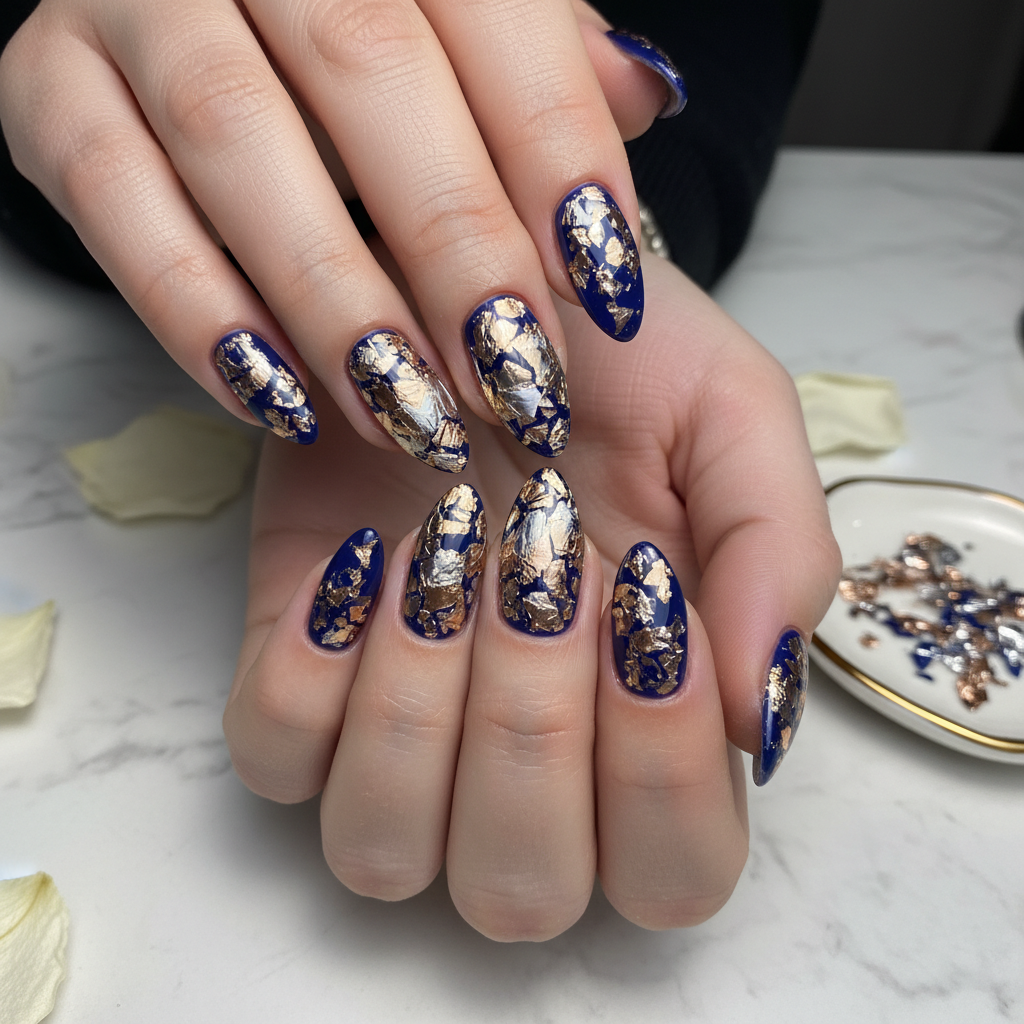
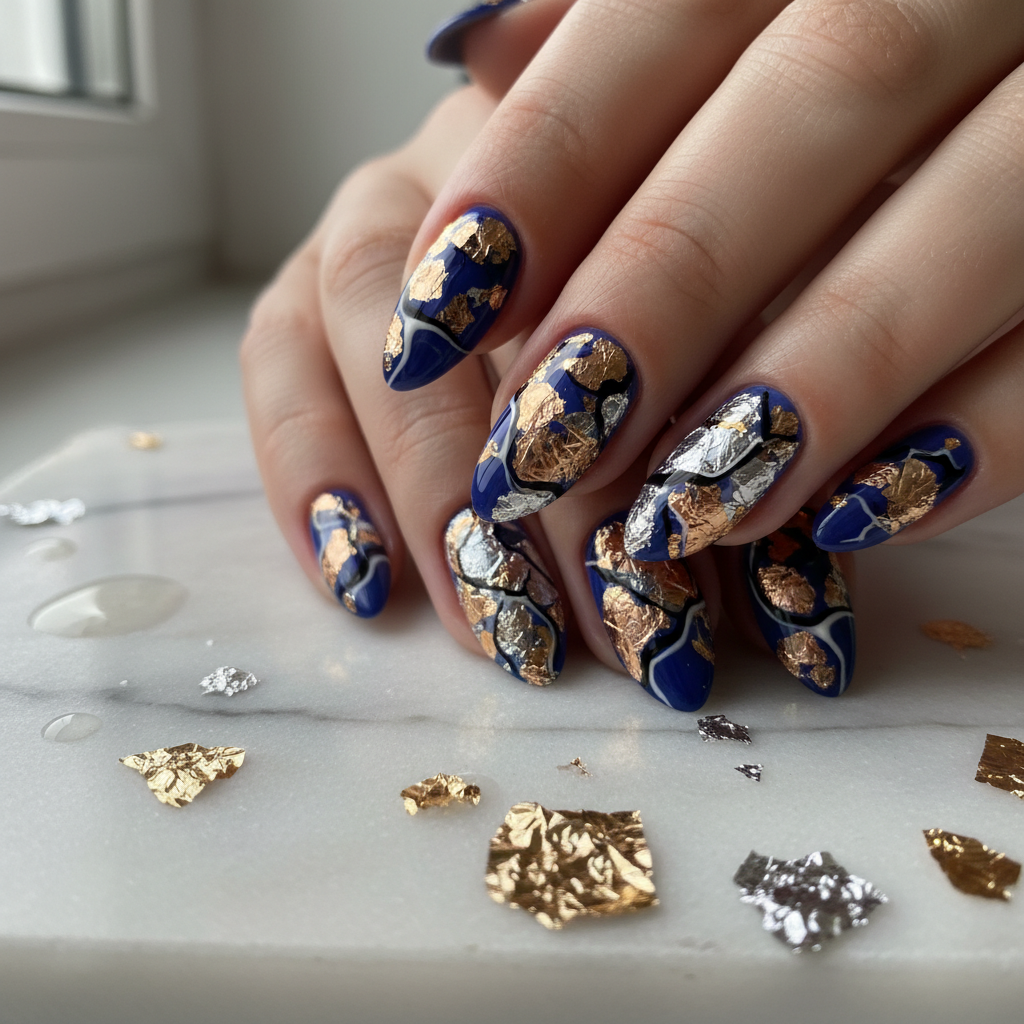
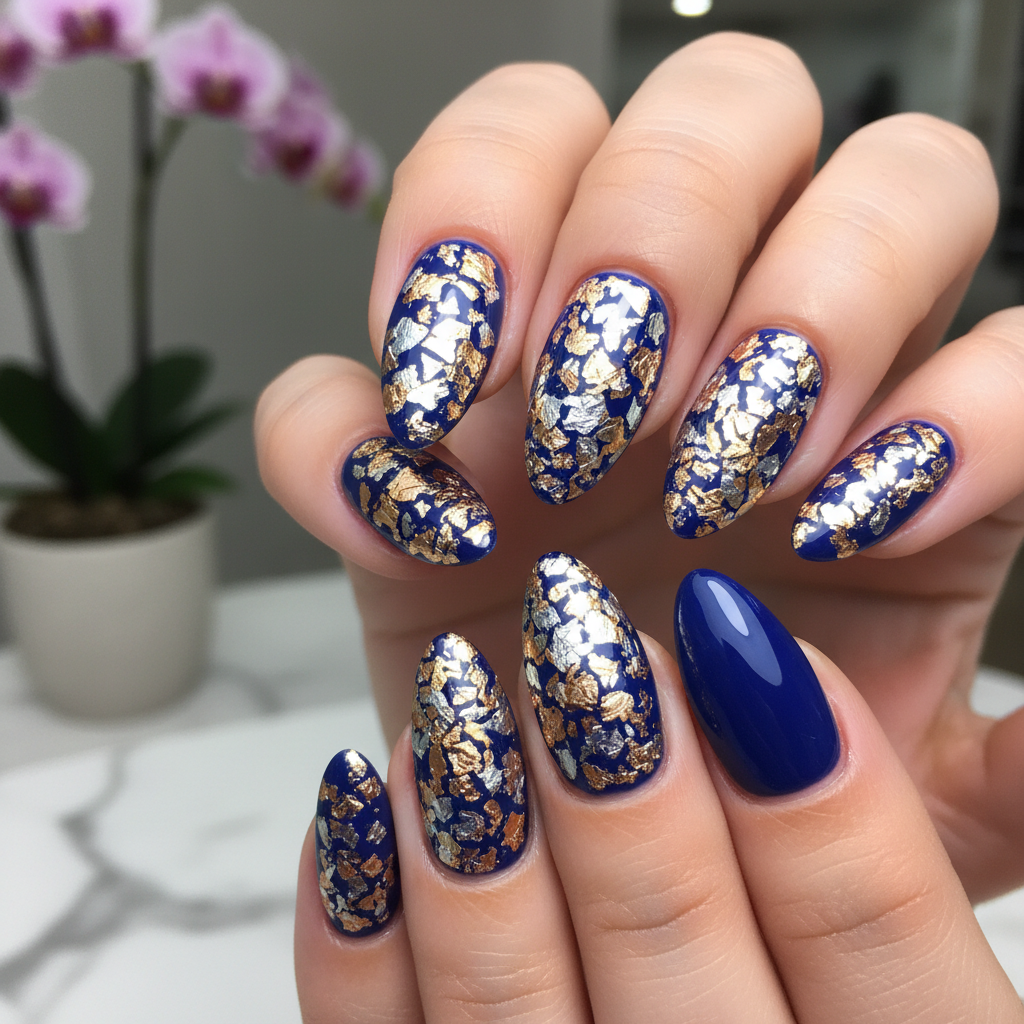
Gorgeous Photo-real Salon Foil Nails
Foil inspired nail art with gorgeous, photo-real finish and professional salon quality
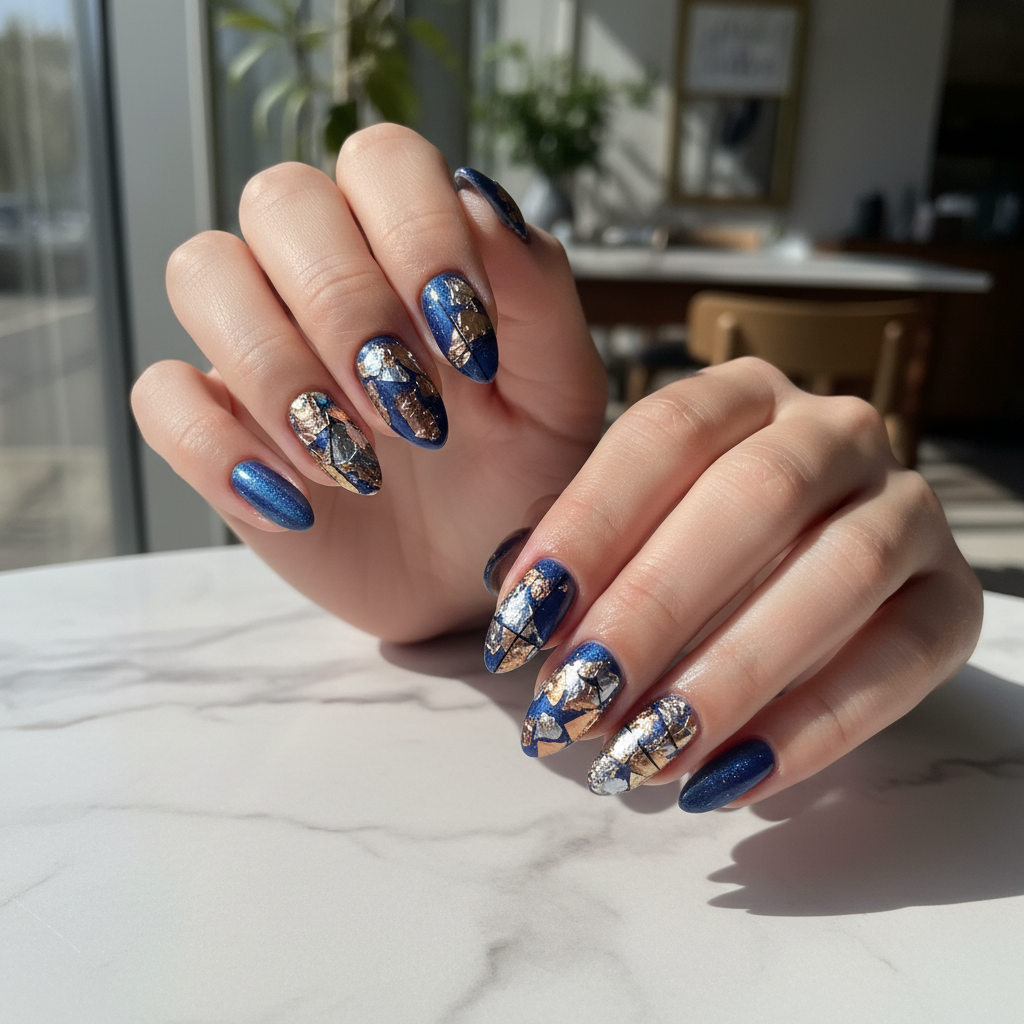
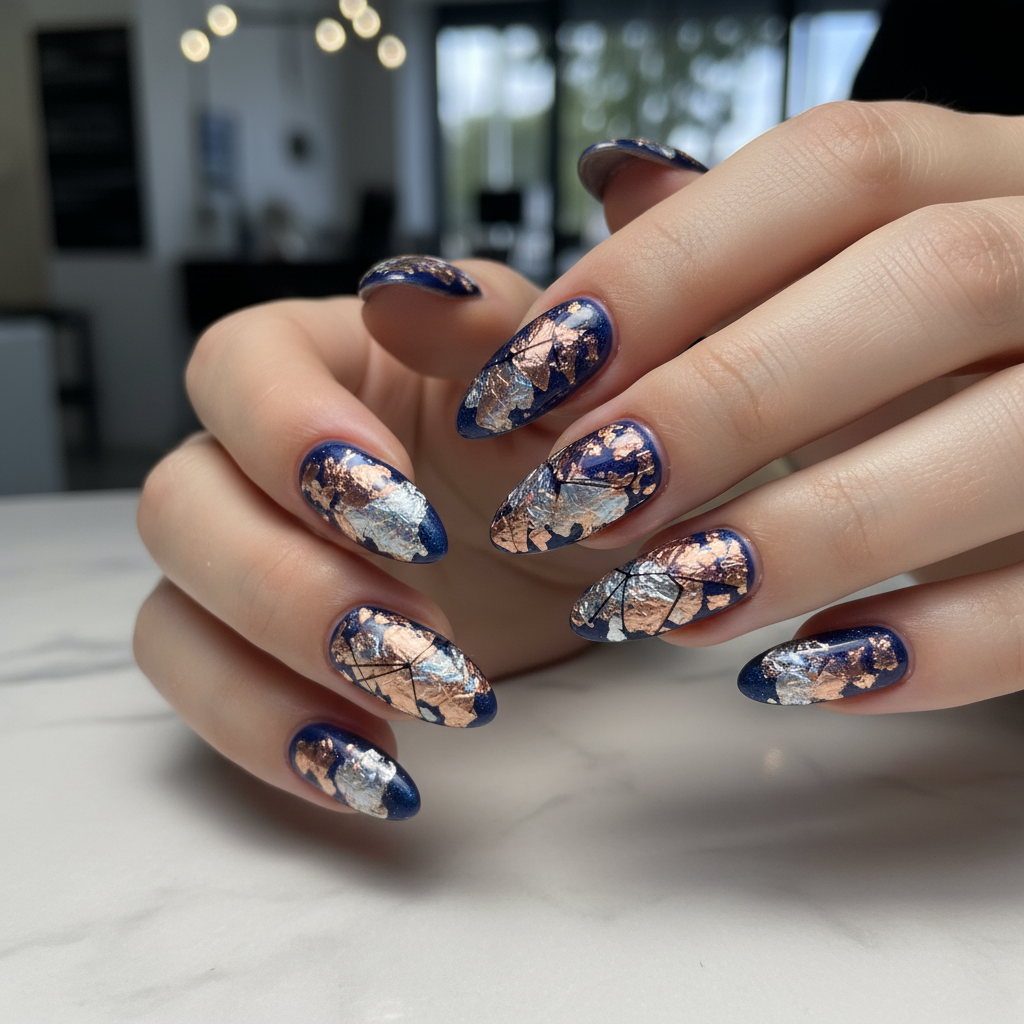
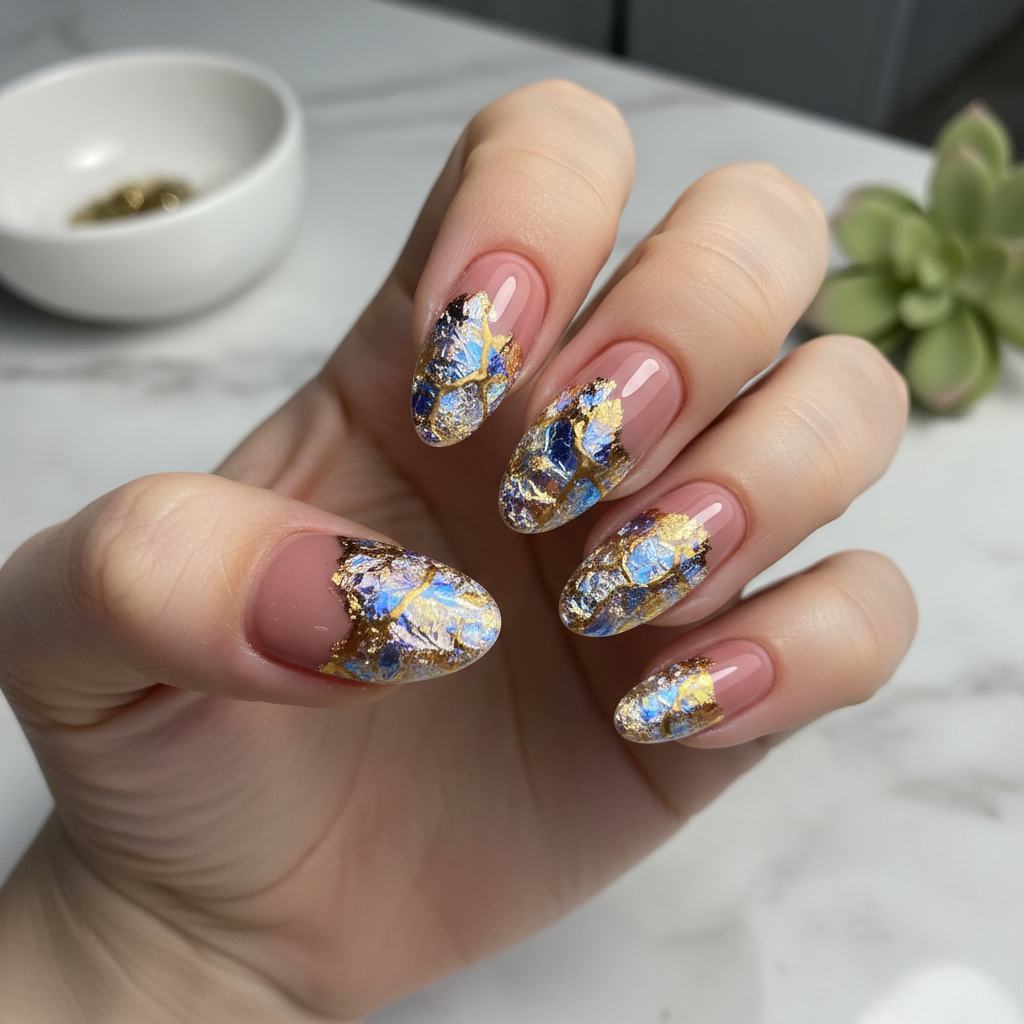
Stunning Photo-real Salon Foil Nails
Foil inspired nail art with stunning, photo-real finish and professional salon quality
Beautiful Photo-real Salon Foil Nails
Foil inspired nail art with beautiful, photo-real finish and professional salon quality
Sophisticated Photo-real Salon Foil Nails
Foil inspired nail art with sophisticated, photo-real finish and professional salon quality
Gorgeous Photo-real Salon Foil Nails
Foil inspired nail art with gorgeous, photo-real finish and professional salon quality
Beautiful Photo-real Salon Foil Nails
Foil inspired nail art with beautiful, photo-real finish and professional salon quality
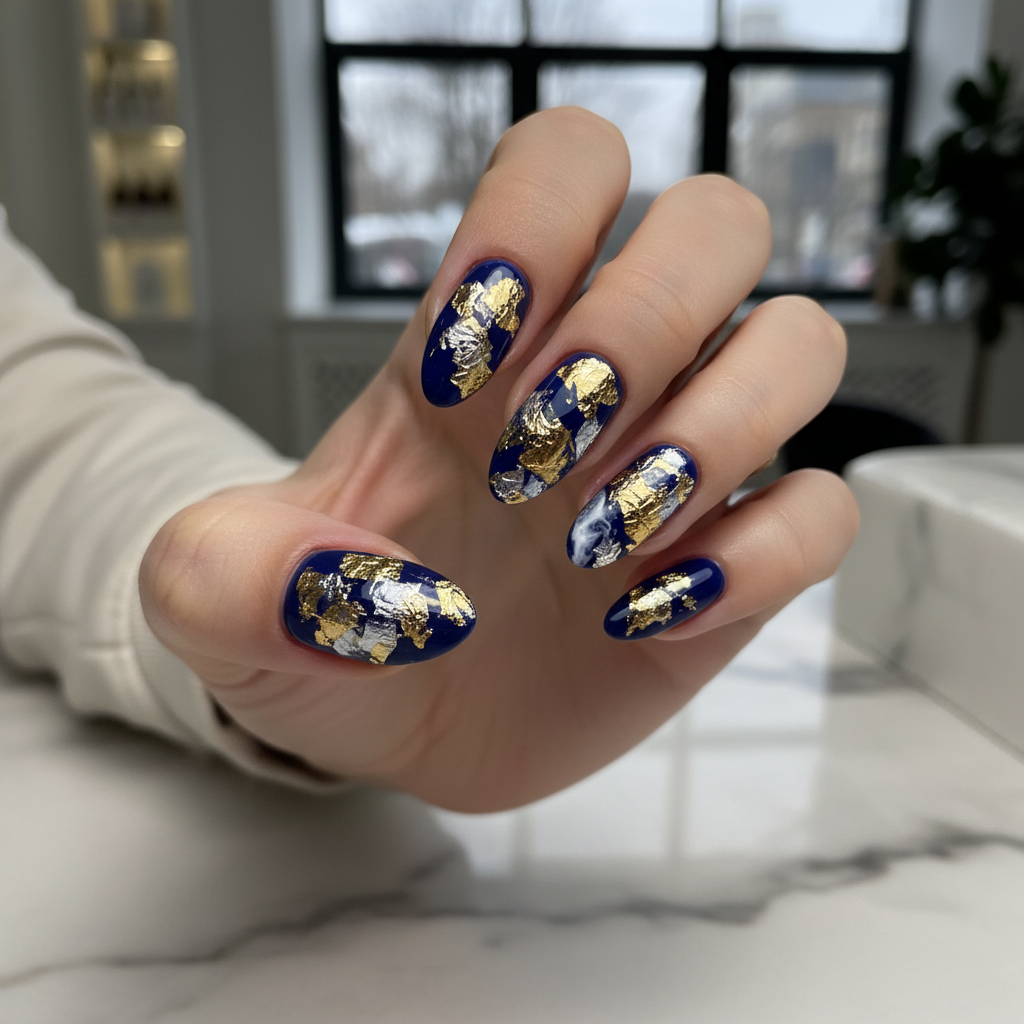
Photo-real Salon Foil Nails
Foil inspired nail art with elegant, photo-real finish and professional salon quality
Stunning Photo-real Salon Foil Nails
Foil inspired nail art with stunning, photo-real finish and professional salon quality
Gorgeous Photo-real Salon Foil Nails
Foil inspired nail art with gorgeous, photo-real finish and professional salon quality
More Designs
Salon-Worthy Foil Nail Art: Photo-Real Finish Designs
Elevate your nail game with stunning photo-real foil nail art! This design features meticulously applied foil for a flawless, salon-quality finish that's sure to turn heads. The perfect blend of elegance and modern style.
Supplies You'll Need
- Base coat
- Gel polish (matching foil color)
- Nail foil (desired color)
- Foil adhesive
- Top coat
- Nail art brush (for precise application)
How To Recreate It
- Apply a base coat and cure under a UV/LED lamp.
- Apply 2-3 coats of gel polish, curing after each coat.
- Apply a thin, even layer of foil adhesive and let it become tacky (refer to adhesive instructions).
- Gently press the nail foil onto the adhesive, ensuring full coverage.
- Carefully peel away the foil, leaving the metallic design on the nail.
- Seal with a top coat and cure under a UV/LED lamp for a long-lasting, glossy finish.
Expert Tip
Use a lint-free wipe to gently smooth the foil after application to eliminate any wrinkles and ensure a perfectly flat, photo-real finish. Avoid excessive pressure to prevent tearing.
Try These Variations
- →Ombre Foil: Blend different foil colors for a gradient effect.
- →Geometric Foil: Cut foil into shapes for a modern design.
- →Textured Foil: Use a crumpled foil technique for a unique texture.
Aftercare Tips
- ✓Keep your hands moisturized with a quality hand cream.
- ✓Avoid picking or peeling the foil.
- ✓Apply cuticle oil regularly to maintain healthy nails and prevent lifting.
Safe Removal
- 1.Gently file the top coat to break the seal.
- 2.Soak cotton pads in acetone, place them on your nails, and wrap with foil.
- 3.Wait 10-15 minutes, then gently remove the foil and remaining product with a cuticle pusher.
Quick Facts
Why It's Trending
The clean, photo-real finish creates a high-end look, making it a popular choice for those seeking sophisticated and polished nail art.
Seasonal Styling
Perfect for holiday parties and special events in the fall and winter, or any time you want a glamorous touch.
Color Variations
Perfect For
Why People Love It
These photo-real foil nails are trending on Instagram and Pinterest for their luxurious and polished look.
Daily Maintenance
- 💅Avoid harsh chemicals and prolonged water exposure.
- 💅Wear gloves when doing household chores.
- 💅Apply cuticle oil daily to keep nails healthy and hydrated.
Common Issues & Fixes
- ⚠Foil is not sticking properly.Ensure the foil adhesive is tacky before applying the foil. Avoid applying too much adhesive.
- ⚠The foil is wrinkling.Apply the foil smoothly and gently, using a silicone tool to press it down.
- ⚠The top coat is causing the foil to dull.Use a top coat specifically designed for gel polish and apply thin coats.
- ⚠Foil is lifting at the edges.Make sure to properly seal the edges with top coat. Gently buffing the edges can also help.
Design Inspiration
Inspired by high-fashion runway looks and the desire to create a mirror-like, reflective finish on nails.
Explore Similar Designs
Colors in this Design
Techniques Used
Perfect For
Nail Shapes
More Categories to Explore
Popular Colors
Popular Techniques
Perfect Occasions
FAQs
Can I use regular nail polish instead of gel polish?
While possible, gel polish provides a smoother and longer-lasting base for the foil.
How long will this design last?
With proper application and aftercare, this design can last up to 2 weeks.
Can I apply foil on acrylic nails?
Yes, the same technique can be used on acrylic nails after prepping the surface.
What is the best way to clean up around the edges?
Use a small nail art brush dipped in acetone to carefully clean up any excess foil or adhesive.
Is there a special top coat I should use with foil?
Yes, a gel top coat designed for nail art is recommended to prevent smudging or dulling the foil.
Can I use different foil patterns?
Absolutely! Experiment with various foil patterns and designs to create a unique look.