Photo-real Salon Retro Nails
Retro inspired nail art with clean, photo-real finish and professional salon quality
Created: October 5, 2025 at 12:49 PM
More Retro Designs
More Designs
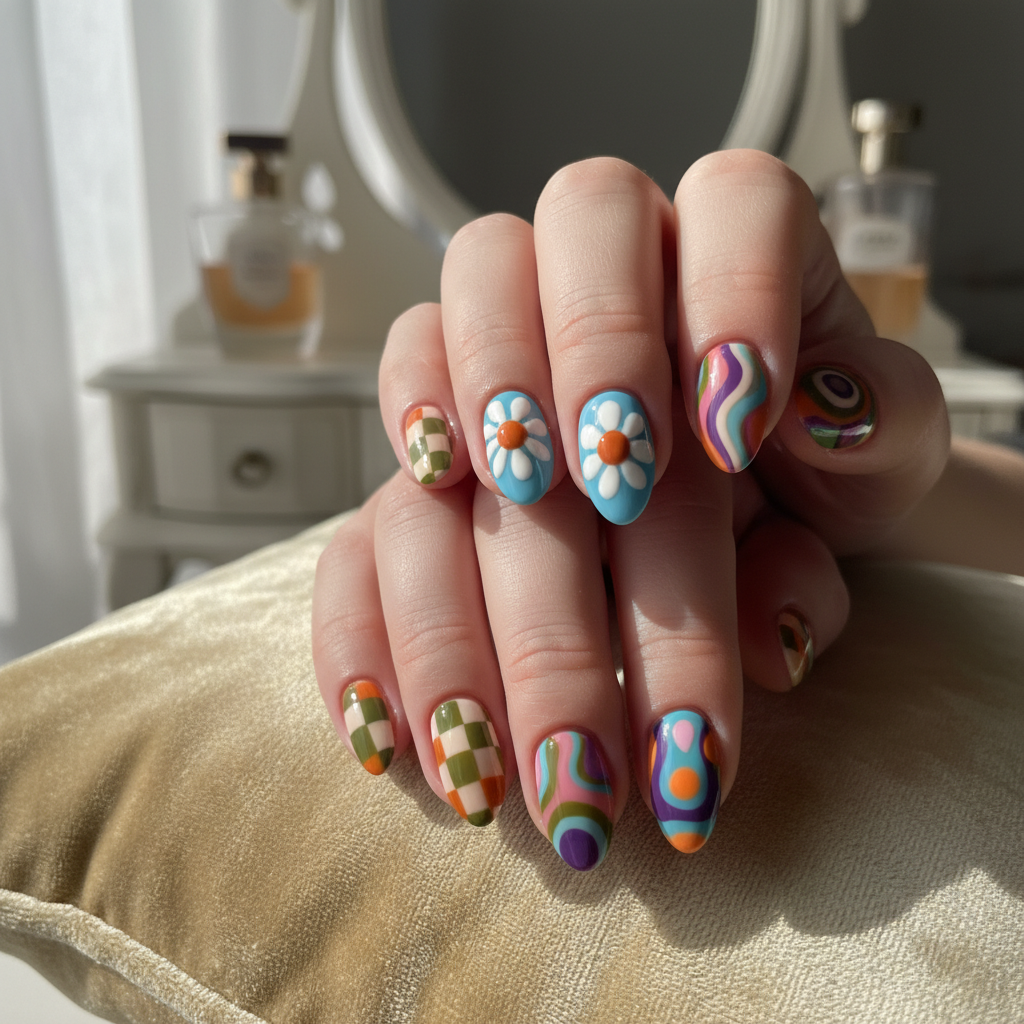
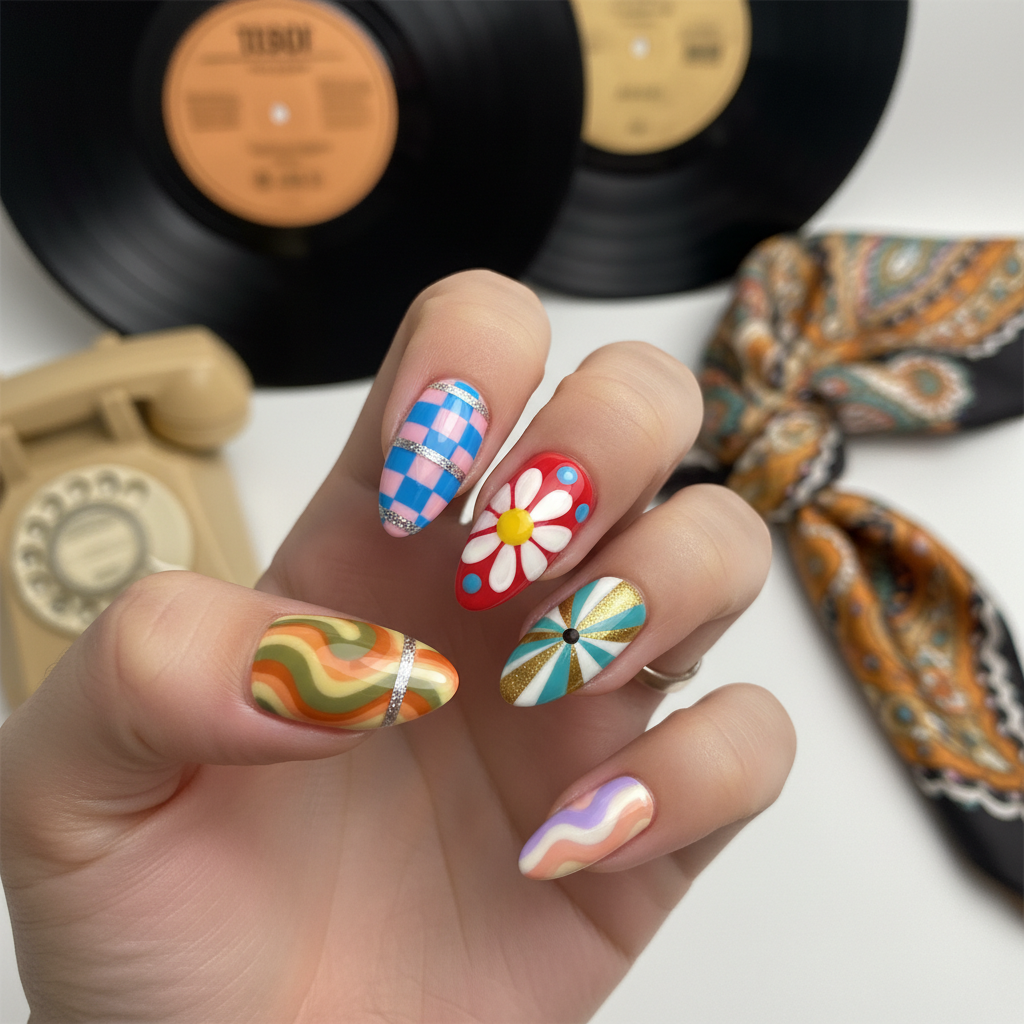
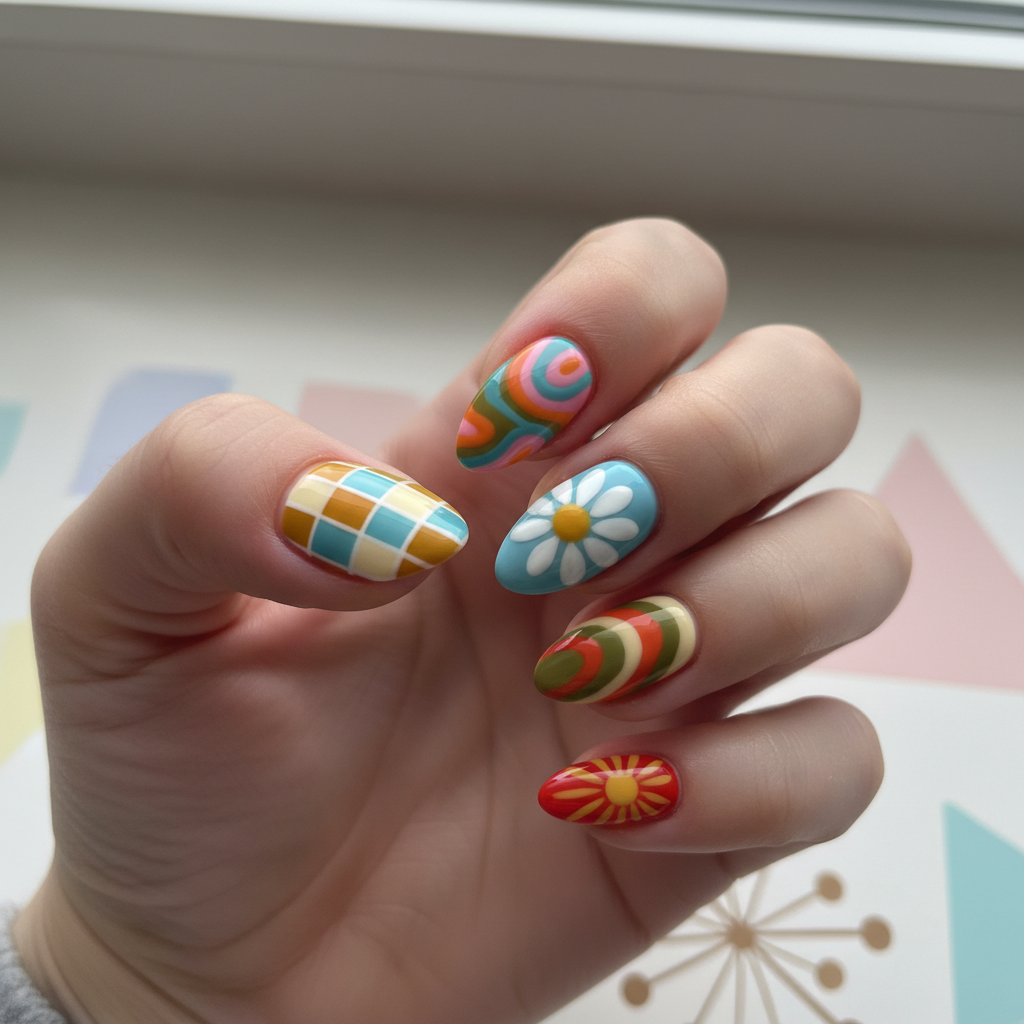
Groovy Retro Nails: Photo-Real Salon Design
Step back in time with these retro-inspired nails! This design features a clean, photo-real finish that brings a professional salon quality to your fingertips, perfect for adding a pop of vintage charm to your look.
Supplies You'll Need
- Gel polishes in mustard yellow, avocado green, burnt orange, and cream white
- Fine detail brushes
- Base coat and top coat
- LED/UV lamp
- Nail art dotting tool
- Isopropyl alcohol for cleaning
How To Recreate It
- Apply a base coat and cure under the LED/UV lamp.
- Apply 2-3 thin coats of cream white gel polish as a base color and cure.
- Using fine detail brushes, create geometric patterns with mustard yellow, avocado green, and burnt orange gel polishes.
- Cure each layer of color under the lamp to prevent bleeding.
- Apply a glossy top coat and cure.
- Cleanse the nails with isopropyl alcohol to remove any sticky residue.
Expert Tip
Use high-quality gel polishes and fine detail brushes for sharp, clean lines. Practice your freehand painting skills on a nail wheel before attempting the design on your nails.
Try These Variations
- →Substitute the geometric patterns with retro floral designs.
- →Use a matte top coat for a more subdued, vintage feel.
- →Incorporate glitter or metallic accents for a touch of sparkle.
Aftercare Tips
- ✓Keep your hands moisturized with a good quality hand cream.
- ✓Avoid picking or peeling off the gel polish.
- ✓Schedule regular salon appointments for professional removal.
Safe Removal
- 1.File off the top coat to break the seal.
- 2.Soak cotton pads in acetone and apply them to the nails, wrapping them in foil. Let sit for 10-15 minutes.
- 3.Gently remove the softened gel polish with a cuticle pusher.
Quick Facts
Why It's Trending
The resurgence of vintage fashion and aesthetics is driving the popularity of retro-inspired nail art. This design offers a sophisticated and polished take on the trend.
Seasonal Styling
Perfect for spring and summer, or any occasion where you want to add a fun, retro touch to your look. This design works well for music festivals or themed parties.
Color Variations
Perfect For
Why People Love It
Instagram and Pinterest are filled with examples of this trend, proving its wide appeal. Many nail artists are creating similar designs for their clients.
Daily Maintenance
- 💅Apply cuticle oil daily to keep nails hydrated.
- 💅Wear gloves when doing household chores to protect your nails.
- 💅Avoid using your nails as tools.
Common Issues & Fixes
- ⚠Bleeding colors: Cure each layer of gel polish thoroughly before applying the next.
- ⚠Uneven lines: Use a steady hand and practice your freehand painting techniques.
- ⚠Gel polish lifting: Ensure proper nail preparation and avoid getting gel polish on the cuticle.
- ⚠Bubbling: Apply thin, even coats of gel polish and avoid shaking the bottle vigorously.
Design Inspiration
This design is inspired by the bold geometric patterns and vibrant color palettes of the 1960s and 1970s, aiming for a photo-real salon finish.
Explore Similar Designs
Colors in this Design
Techniques Used
Perfect For
Nail Shapes
More Categories to Explore
Popular Colors
Popular Techniques
Perfect Occasions
FAQs
How long will this design last?
With proper application and aftercare, this gel polish design can last up to 2-3 weeks.
Can I recreate this design with regular nail polish?
While possible, gel polish provides a longer-lasting and more durable finish. The fine details are easier to achieve with the self-leveling properties of gel.
What kind of brushes should I use?
Fine detail brushes with synthetic bristles are ideal for creating precise lines and intricate patterns.
Is it necessary to use a UV/LED lamp?
Yes, a UV/LED lamp is required to cure gel polish and achieve a long-lasting, durable finish.
How do I prevent the colors from bleeding together?
Cure each layer of gel polish under the UV/LED lamp before applying the next layer to prevent bleeding.
What's the best way to clean the brushes?
Use a brush cleaner or isopropyl alcohol to clean your brushes immediately after use to prevent the gel polish from hardening.