Photo-real Salon Preppy Nails
Preppy inspired nail art with clean, photo-real finish and professional salon quality
Created: October 5, 2025 at 12:58 PM
More Preppy Designs
More Designs
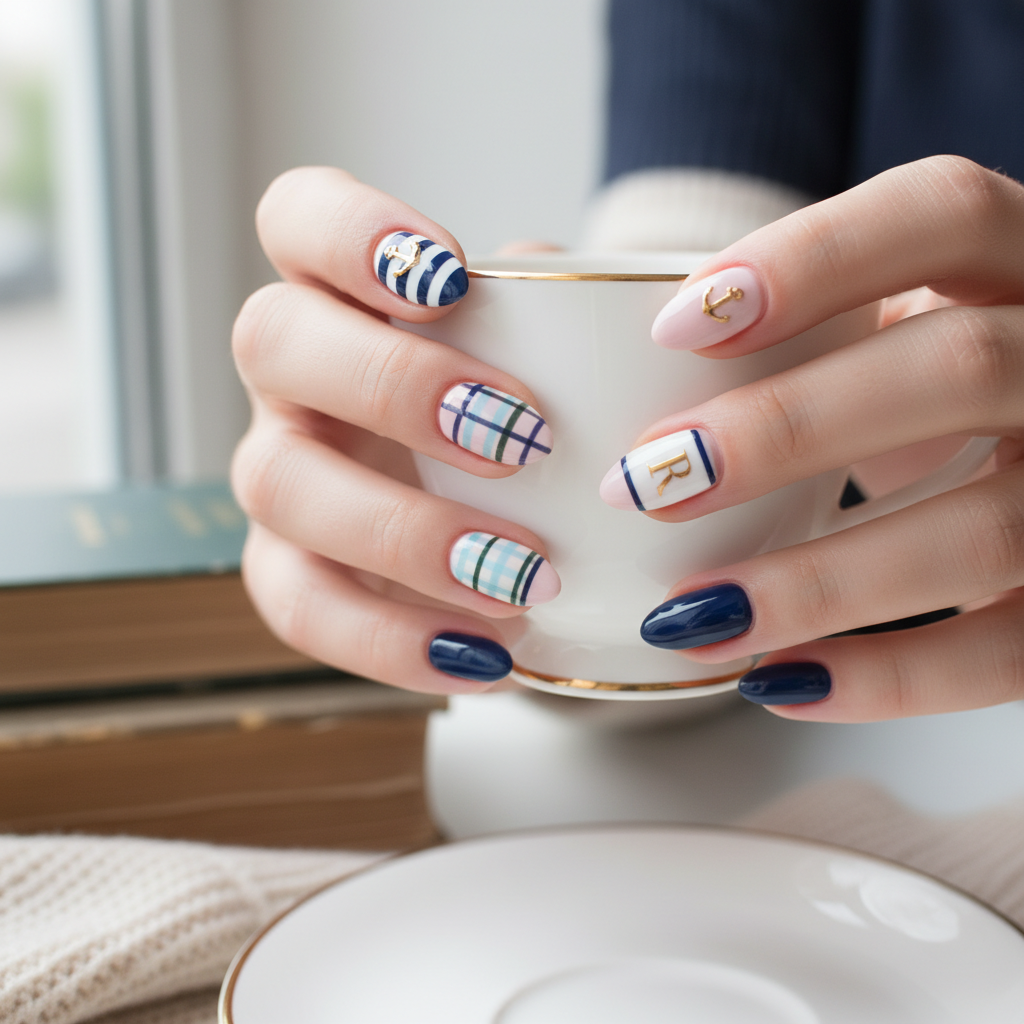
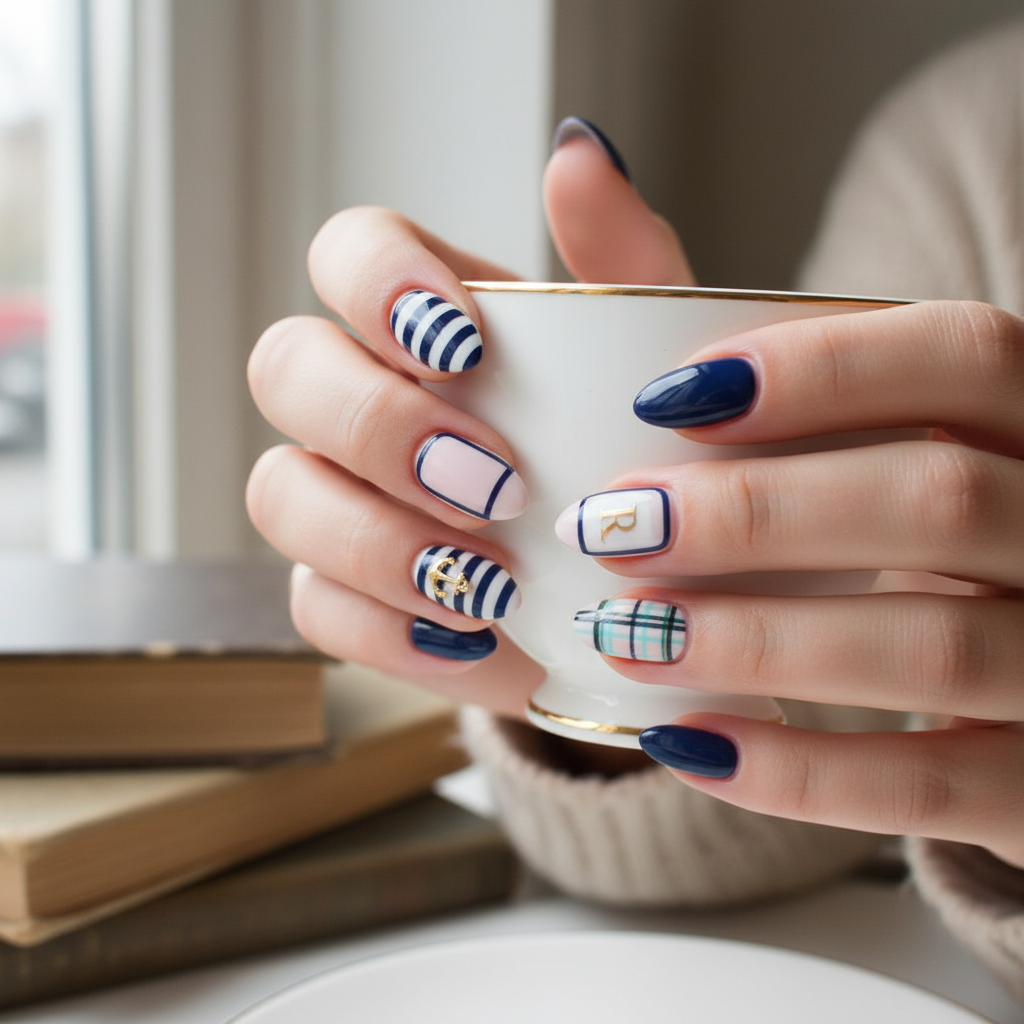
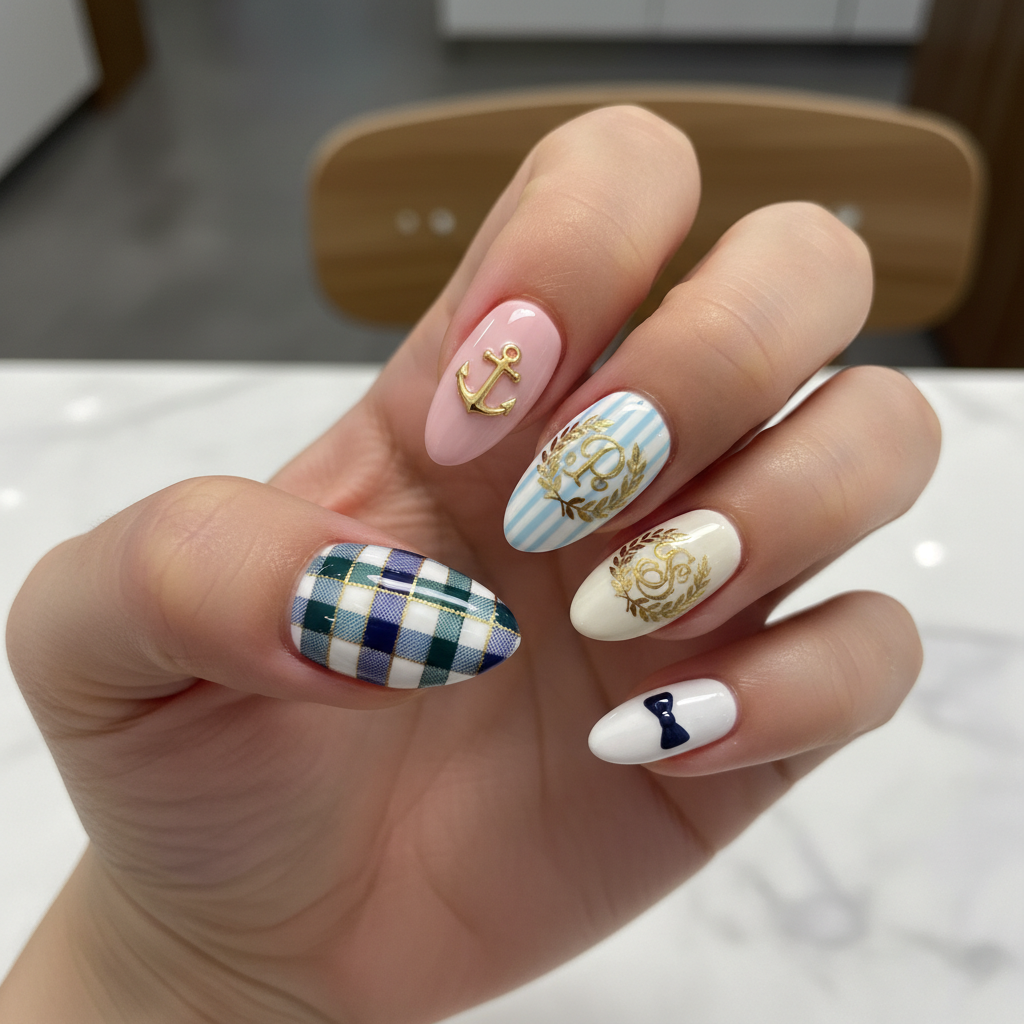
Photo-Real Preppy Nails: Clean & Classic Salon Design
Elevate your nail game with this photo-real preppy design! These nails boast clean lines, classic patterns, and a flawless salon finish, perfect for a sophisticated and polished look. Achieve a preppy inspired look with professional quality results.
Supplies You'll Need
- Base coat
- Navy blue nail polish
- White nail polish
- Fine detail brush
- Top coat
- Striping tape (optional)
How To Recreate It
- Apply a base coat to protect your nails.
- Paint the entire nail with the light pink polish as a base color, allow to dry completely.
- Using thin striping tape, create a clean line separating the top portion of the nail. Paint the top portion with navy blue polish. Remove striping tape immediately.
- Using a fine detail brush, create a white stripe along the blue section as an accent.
- Optional: add thin gold lines to create a plaid effect.
- Seal the design with a glossy top coat.
Expert Tip
Use high-quality, pigmented polishes and a steady hand when creating the clean lines. Practice on a nail wheel or piece of paper first to perfect your technique.
Try These Variations
- →Use pastel colors for a softer, spring-inspired preppy look.
- →Incorporate a houndstooth or argyle pattern for a more traditional preppy vibe.
- →Replace navy with emerald green or burgundy for a fall/winter aesthetic.
Aftercare Tips
- ✓Apply cuticle oil daily to keep your nails and cuticles hydrated.
- ✓Moisturize your hands regularly to prevent dryness.
- ✓Avoid harsh chemicals that can damage your manicure.
Safe Removal
- 1.Soak a cotton ball in acetone-based nail polish remover.
- 2.Place the cotton ball on the nail and secure it with foil.
- 3.Let it sit for 10-15 minutes, then gently wipe away the polish.
Quick Facts
Why It's Trending
The return of classic and polished aesthetics, combined with the desire for professional-looking nails at home, is driving the popularity of this preppy design.
Seasonal Styling
Perfect for spring and summer with lighter, brighter color schemes, or transition into fall and winter with deeper, richer tones like navy, burgundy, and forest green.
Color Variations
Perfect For
Why People Love It
Instagram and Pinterest are filled with stunning examples of photo-real preppy nails, inspiring countless nail enthusiasts to recreate this sophisticated style.
Daily Maintenance
- 💅Apply a top coat every 2-3 days to maintain shine and prevent chipping.
- 💅Avoid using your nails as tools to prevent breakage or damage.
- 💅Wear gloves when doing household chores to protect your manicure.
Common Issues & Fixes
- ⚠Uneven linesUse striping tape as a guide or practice with a fine detail brush on a nail wheel first.
- ⚠ChippingEnsure the base coat and polish layers are completely dry before applying the next coat. Use a high-quality top coat and reapply every 2-3 days.
- ⚠SmudgingAllow ample drying time between each layer of polish. Use thin coats to avoid trapping moisture.
- ⚠Bubbles in polishRoll the bottle of polish gently instead of shaking it. Avoid applying polish in a humid environment.
Design Inspiration
Inspired by classic preppy fashion, Ivy League style, and the desire for a polished, professional-looking manicure at home.
Explore Similar Designs
Colors in this Design
Techniques Used
Perfect For
Nail Shapes
More Categories to Explore
Popular Colors
Popular Techniques
Perfect Occasions
FAQs
What is a preppy nail design?
Preppy nail designs are inspired by the classic, polished, and sophisticated aesthetic often associated with prep schools and Ivy League colleges. They typically feature clean lines, classic patterns, and timeless color combinations.
How do I achieve a photo-real finish?
A photo-real finish requires precise application, high-quality products, and patience. Use thin coats of polish, allow ample drying time, and use a fine detail brush for intricate designs.
What nail shape is best for preppy nails?
Square or almond-shaped nails are ideal for preppy nail designs as they provide a clean and sophisticated canvas.
Can I use gel polish for this design?
Yes, you can use gel polish for a longer-lasting manicure. Follow the same steps, curing each layer under a UV/LED lamp.
What if I don't have a fine detail brush?
You can use a toothpick or a dotting tool to create fine lines, but a detail brush will provide more control and precision.
How long will this design last?
With proper application and maintenance, this design can last up to a week with regular nail polish, or two weeks with gel polish.