Photo-real Salon Playful Nails
Playful inspired nail art with clean, photo-real finish and professional salon quality
Created: October 5, 2025 at 01:02 PM
More Playful Designs
More Designs
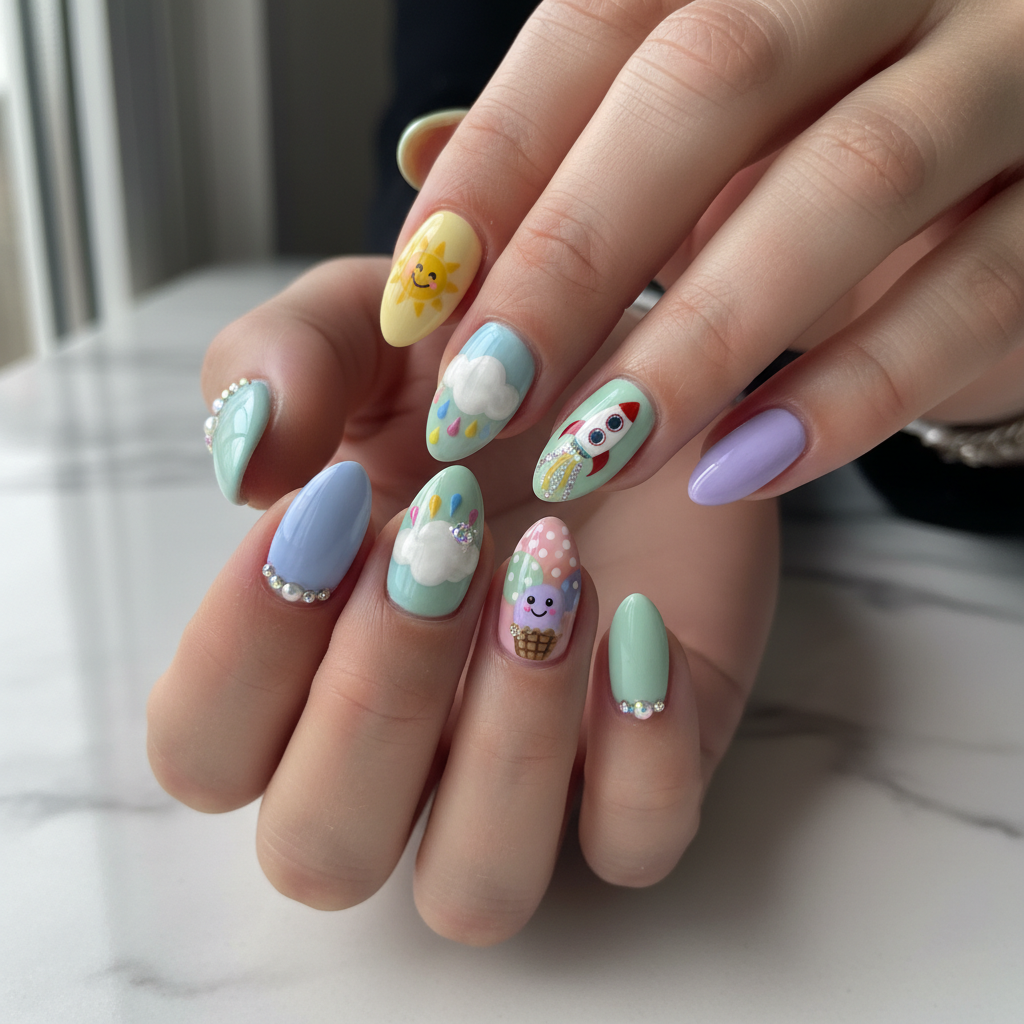
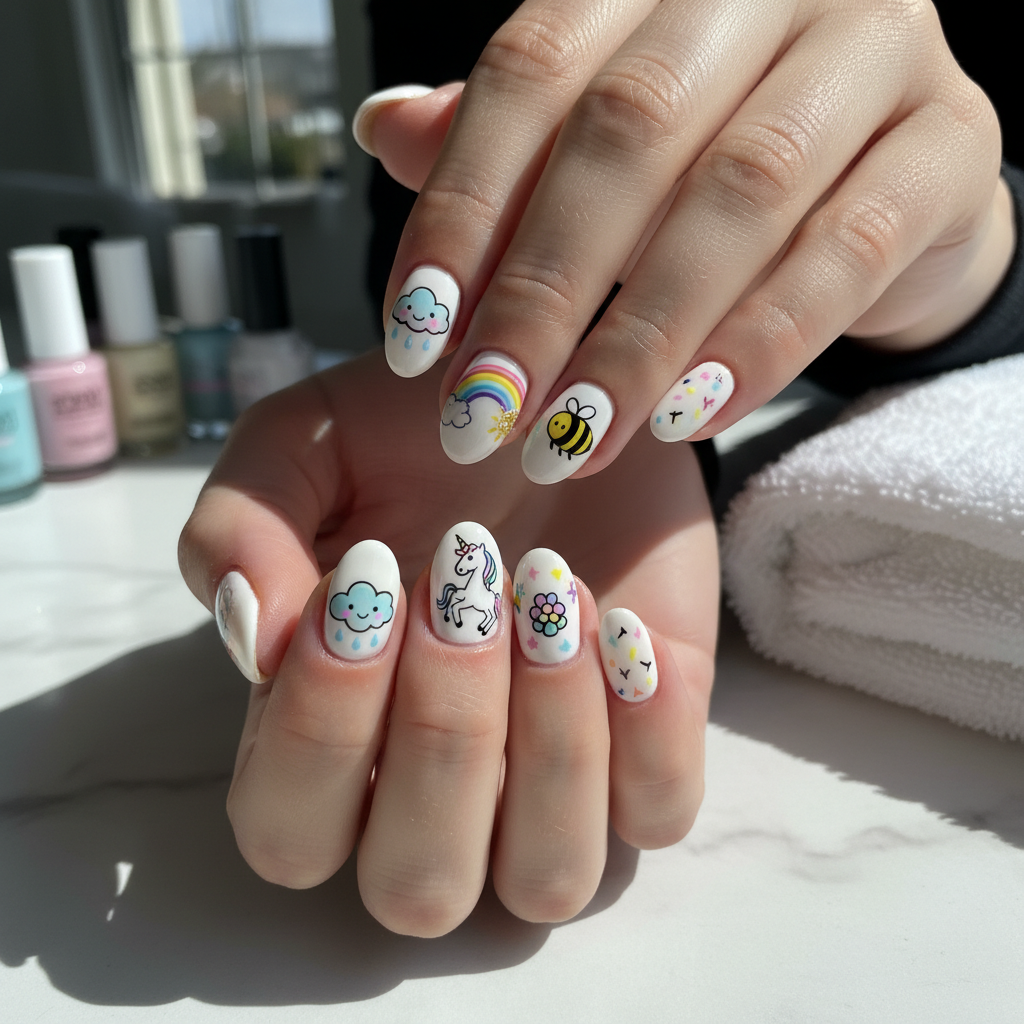
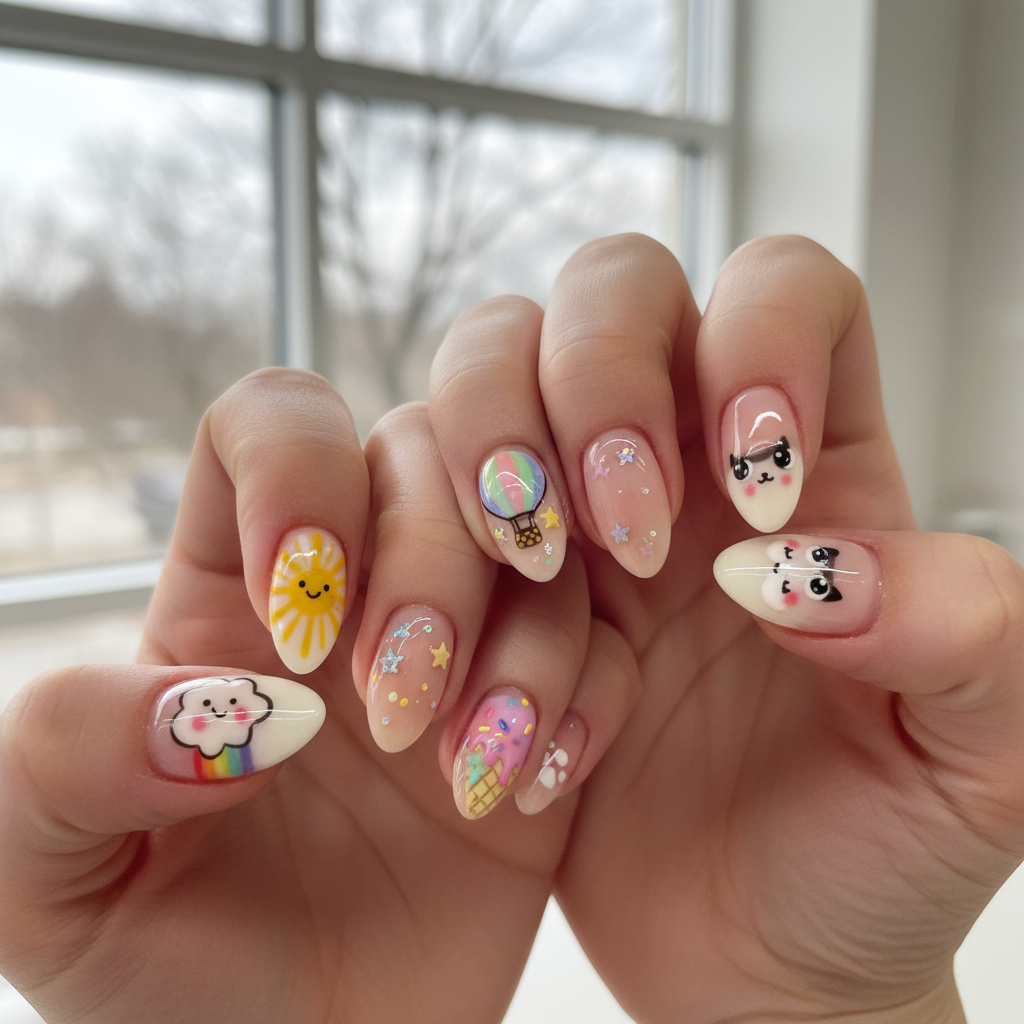
Photo-Real Playful Nails: Salon Quality Nail Art
These playful nails bring a burst of fun to your fingertips with a photo-real finish. Achieve a professional, salon-quality look at home with this vibrant design that's sure to turn heads.
Supplies You'll Need
- Nail primer
- Pastel nail polishes (pink, blue, yellow, green)
- Fine-tip nail art brushes
- Airbrush machine (optional)
- Glossy top coat
- Detailing tools (dotting tools, thin brushes)
How To Recreate It
- Apply nail primer and base coat to protect the natural nail.
- Apply pastel base colors (pink, blue, yellow, green) to each nail, creating a colorful canvas.
- Using fine-tip brushes and/or airbrush, add intricate details and playful designs to each nail. (e.g., tiny clouds, stars, polka dots).
- Allow design to fully dry, then apply a glossy top coat to seal and enhance the photo-real effect.
- Clean up any excess polish around the cuticles for a professional finish.
Expert Tip
Use high-quality nail polishes and fine-tip brushes for precise detailing. Practice your designs on a nail art practice sheet before applying them to your actual nails.
Try These Variations
- →Matte Finish: Swap the glossy top coat for a matte finish for a modern twist.
- →Geometric Playful: Incorporate geometric shapes and patterns with playful colors.
- →Character Accents: Add tiny hand-painted cartoon characters or whimsical animals.
Aftercare Tips
- ✓Moisturize your hands and nails regularly.
- ✓Avoid harsh chemicals that can damage the nail art.
- ✓Consider a reapplication of top coat after one week to maintain shine and protection.
Safe Removal
- 1.Soak cotton pads in acetone-based nail polish remover.
- 2.Place the soaked pads on your nails and wrap them with foil for 10-15 minutes.
- 3.Gently remove the foil and cotton pads, and wipe off any remaining polish.
Quick Facts
Why It's Trending
The demand for photo-real and whimsical nail art is soaring as people seek unique and expressive ways to showcase their personality.
Seasonal Styling
Perfect for spring and summer when you want to showcase bright and cheerful designs. Also, great for parties and festive occasions year-round.
Color Variations
Perfect For
Why People Love It
These photo-real playful nails are trending on Instagram and Pinterest, with users showcasing their unique interpretations of the design.
Daily Maintenance
- 💅Apply cuticle oil daily to keep nails hydrated.
- 💅Wear gloves when doing housework to protect your nails.
- 💅Avoid using your nails as tools.
Common Issues & Fixes
- ⚠
- ⚠
- ⚠
Design Inspiration
This design draws inspiration from whimsical cartoons, bright and colorful illustrations, and the desire to bring joy and playfulness to everyday life.
Explore Similar Designs
Colors in this Design
Techniques Used
Perfect For
Nail Shapes
More Categories to Explore
Popular Colors
Popular Techniques
Perfect Occasions
FAQs
How long does this design typically last?
With proper care, this design can last up to two weeks.
Can I use gel polish for this design?
Yes, gel polish can be used, but make sure to cure each layer properly under a UV/LED lamp.
What if I don't have an airbrush?
You can achieve a similar look with fine-tip nail art brushes and steady hands.
How do I protect this intricate design from chipping?
Apply a high-quality top coat and reapply it every few days to seal and protect the design.
Is this design suitable for short nails?
While it's best suited for medium-length nails to showcase the details, you can adapt the design to shorter nails by simplifying the patterns.
What is a good primer to use?
Look for non-acid primers. These provide excellent adhesion without damaging the nail.