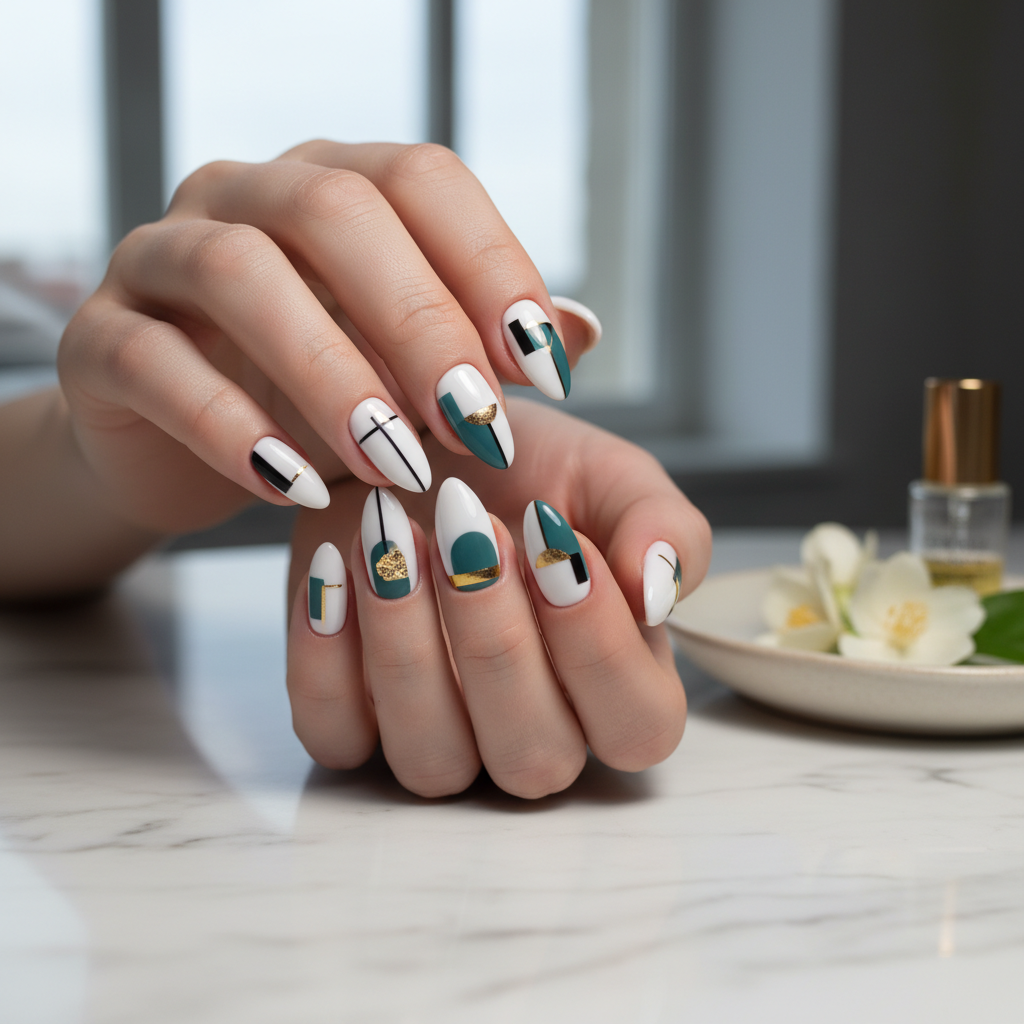
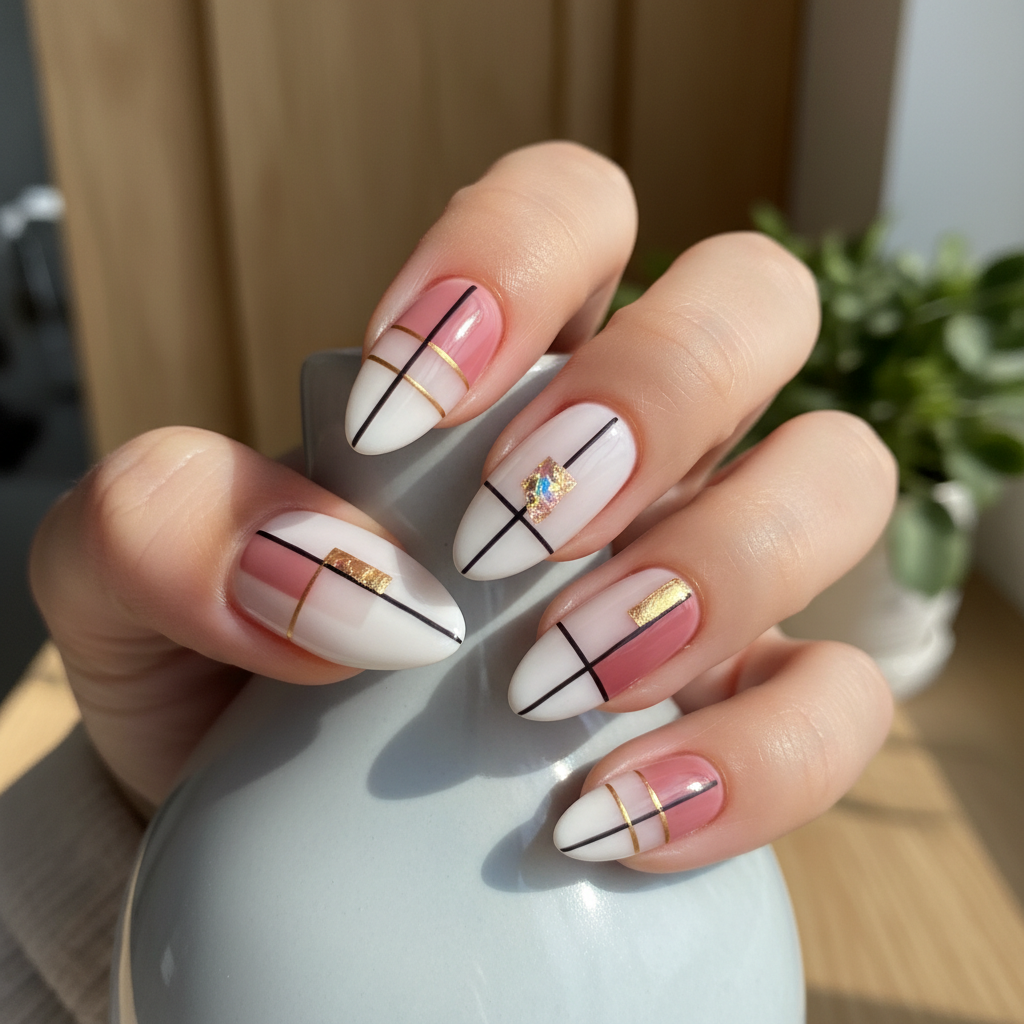
Photo-real Salon Modern Nails
Modern inspired nail art with clean, photo-real finish and professional salon quality
Created: October 5, 2025 at 12:48 PM
More Modern Designs

More Designs
Photo-Real Salon Nails: Modern Nail Art Perfection
Achieve a flawless, photo-real finish with this modern nail art design. Inspired by professional salon techniques, these nails offer a sophisticated and clean look that's perfect for any occasion.
Supplies You'll Need
- Base Coat
- Gel Polish (Neutral or Pastel)
- High-Shine Top Coat
- UV/LED Lamp
- Nail Buffer
- Lint-Free Wipes
How To Recreate It
- Prep your nails: file, buff, and clean the nail surface.
- Apply a thin layer of base coat and cure under UV/LED lamp.
- Apply 2-3 thin coats of gel polish, curing after each layer.
- Apply a high-shine top coat and cure under the lamp.
- Wipe off any sticky residue with lint-free wipes.
- Apply cuticle oil to hydrate the nail area.
Expert Tip
To achieve a true photo-real finish, ensure each coat of gel polish is applied thinly and evenly. Proper curing under the UV/LED lamp is crucial for longevity and shine.
Try These Variations
- →Add a subtle ombre effect using two complementary pastel shades.
- →Incorporate a delicate chrome powder for a pearlescent finish.
- →Create a minimalist geometric design with thin striping tape.
Aftercare Tips
- ✓Moisturize your hands regularly to maintain healthy skin around your nails.
- ✓Avoid harsh chemicals that can damage the nail polish.
- ✓Schedule regular maintenance appointments if you are not doing them yourself.
Safe Removal
- 1.File off the top coat to break the seal.
- 2.Soak cotton pads in acetone, place them on your nails, and wrap with foil.
- 3.After 10-15 minutes, gently remove the gel polish with a cuticle pusher.
Quick Facts
Why It's Trending
The trend of achieving salon-quality nails at home has made photo-real finishes highly sought after.
Seasonal Styling
Looks stunning year-round, but particularly shines during spring and summer months when clean, bright looks are in style.
Color Variations
Perfect For
Why People Love It
Instagram and Pinterest are filled with examples of this clean, professional look, inspiring many to try it themselves.
Daily Maintenance
- 💅Apply cuticle oil daily to keep nails hydrated.
- 💅Wear gloves when doing household chores to prevent chipping.
- 💅Avoid using your nails as tools to prevent breakage.
Common Issues & Fixes
- ⚠Bubbles in the gel polish.Apply thinner coats and avoid shaking the bottle vigorously before application.
- ⚠Uneven application.Use a fine brush to smooth out any imperfections before curing.
- ⚠Chipping.Ensure proper nail prep and use a high-quality top coat.
- ⚠Dull FinishUse a lint-free wipe with cleanser to ensure a high-shine surface after curing the top coat.
Design Inspiration
Inspired by the pursuit of achieving salon-quality results at home and the desire for clean, sophisticated nail designs.
Explore Similar Designs
Colors in this Design
Techniques Used
Perfect For
Nail Shapes
More Categories to Explore
Popular Colors
Popular Techniques
Perfect Occasions
FAQs
What is a photo-real finish?
It's a nail finish that looks incredibly smooth, even, and flawless, mimicking the appearance of professionally photographed nails.
How long does this design last?
With proper application and care, this gel polish design can last up to 2-3 weeks.
Can I achieve this look with regular nail polish?
While possible, gel polish provides a more durable and glossy finish, making it ideal for a photo-real effect.
What if I don't have a UV/LED lamp?
A UV/LED lamp is necessary for curing gel polish. Air-dry polishes can be substituted but won't provide the same level of shine and durability.
How do I prevent the polish from peeling?
Proper nail preparation, thin coats of polish, and a quality top coat are essential to prevent peeling.
Can I add nail art on top of this design?
Yes, minimalist nail art designs such as dots, lines or simple geometric shapes can complement the clean look without being too loud.