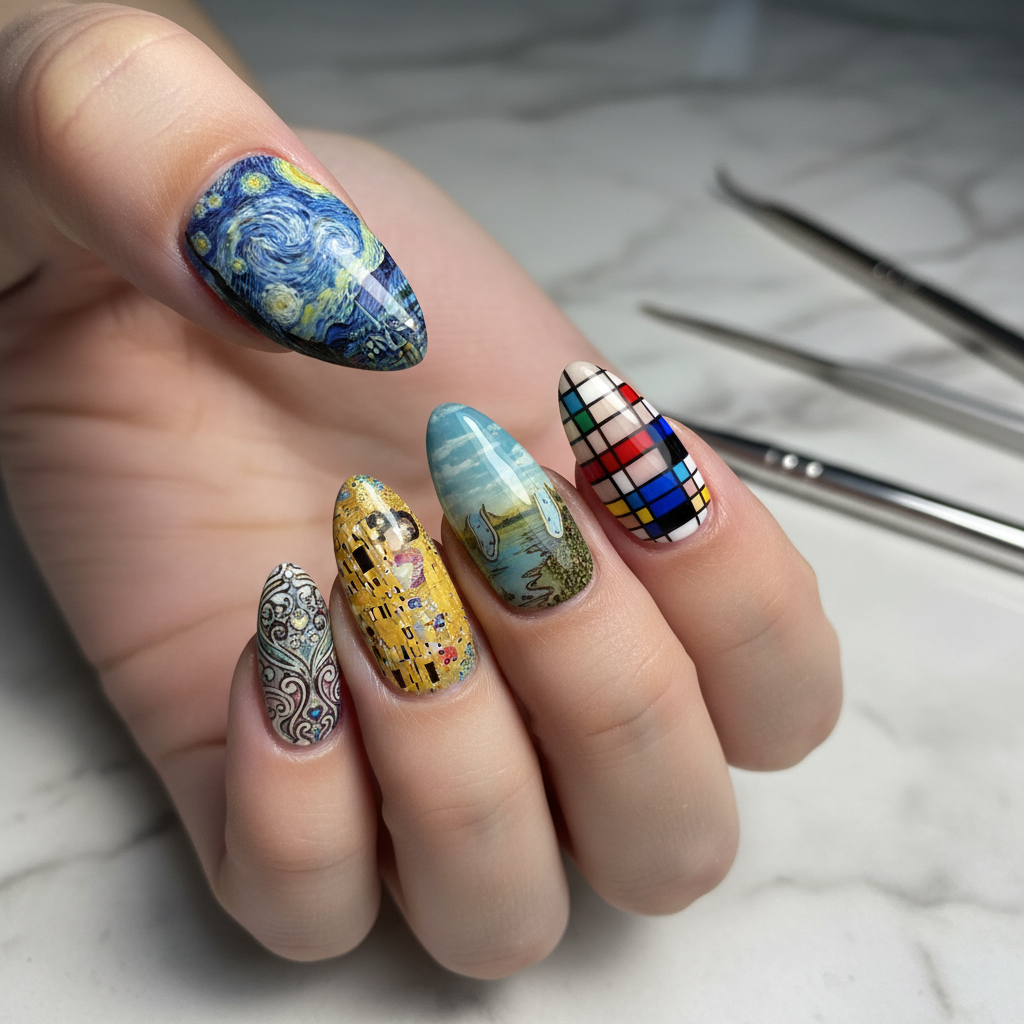
Photo-real Salon Detailing Nails
Detailing inspired nail art with clean, photo-real finish and professional salon quality
Created: October 5, 2025 at 11:54 AM
More Detailing Designs
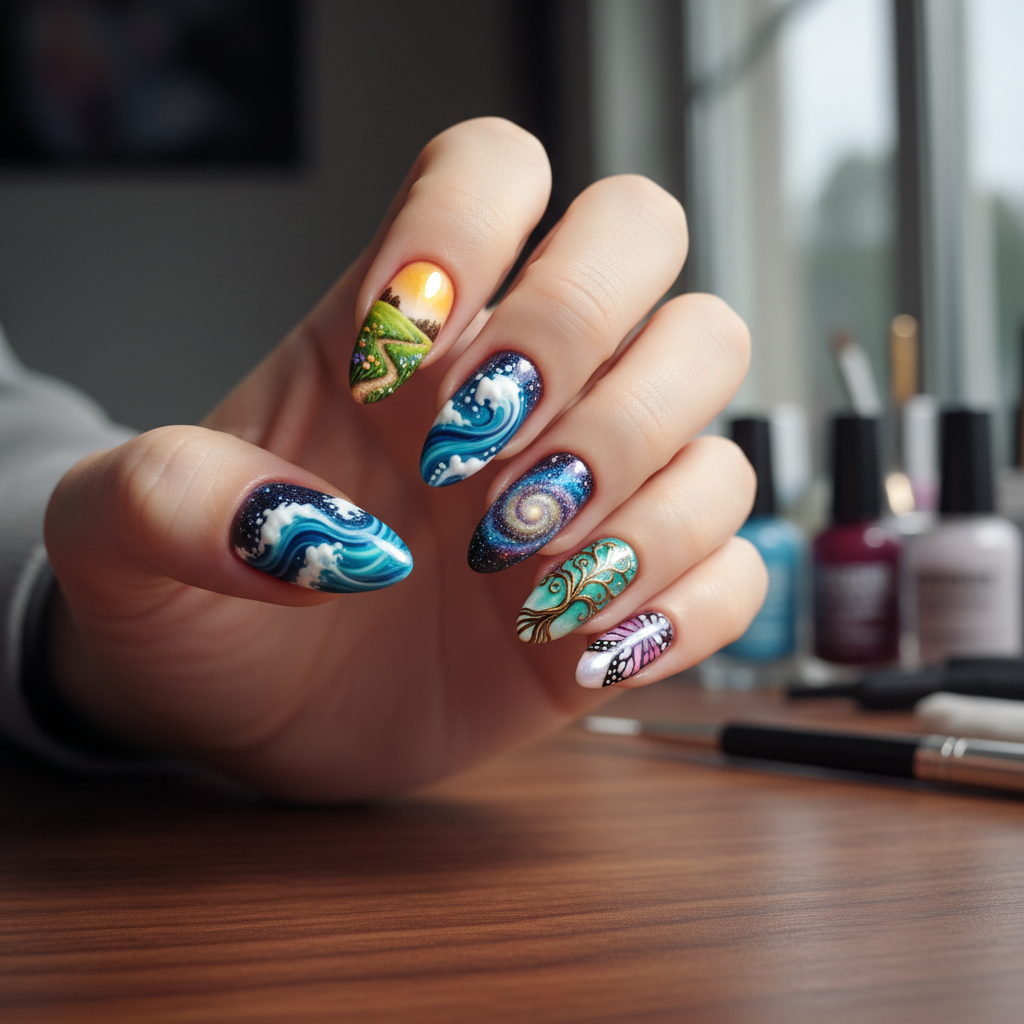
Beautiful Photo-real Salon Detailing Nails
Detailing inspired nail art with beautiful, photo-real finish and professional salon quality
Beautiful Photo-real Salon Detailing Nails
Detailing inspired nail art with beautiful, photo-real finish and professional salon quality

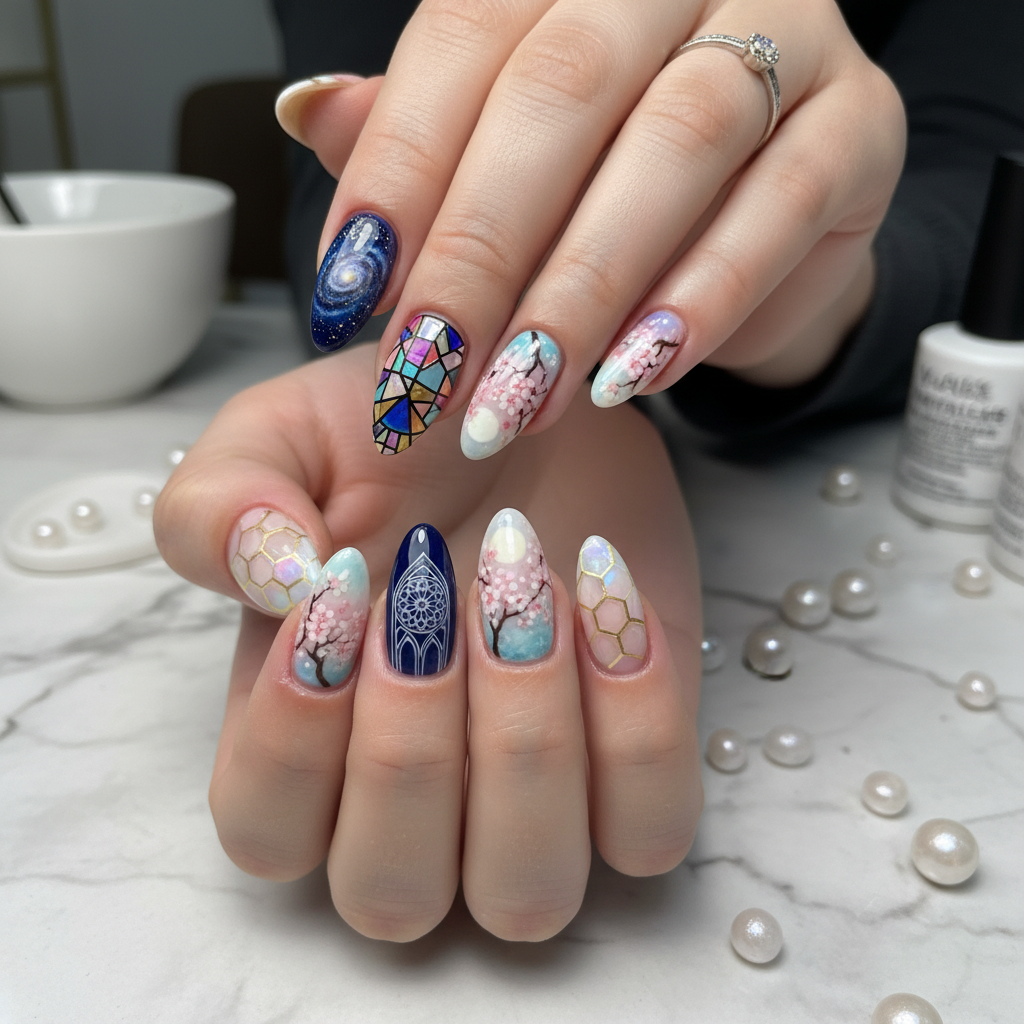
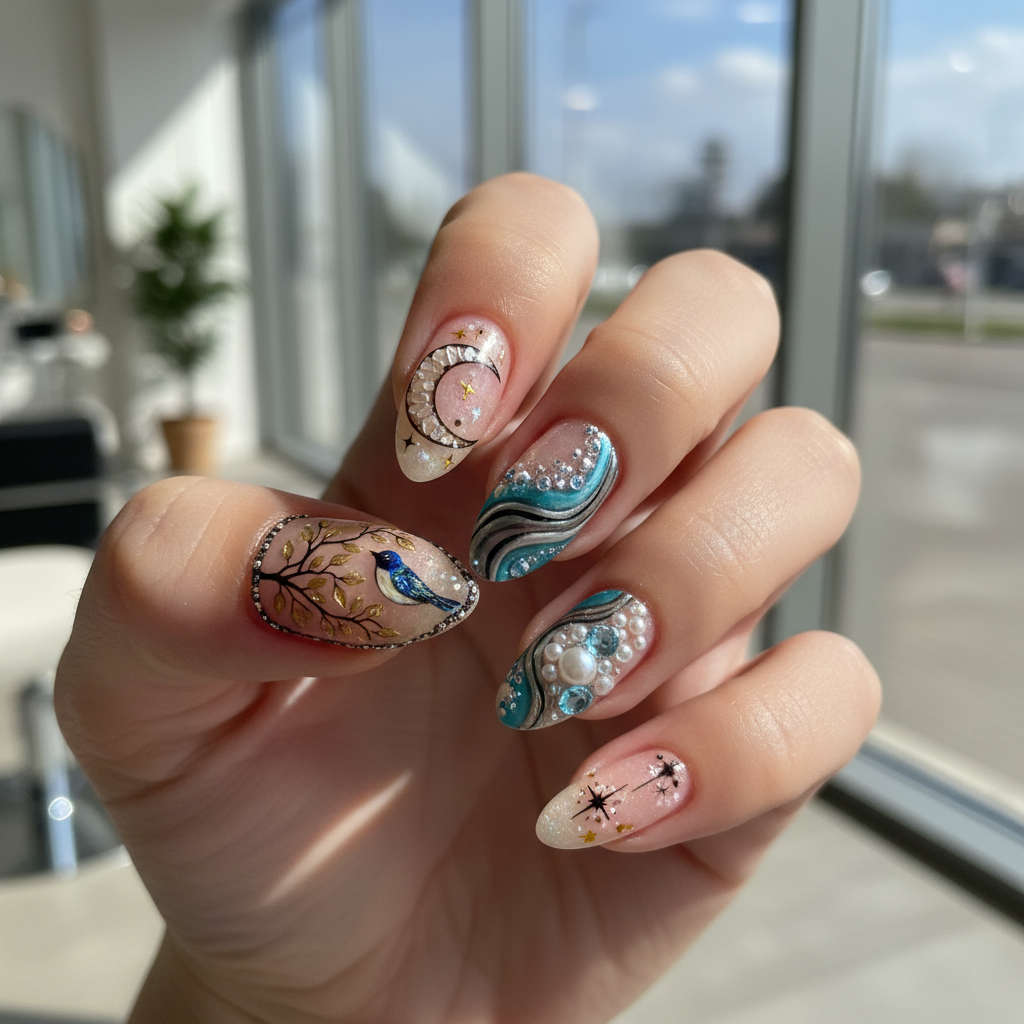
Gorgeous Photo-real Salon Detailing Nails
Detailing inspired nail art with gorgeous, photo-real finish and professional salon quality
Gorgeous Photo-real Salon Detailing Nails
Detailing inspired nail art with gorgeous, photo-real finish and professional salon quality
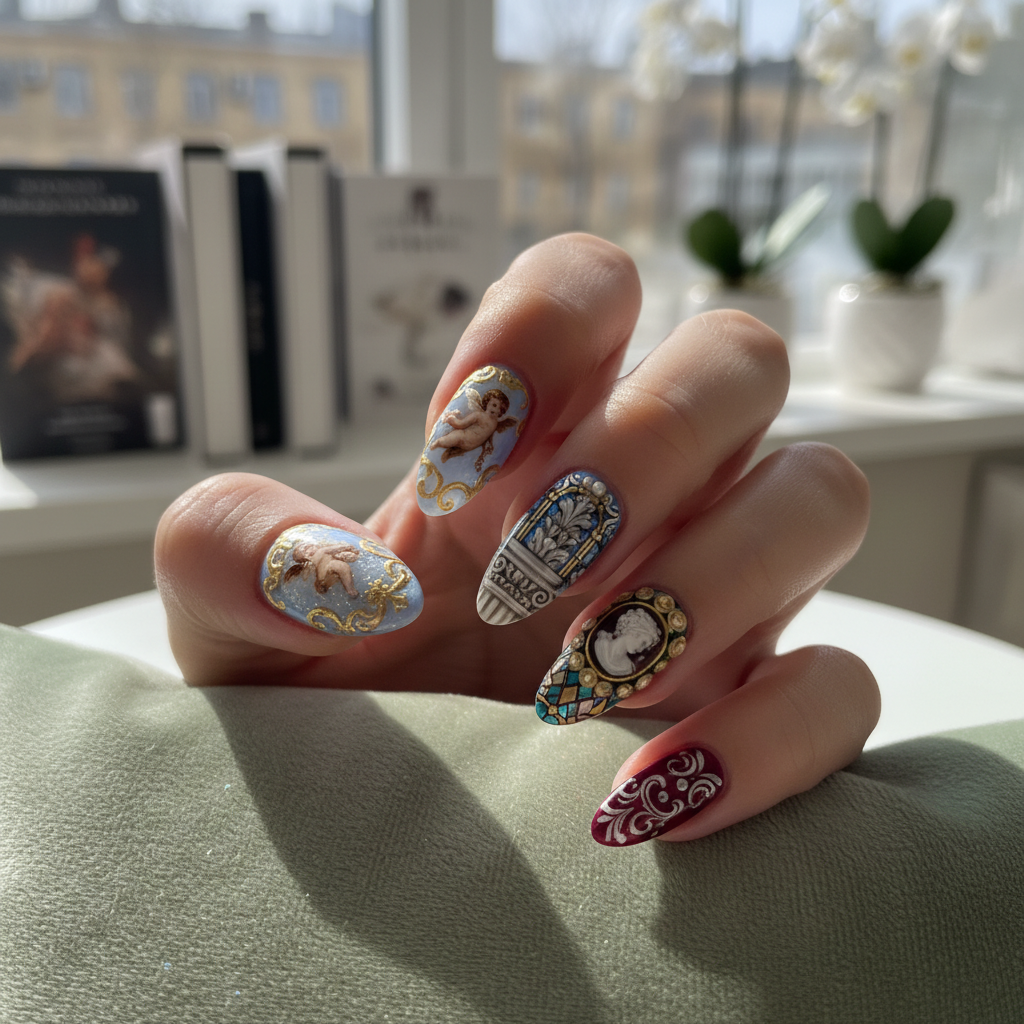
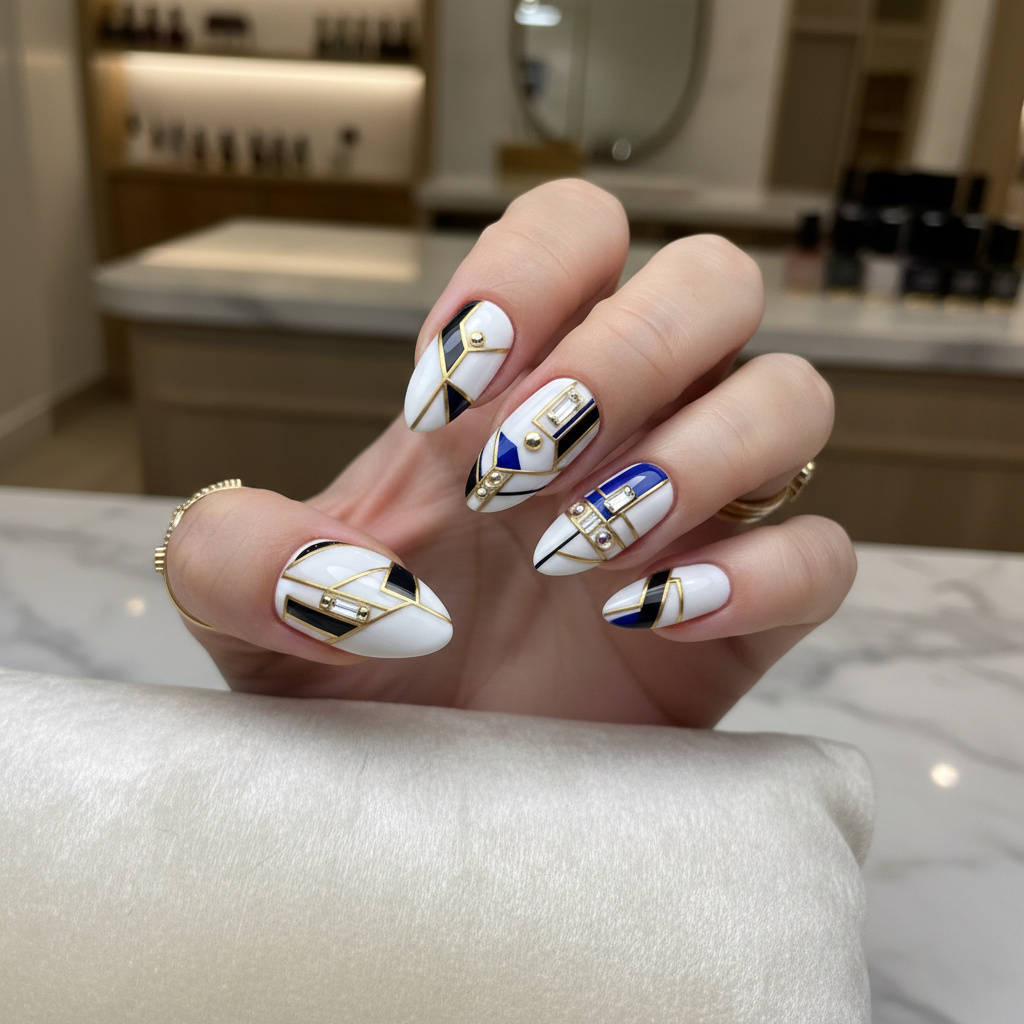
Stunning Photo-real Salon Detailing Nails
Detailing inspired nail art with stunning, photo-real finish and professional salon quality
Stunning Photo-real Salon Detailing Nails
Detailing inspired nail art with stunning, photo-real finish and professional salon quality
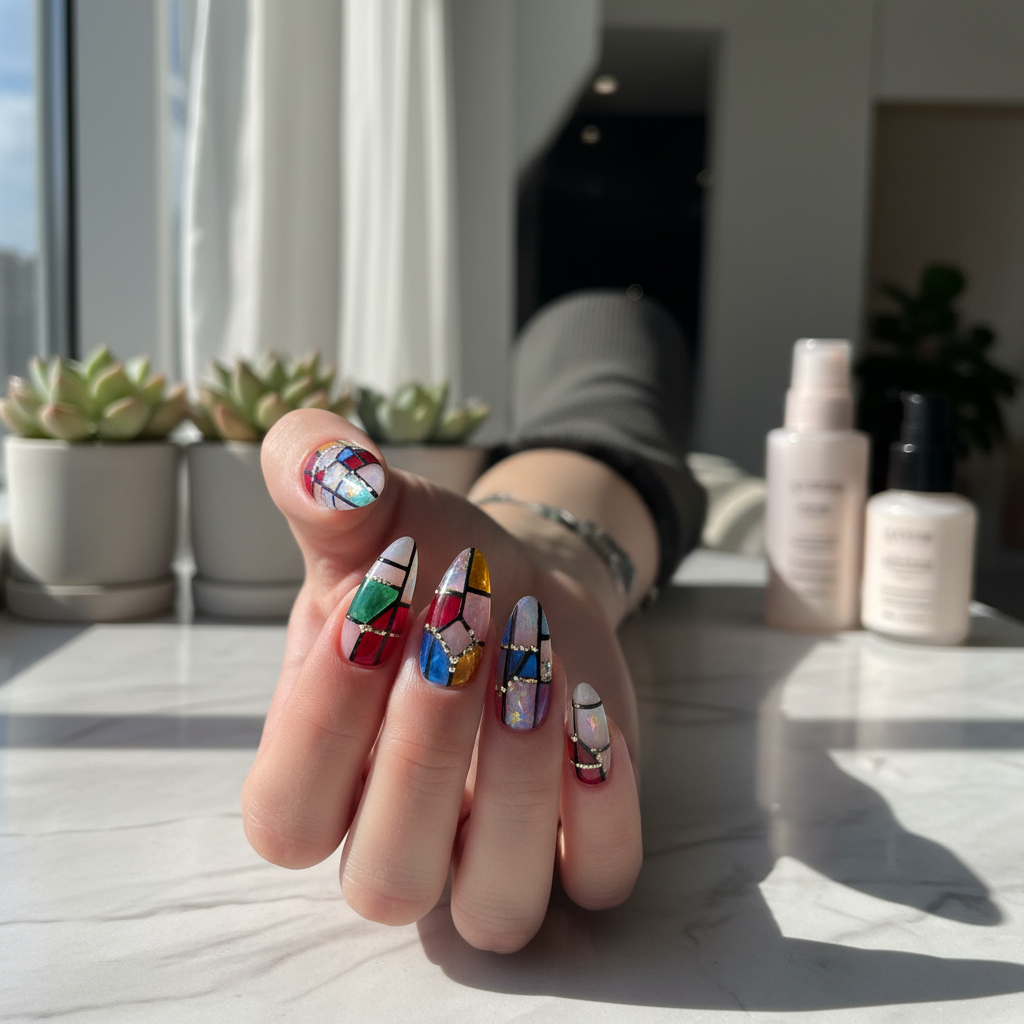
Sophisticated Photo-real Salon Detailing Nails
Detailing inspired nail art with sophisticated, photo-real finish and professional salon quality
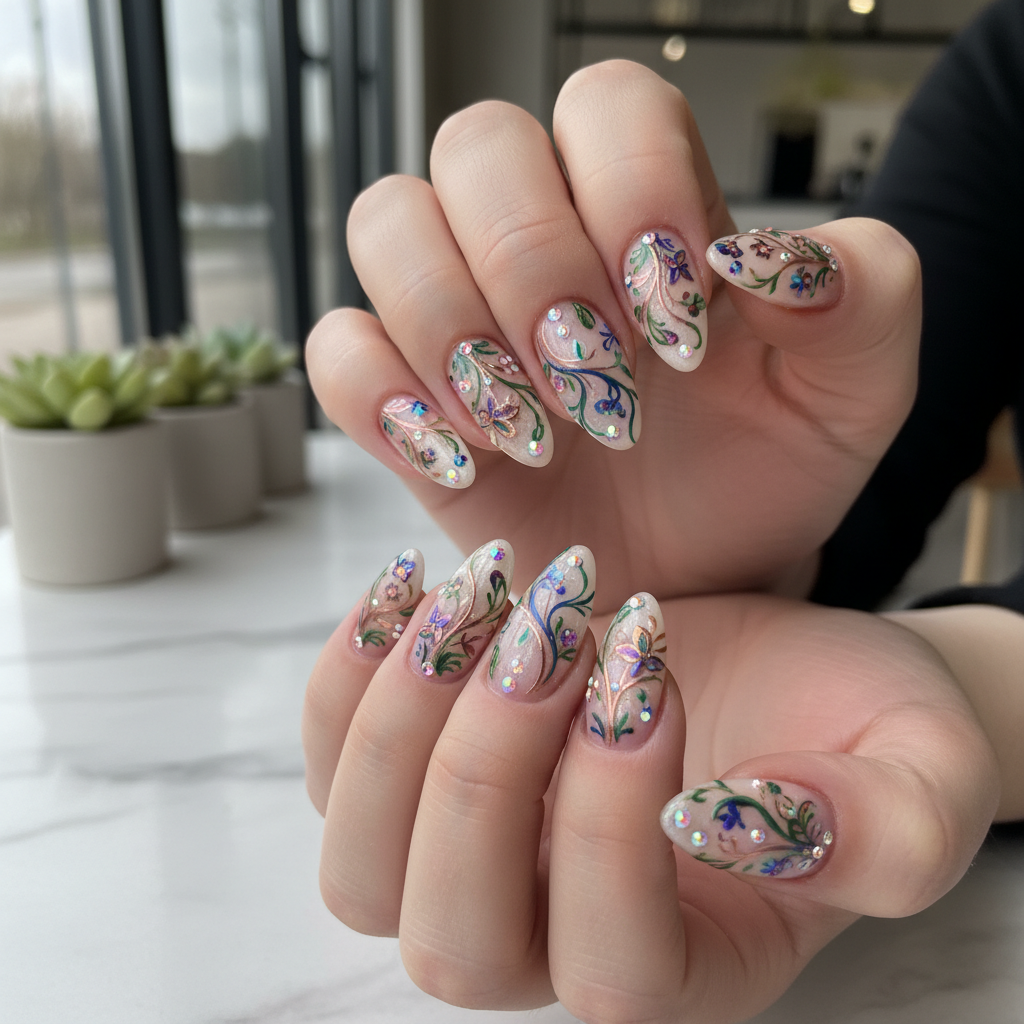
Sophisticated Photo-real Salon Detailing Nails
Detailing inspired nail art with sophisticated, photo-real finish and professional salon quality
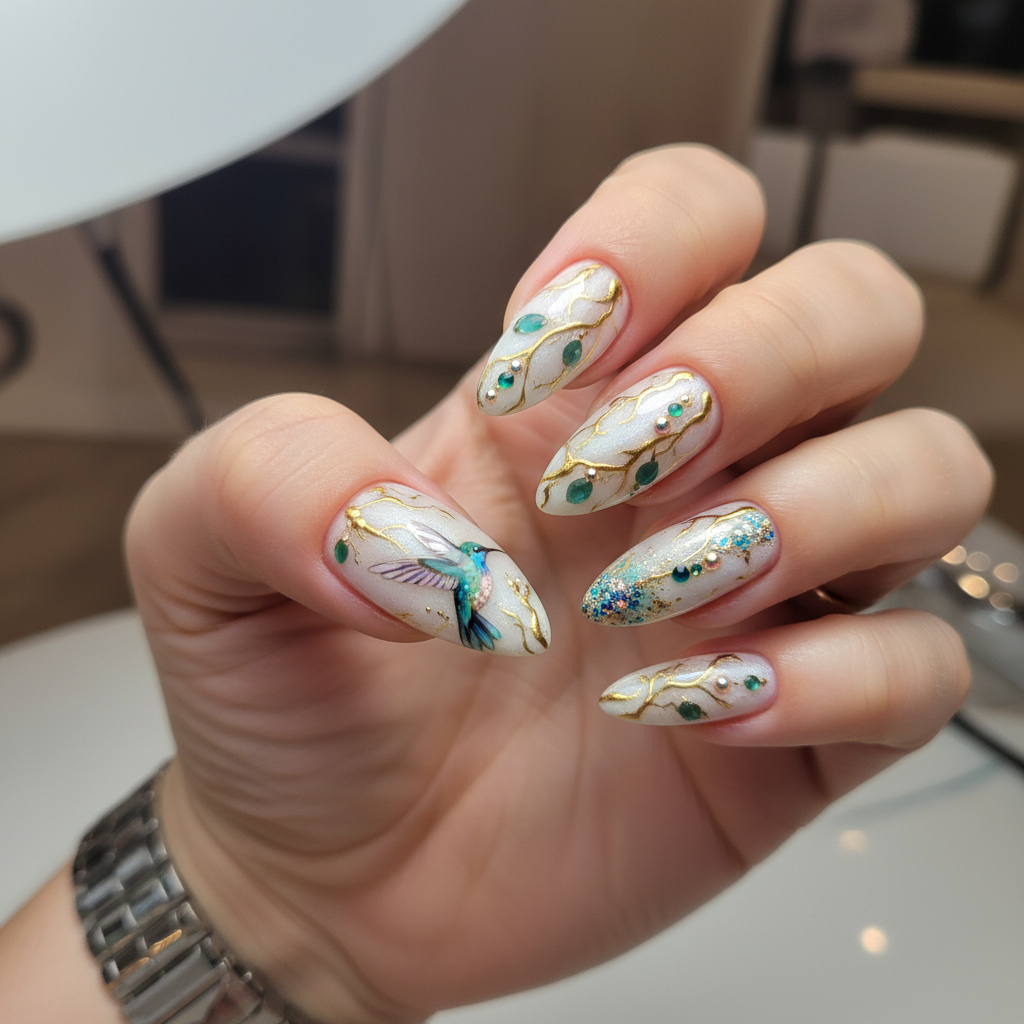
Photo-real Salon Detailing Nails
Detailing inspired nail art with elegant, photo-real finish and professional salon quality
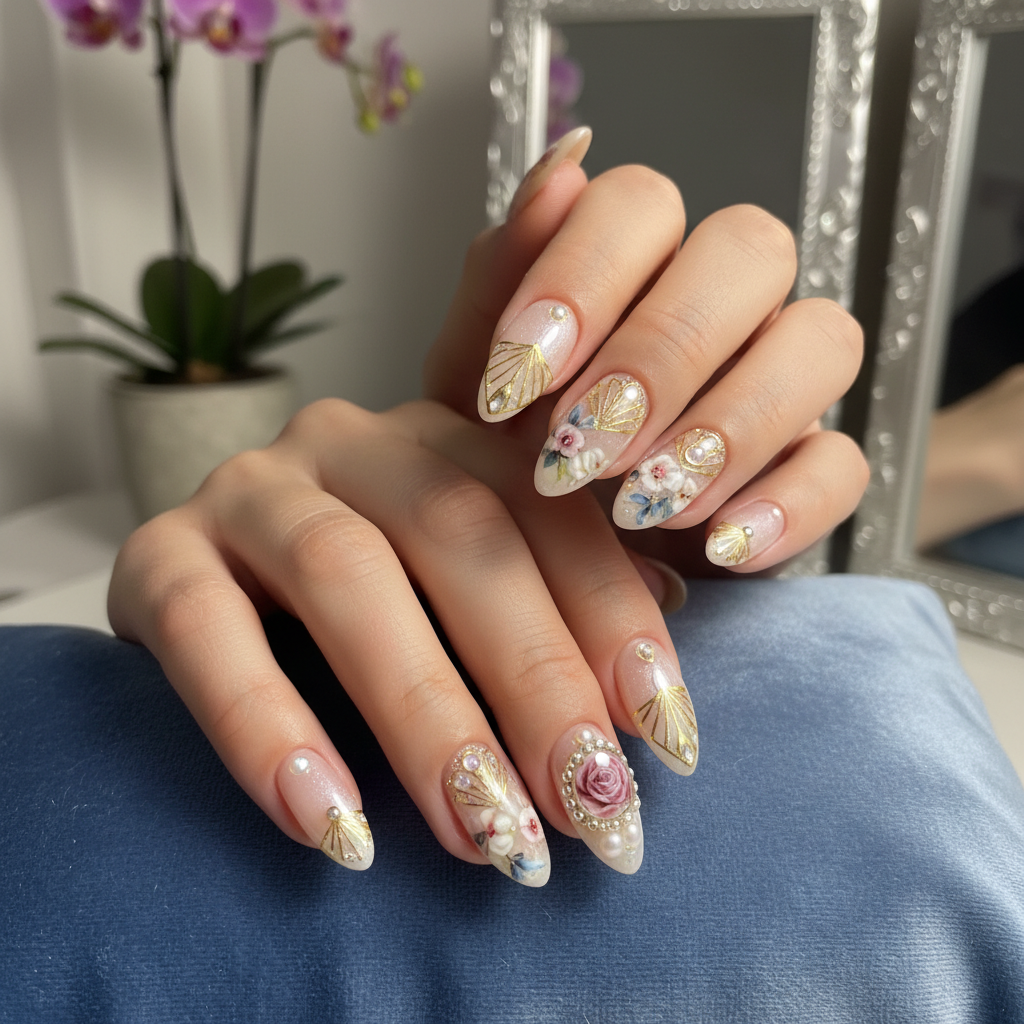
Photo-real Salon Detailing Nails
Detailing inspired nail art with elegant, photo-real finish and professional salon quality
More Designs
Photo-Real Detailing Nails: Salon-Quality Nail Art
Achieve stunning, photo-real nail detailing with this salon-quality design. This intricate look requires precision and patience, but the resulting artwork is truly captivating and eye-catching.
Supplies You'll Need
- Base Coat
- High-Quality Nail Polishes (various colors)
- Ultra-Fine Detailing Brushes
- Dotting Tool
- Top Coat
- Nail Art Palette
How To Recreate It
- Apply a base coat and let it dry completely.
- Apply a base color that complements your chosen design.
- Using ultra-fine detailing brushes and a nail art palette, carefully paint the photo-realistic details. Layer and shade for depth.
- Allow the design to dry thoroughly to prevent smudging.
- Apply a top coat to seal in the design and add shine.
- Clean up any mistakes with a small brush dipped in nail polish remover.
Expert Tip
Use a magnifying glass or a specialized nail art lamp to enhance visibility and precision during detailing. Practice on a nail art practice hand before attempting the design on your own nails.
Try These Variations
- →Micro-Portrait Nails: Create tiny, realistic portraits on each nail.
- →Landscape Detailing: Paint miniature landscapes with incredible depth and detail.
- →Abstract Photo-Realism: Combine realistic detailing with abstract shapes and colors for a modern twist.
Aftercare Tips
- ✓Moisturize your hands and cuticles daily with a nourishing cuticle oil.
- ✓Avoid picking or peeling at the nail art to prevent damage to the natural nail.
- ✓Take breaks between complex nail art designs to allow your nails to recover.
Safe Removal
- 1.Soak cotton pads in acetone-based nail polish remover.
- 2.Place the saturated pads on your nails and wrap them in foil for 10-15 minutes.
- 3.Gently remove the foil and cotton pads, then buff away any remaining polish.
Quick Facts
Why It's Trending
The demand for hyper-realistic nail art is surging as people seek unique and visually striking ways to express themselves.
Seasonal Styling
This design is versatile year-round but consider seasonal themes (e.g., floral detailing in spring, snowflakes in winter) for an extra touch.
Color Variations
Perfect For
Why People Love It
Photo-real nail detailing is a popular trend on social media, with nail artists showcasing their incredible skills and inspiring others to try the look.
Daily Maintenance
- 💅Apply a top coat every 2-3 days to prolong the design's lifespan.
- 💅Avoid harsh chemicals and detergents that can damage the delicate detailing.
- 💅Wear gloves when doing household chores to protect your nails.
Common Issues & Fixes
- ⚠Smudging: Ensure each layer is completely dry before adding the next. Use a quick-drying top coat.
- ⚠Uneven Lines: Practice your detailing skills on paper first. Use a very fine, steady hand.
- ⚠Bubbling: Apply thin, even coats of polish. Avoid shaking the polish bottle vigorously.
- ⚠Color Bleeding: Use high-quality polishes and allow each color to dry before applying another next to it.
Design Inspiration
Inspired by hyper-realistic paintings and the desire to miniaturize complex artwork onto the canvas of the nail.
Explore Similar Designs
Colors in this Design
Techniques Used
Perfect For
Nail Shapes
More Categories to Explore
Popular Colors
Popular Techniques
Perfect Occasions
FAQs
What brushes are best for photo-real detailing?
Ultra-fine detailing brushes with synthetic bristles are ideal for achieving precise lines and intricate details.
How can I prevent my hand from shaking while detailing?
Rest your elbow on a stable surface and take deep breaths to steady your hand. Practice regularly to improve your control.
What type of top coat is best for protecting this design?
A thick, glossy top coat is recommended for sealing and protecting the intricate detailing. Consider a gel top coat for extra durability.
How long will this design last?
With proper care and maintenance, this design can last up to a week or longer.
Can I use gel polish for this design?
Yes, gel polish can be used for this design. Just ensure you have a UV/LED lamp for curing.
What if I make a mistake while detailing?
Use a small brush dipped in nail polish remover to carefully correct any errors.